What's inside
As an Amazon Associate I earn from qualifying purchases. This post may contain affiliate links at no extra cost to you.
Red oak and white ash can both take a gray-washed finish, but they produce different results. Red oak has a strong, open grain and naturally warm pink, red, and brown tones. White ash is also ring-porous, but its grain is usually straighter and its base color is lighter and less red. If you want a cool, weathered gray, white ash is generally easier to control. Red oak can look excellent, but it often needs more careful color selection and preparation to keep the finish from turning muddy or pink.
As an Amazon Associate we earn from qualifying purchases at no extra cost to you.


Our Top Picks
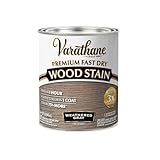
 Varathane Total Control Smoke Gray Gel StainHalf Pint (Pack of 1)2.88 x 2.88 x 2.97 inchesCheck on Amazon
 Varathane Water-Based Ultimate Matte PolyurethaneQuart (Pack of 1)9.8 x 5.5 x 6.3 inches2.2 poundsCheck on Amazon

Red Oak vs. White Ash at a Glance
| Characteristic | Red Oak | White Ash |
|---|---|---|
| Natural color | Warm tan with pink or reddish undertones | Pale tan to light brown, usually less red |
| Grain | Bold, open, and highly visible | Open, long, and often straighter |
| Gray-wash appearance | More dramatic, rustic, and potentially warm | Cleaner, cooler, and closer to driftwood |
| Color consistency | Can vary noticeably between boards | Generally easier to keep visually uniform |
| Best use | Furniture or floors where strong grain is part of the design | Cabinetry, shelving, and furniture needing a lighter weathered look |
Which Species Looks Better Gray?
Choose white ash when the target is a pale, neutral gray with visible but orderly grain. Its lighter starting color gives a gray pigment more room to show without fighting strong red undertones. A diluted charcoal, driftwood, or weathered-gray stain usually leaves the earlywood and latewood clearly defined.
Red oak is the better choice when you want a more pronounced rustic effect. Its wide grain absorbs color differently from the harder surrounding wood, so the grain often becomes the dominant feature. That can be attractive on a farmhouse table or wall shelf, but a cool gray may develop a mauve, brown, or slightly purple cast over the red wood.
Do not judge either species from a stain color printed on a can. Make samples from the actual boards, including one piece with the same sanding schedule and topcoat you will use on the project. Test at least two coats and let the sample dry for 48 hours. Water-based finishes often look bluer or lighter when wet, while oil-based products deepen and warm as they cure.
Preparation and Sanding
Sand both woods evenly through the same grits. For most furniture, stop at 150 or 180 grit. Going much finer can burnish the surface and reduce stain absorption, especially on the harder latewood. A practical schedule is 80 grit only when removing milling marks, followed by 120 and 150 grit. Use 180 grit on a final pass if the wood feels rough, but do not polish it aggressively.
Remove all sanding dust with a vacuum and a clean, dry cloth. Avoid soaking the surface with water unless you plan to raise the grain deliberately. If you use a water-based wash, lightly dampen the wood first, allow it to dry completely, and sand the raised fibers with 220 grit. This reduces the rough feel that can appear after the first water-based coat.
Inspect end grain before staining. End grain absorbs gray color quickly and may become nearly black. On table edges, shelves, and cut ends, apply a thin washcoat of finish or a compatible sanding sealer, then sand lightly after it dries. The goal is to slow absorption, not create a glossy film.
Choosing a Gray-Wash Method
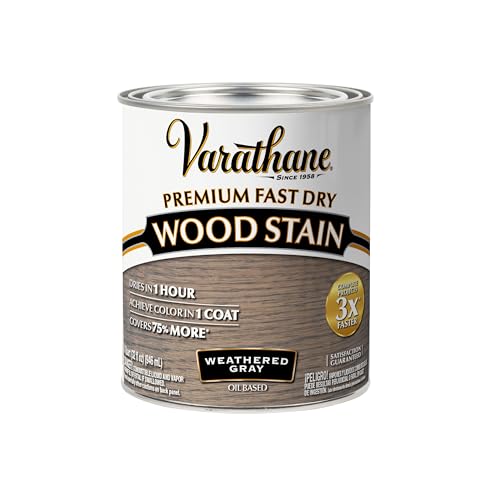
For the most predictable result, use a water-based gray stain or a tinted water-based finish. These products dry relatively clear, add little amber color, and are easier to layer. A water-based gray wood stain is a sensible starting category for both woods.
A paint wash gives more control over opacity. Mix a water-based gray paint with water, often starting around one part paint to three or four parts water. Brush it on, wait two to five minutes, then wipe along the grain. Add another thin coat if needed. More water produces a transparent wash; more paint produces a painted gray surface that can hide the grain.
Oil-based gray stains can work on red oak, but they usually emphasize the wood’s warmth and take longer to dry. That may be useful if you want an aged, brown-gray appearance. If you want a clean contemporary gray, avoid oil unless you have confirmed the color on a full-size sample.
On red oak, a gray or charcoal wood stain with a blue-neutral base can counter some red, but too much blue can create a dull purple cast. On white ash, lighter gray or driftwood tones are usually sufficient.
Application Technique
Stir the stain rather than shaking it, which can introduce bubbles. Apply a manageable section, generally 2 to 3 square feet, and keep a wet edge. Wipe excess in the direction of the grain using a clean, lint-free cloth. Do not leave puddles in the open pores. They dry darker and may remain tacky under a clear finish.
For a gray wash, one thin coat is often better than one heavy coat. Let it dry fully before deciding whether to add another. A second coat can deepen the color, but it also exaggerates differences between earlywood and latewood. If a red oak board is too warm, adding more gray may not fix it; it may simply make the color darker and muddier.
Topcoat and Common Failure Modes
Protect the cured color with a water-based polyurethane, acrylic finish, or hardwax oil labeled compatible with the stain. A matte water-based polyurethane preserves a cooler gray better than an ambering oil finish. Apply two or three thin coats, sanding only as directed by the label, usually with 320 grit between coats.
The most common failure is uneven color from inconsistent sanding. Another is dark end grain caused by excessive absorption. Red oak may also show pink patches where boards differ in heartwood and sapwood. On ash, open pores can trap pigment and create dark lines; wipe thoroughly and inspect under strong side lighting before topcoating.
If the cheaper species is readily available, it can be the sensible buy. White ash does not automatically produce a superior finish, and red oak is often less expensive and easier to find. Buy red oak when you want strong grain and do not mind making larger samples. Buy white ash when a cooler, lighter gray and simpler color control are worth the added material cost.



0 Comments