What's inside
As an Amazon Associate I earn from qualifying purchases. This post may contain affiliate links at no extra cost to you.
White oak and walnut both look good under a natural oil finish, but they produce different results. White oak is pale, strongly grained, and relatively hard; walnut is darker, more subdued, and a little softer. Oil deepens the color of both, so judge samples after they are finished—not by the dry, sanded wood.
For a light, durable surface with prominent grain, choose white oak. For a warm brown surface with less contrast and a more forgiving color match, choose walnut. Neither species is automatically better for an oil finish; the right choice depends on the look, use, and budget.
As an Amazon Associate we earn from qualifying purchases at no extra cost to you.



Our Top Picks




How oil changes their appearance
White oak starts beige to light brown, often with darker streaks and visible growth-ring figure. A clear oil finish usually makes it look warmer and more amber, while leaving its grain contrast pronounced. On quarter-sawn boards, the medullary rays can show as reflective flecks. Oil emphasizes the wood rather than hiding those differences, so board selection matters on a large tabletop or cabinet front.
Walnut ranges from light brown to chocolate brown, with occasional purplish or gray tones and lighter sapwood. Oil deepens the brown and adds warmth, but it does not reliably make pale sapwood match the heartwood. If uniform color is important, buy boards with consistent heartwood or plan to sort and arrange the pieces before glue-up. Over time, walnut exposed to light can fade toward a lighter brown; an oil finish does not prevent that change.
Make a sample from the same stock, sand it to the intended grit, and apply the exact oil you plan to use. A wet surface can look close to the oiled result, but it is not a reliable substitute: oils differ in color and sheen, and the wood may look different after the finish cures.
White oak vs walnut at a glance
| Factor | White oak | Walnut |
|---|---|---|
| Typical oiled color | Warm beige to medium brown | Medium to dark brown |
| Grain appearance | Strong, open grain; rays may show on quarter-sawn stock | Usually smoother-looking, with varied but less prominent grain |
| Hardness | About 1,360 lbf Janka | About 1,010 lbf Janka |
| Common trade-off | Hard-wearing, but can be harder to sand and shape | Easier to work, but dents more readily and often costs more |
| Best fit | Floors, dining tables, cabinets, and a lighter natural look | Furniture and accents where a darker, quieter look is wanted |
Janka figures are useful for comparing resistance to denting, not as a guarantee against damage. Both woods can be scratched or dented in normal use, and the oil finish itself adds little protection against either.
Choose for use, appearance, and cost
For a dining table, white oak is a sensible pick if the surface will see frequent use and you want a lighter top with visible grain. Its greater hardness helps with dents, but a natural oil finish still needs maintenance and will not protect as well as a film finish from standing water, wine, or grease. Use coasters and wipe spills promptly. For a walnut tabletop, expect the same care—and be realistic about dents, particularly around edges.
For cabinets, shelves, and furniture that will not take heavy impacts, walnut’s lower hardness is often no practical problem. Its darker color can also make small scratches less conspicuous than on pale oak, though scratches that expose fresh wood may still stand out. White oak is often the more economical choice, but local prices vary by grade, thickness, and board width. Compare usable yield, not just the price per board foot: knots, sapwood, and defects can make an apparently cheap board a poor bargain.
If the project needs to stay light, white oak is the safer starting point. If you want a dark brown without stain, walnut is the straightforward choice. Staining oak darker can cost less than buying walnut, but stain cannot fully reproduce walnut’s natural color variation or grain. For a large project, price both options and make samples before committing.
Sand and prepare for an even finish
Begin with sharp tools and remove glue squeeze-out before sanding. Glue left on the surface can block oil and show up as pale patches. Sand evenly through the grits rather than jumping straight to a fine abrasive. A practical sequence for a typical furniture surface is 120, 150, then 180 grit. Use 120 only when needed to remove milling marks; if the boards are already smooth, starting at 150 can save time. Follow the oil maker’s stated sanding limit—some products recommend stopping at 150 or 180 because very fine sanding can reduce absorption.
White oak’s open pores can make the finish look more textured, especially on a large flat surface. That is part of its character, not necessarily a defect. Walnut can also have open pores, but its surface often reads as smoother because of its darker color. If you want a glass-smooth result, pore filling is a separate step; oil alone does not fill pores. Test any filler on scrap because its color can change the wood’s appearance.
After sanding, remove dust with a vacuum and a clean, dry cloth. Avoid oily tack cloths unless the finish maker approves them. Check the surface under raking light for scratches, and inspect glue joints before applying oil; oil often makes both defects easier to see.
Apply oil without leaving a sticky surface
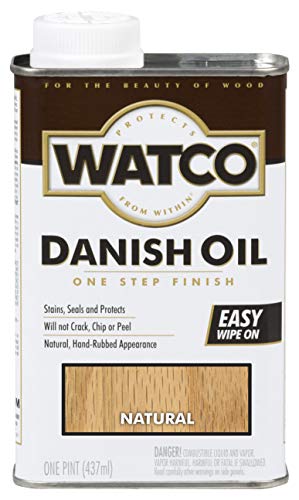
Use a penetrating or hardwax oil intended for furniture or the specific surface. Follow the label for coverage, number of coats, and cure time. Apply a thin coat, allow the stated dwell time, then wipe off all excess with a clean cloth. Pooled oil in pores, corners, or around joints can cure unevenly and remain tacky. A second coat is useful only if the product calls for it and the first coat has dried as directed.
For a simple wipe-on finish, compare hardwax oils for wood furniture with penetrating oil finishes. Check whether the product is suitable for tabletops and food-contact surfaces if that matters for your project; “natural” on the label does not by itself mean food-safe or maintenance-free.
Oil-soaked rags can heat up and ignite as they dry. Do not leave them bunched in a pile or put them in ordinary indoor trash. Follow the product label’s disposal directions; a common method is to spread rags flat outdoors to dry fully, away from buildings and combustible material, before disposal.
A practical buying decision
Choose white oak when you want a lighter, strongly grained surface and value extra dent resistance. Choose walnut when you want naturally dark wood and prefer a less prominent grain pattern, accepting a softer surface and potentially higher cost. If price is the deciding factor, white oak is usually the better place to start; for shelves, cabinets, or light-use furniture, it is not a compromise just because walnut is more expensive. Buy a small amount of each, finish offcuts with the intended oil, and compare them in the room where the finished piece will live.



0 Comments