What's inside
As an Amazon Associate I earn from qualifying purchases. This post may contain affiliate links at no extra cost to you.
Ash and oak are both ring-porous hardwoods, so their open grain can be filled to create a flatter, smoother surface than ordinary sanding alone provides. The choice matters, though. Ash usually has a more open, linear pore pattern and a lighter base color. Oak has stronger tannin content, more visible medullary rays in quartersawn boards, and a grain that can look either classic or overly busy depending on the filler and topcoat.
For a natural pore-filled finish, “natural” usually means the pores are filled without hiding the wood’s color or grain. That calls for a clear or lightly tinted grain filler, careful sanding, and a finish that does not add excessive amber color. The right process can produce a smooth, furniture-grade surface while retaining the character that makes ash or oak worth using.
As an Amazon Associate we earn from qualifying purchases at no extra cost to you.
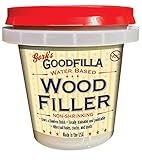


Our Top Picks
 Aqua Coat Water-Based Clear Wood Grain Filler GelPint3.55 x 3.55 x 4.2 inches1.14 PoundsCheck on Amazon
 Polyurethane Wood Finish Water Based Polyurethane Clear Gloss100 ml1.6 x 1.6 x 4.7 inchesCheck on Amazon
Choosing Between Ash and Oak
| Characteristic | Ash | Oak |
|---|---|---|
| Grain appearance | Long, bold, usually straight grain | Strong grain with more variation; prominent rays in quartersawn stock |
| Pore structure | Large, open pores that accept filler readily | Open pores, often slightly less visually uniform |
| Natural color | Very pale cream to light tan | White oak is tan to brown; red oak is pinker and warmer |
| Ease of filling | Generally straightforward | Straightforward, but the grain and rays can telegraph through filler |
| Best clear-finish effect | Bright, clean, modern | Traditional, warm, and more visibly figured |
Choose ash when you want the pores to remain visible but the overall piece to stay light and crisp. It is often the easier wood for a pale, contemporary finish. Choose white oak when you want a warmer, more traditional appearance or want the pore pattern to contribute strongly to the design. Red oak can also be filled, but its pink and orange undertones become more pronounced under many oil-based finishes.
Neither species benefits from filling every project. A tabletop, cabinet door, or smooth painted surface is a good candidate. A rustic bench or heavily textured piece may look better with the pores left open. Filling adds labor and can make the surface look unnaturally flat if the filler color contrasts too sharply with the surrounding wood.
Selecting a Filler for a Natural Look
Use a neutral or wood-colored paste grain filler rather than a dark contrasting filler if you want a natural pore-filled finish. Water-based fillers are easier to clean up and generally preserve a lighter appearance. Oil-based fillers give longer working time and can flow well into large pores, but they may deepen the wood’s color and require more drying time.
A transparent filler can reduce the tactile depth of the pores without dramatically changing their color. A natural beige or light oak filler adds a little definition. Avoid a filler labeled walnut, ebony, or black unless the deliberate goal is a high-contrast open-pore effect.
For the safest result, test the complete schedule on scrap from the same board. The filler, sealer, and topcoat interact. A clear water-based finish may look pale over ash, while the same finish over oak can emphasize differences between earlywood and latewood. An oil finish can make both woods look richer, but it also makes light ash noticeably darker and warmer.
Useful supplies include a water-based grain filler, a flexible plastic spreader, clean lint-free rags, and abrasive paper in several grits. Do not substitute ordinary wood putty for grain filler. Putty is intended for holes and defects; it often shrinks, sands unevenly, and leaves obvious spots across a broad surface.
Preparing Ash or Oak
Mill the boards flat before sanding. Grain filler follows the surface; it will not correct planer tracks, dents, or uneven glue joints. Sand through 120, 150, and 180 grit, using a random-orbit sander on broad faces and a sanding block near edges. Stop at 180 grit for most filler systems. Sanding much finer than 220 can burnish the surface and reduce how evenly the filler enters the pores.
Remove dust with a vacuum and a clean, dry cloth. Avoid soaking the surface with water before filling unless the product instructions specifically call for it. Water can raise the grain and make the next sanding step longer, particularly on ash. If you do raise the grain, let the board dry fully and sand lightly with 180 grit before applying filler.
Pay attention to end grain and soft earlywood. Aggressive sanding can leave shallow dips in the softer bands, which become visible after finishing. On oak, inspect the surface under raking light. On ash, look along the long grain for compressed fibers or sanding scratches that will collect filler and appear as dark streaks.
Applying the Pore Filler
Stir the filler thoroughly rather than shaking it, which can introduce air bubbles. Spread a thin coat across the grain when possible. Working across the pores forces material into them instead of simply dragging filler along the grain. Cover an area you can wipe within the product’s open time, usually a few square feet at once.
Let the filler dull or partially set according to the label, then scrape or wipe off the excess diagonally across the grain. Leaving a thick film on the surface creates unnecessary sanding and can obscure the wood. A plastic spreader is less likely than a metal tool to scratch ash or oak.
After the filler dries completely, sand the surface with 220 grit on a flat sanding block. Sand only until the surrounding wood is clean; do not sand deeply enough to pull filler back out of the pores. One coat is often enough for ash with large, open pores, but oak may need a second thin application where the pores still show obvious depressions. Two thin coats are safer than one heavy coat.
Topcoats and Common Failures
For the least color change, use a clear water-based polyurethane, acrylic finish, or lacquer labeled non-yellowing. A clear water-based polyurethane keeps ash relatively bright and limits the warming effect on white oak. If you want a warmer traditional look, an oil-based varnish or hardwax oil is reasonable, but test it first because it can turn ash honey-colored and make red oak more orange.
Apply the first coat gently. Over-brushing can soften or disturb incompletely cured filler. Let it dry as directed, then scuff lightly with 320 grit or a fine synthetic abrasive before later coats. For furniture, three finish coats is a practical starting point; high-use tabletops may need additional protection based on the product’s instructions.
Common failures include visible filler haze, uneven dark pores, and a surface that still feels rough. Haze usually means too much filler remained on the face; sand it level after full drying. Dark pores often result from a contrasting filler or dirty sanding dust. Roughness after finishing usually means the filler was not fully leveled, the first coat raised fine fibers, or dust settled in the finish. Fix the cause between coats rather than applying more finish over it.
If cost is the main concern, ash and oak do not require premium filler or an exotic finish. A basic water-based grain filler, careful 180-to-220-grit sanding, and a dependable clear topcoat are enough for most indoor projects. Spend more on surface preparation and scrap testing before spending more on the finish; those two steps have the greatest effect on whether the final pores look natural.



0 Comments