What's inside
As an Amazon Associate I earn from qualifying purchases. This post may contain affiliate links at no extra cost to you.
A mahogany-toned stain can bring warmth and depth to a project, but the wood underneath matters as much as the color in the can. Species vary in porosity, grain, and natural color, so the same stain may look even on one board and blotchy or muddy on another. For a predictable result, match the species to the look you want, test the finish on offcuts, and choose a stain made for that wood.
As an Amazon Associate we earn from qualifying purchases at no extra cost to you.
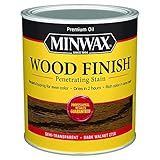


Our Top Picks
 Varathane Total Control Dark Walnut Gel StainHalf Pint (Pack of 1)2.88 x 2.88 x 2.97 inchesCheck on Amazon


Best species for a mahogany-toned finish
Genuine mahogany is the most natural match if it fits your budget. Its reddish-brown color and often interlocking grain already suggest the look; a red-brown stain can deepen the tone without hiding the figure. It is a premium choice, though, and boards can vary in color and grain. On attractive stock, try a clear finish or a lightly tinted stain before committing to a dark color.
Sapele is a strong alternative when you want a rich, reddish-brown appearance and visible grain. It can have ribbon-like figuring, especially on quarter-sawn boards, and it takes a range of finishes well. Sapele is not a visual clone of mahogany: its grain can be more pronounced, and the finish may appear darker or more dramatic. Buy a sample or offcut if matching existing furniture matters.
Khaya, often sold as African mahogany, is another good choice. Its color and grain vary by board, so inspect the actual lumber rather than relying on a species label. A medium mahogany stain can unify lighter stock, but a very dark product may mask the grain and make boards look flat.
For less expensive projects, poplar and maple can work, but they need more care. Poplar is often inexpensive and easy to machine, yet its green, gray, or purple streaks may still show through a reddish stain. Maple has a pale, tight grain and can turn blotchy when stained. A conditioner or washcoat can reduce uneven absorption, but neither guarantees a uniform color. If color consistency matters more than visible natural grain, paint-grade poplar may be a better buy.
How the options compare
| Species | Typical cost | Mahogany-stain result | Main drawback |
|---|---|---|---|
| Genuine mahogany | High | Natural-looking, warm, and grain-forward | Price and board-to-board variation |
| Sapele | Medium to high | Rich red-brown with prominent figure | Can look more dramatic than traditional mahogany |
| Khaya | Medium | Good reddish-brown base; varies by board | Color and grain are not fully consistent |
| Poplar | Low | Can take a red-brown color, but undertones may show | Green or purple streaks and uneven results |
| Maple | Medium | Light, smooth base that can be colored dark | Blotch risk and less visible grain |
Choose the stain for the wood
Oil-based wiping stains are forgiving to apply and often give open-grained woods a warm, full color. They dry more slowly than many water-based products, which gives you time to wipe away excess, but they can take several hours or longer to dry depending on temperature, airflow, and the label directions. Water-based stains typically dry faster and clean up with water, but the raised grain may need a light sanding after the first coat. Always follow the product’s stated recoat time.
For a first project or a piece with several boards, a mahogany wood stain is a sensible starting point, not a guarantee of the final color. The name describes a color family, not a fixed result. Check the label to see whether the product is a penetrating stain, gel stain, or tinted finish; these behave differently, especially over previously finished wood.
Do not assume that more coats always produce a better color. A second coat may deepen the color, but it can also leave a tacky surface if the first coat has not dried or if excess stain remains in the pores. Apply a test coat, wipe it as directed, and let it dry fully before judging it. If the color is too light, try a second test coat or a darker stain rather than leaving a heavy, wet layer on the workpiece.
Prepare the surface and test first
Sand bare wood evenly, usually finishing around 150 to 180 grit for a penetrating stain. Going much finer can reduce absorption and leave the color lighter or less even; stopping at coarse grit can leave scratches that show once stain is applied. Sand with the grain on the final pass, vacuum the dust, and inspect the surface under raking light. Glue squeeze-out is a common failure point: stain will not penetrate it, leaving pale patches or sharp, unstained seams.
On blotch-prone maple or poplar, test a pre-stain wood conditioner on scrap from the same board. Conditioners partly limit absorption, which can reduce dark patches but also make the overall stain lighter. Follow the timing on the label and apply stain within the stated window. If the test still looks uneven, consider a gel stain, a toner, or a tinted topcoat instead of adding stain coats blindly.
Make samples from the actual project wood, sanded with the same grit and finished with the same topcoat you plan to use. A clear finish often makes stain look darker and warmer than it does when wet or freshly wiped. Test both the stain and topcoat, especially when color matching. For a consistent finish on boards with different undertones, it may be cheaper and more reliable to use a uniform-grade material or a tinted coating than to spend time trying to force every board to stain identically.
Protect the color and buy the right amount
Stain adds color; it is not, by itself, a durable protective finish unless the label specifically says otherwise. Once it is fully dry, apply a compatible clear topcoat such as polyurethane or another finish suited to the project’s wear and moisture exposure. Check the manufacturer’s compatibility guidance, and test the complete finish schedule first. Applying a topcoat over stain that is still wet can cause smearing, poor adhesion, or a surface that stays soft.
For a small project, a single can may be enough, but coverage depends on the product, wood porosity, and number of coats. Use the label’s coverage estimate to calculate the amount, then allow extra for test pieces and absorbent end grain. If you are choosing between expensive mahogany and cheaper poplar, buy a small offcut of each and compare finished samples before purchasing all the lumber. That modest test is often the cheapest way to avoid a full project that looks blotchy or too red.



0 Comments