What's inside
As an Amazon Associate I earn from qualifying purchases. This post may contain affiliate links at no extra cost to you.
Choosing between ash and red oak for a white-pigmented finish is less about hardness and more about color, grain, and how much contrast you want. Both are ring-porous hardwoods with large pores, so both can produce an attractive whitewashed or cerused effect. They do not produce the same result, however. Ash starts lighter and cooler. Red oak brings a pink, salmon, or reddish-brown cast that can remain visible through a thin white finish.
As an Amazon Associate we earn from qualifying purchases at no extra cost to you.


Our Top Picks
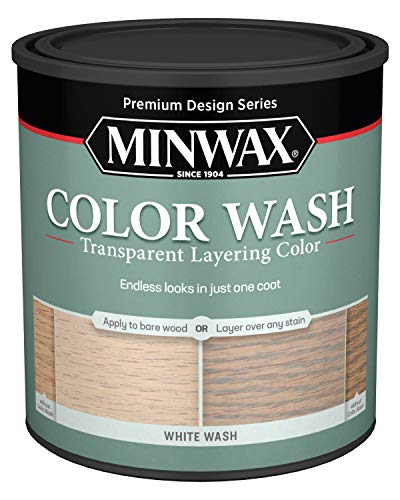 Minwax Color Wash Transparent Layering Color1 Quart (Pack of 1)4.25 x 4.25 x 4.88 inches2.5 PoundsCheck on Amazon
 Minwax Semi-Transparent Simply White Oil-Based Gel Stain 1One Size4.3 x 4.3 x 4.9 inches0.01 PoundsCheck on Amazon
 Varathane Less Mess Whitewash Wood Stain & Applicator4 Ounce (Pack of 1)1.75 x 1.75 x 6.5 inches0.25 PoundsCheck on Amazon
 Varathane Water-Based Ultimate Matte PolyurethaneQuart (Pack of 1)9.8 x 5.5 x 6.3 inches2.2 poundsCheck on Amazon
Ash and red oak compared
| Feature | Ash | Red oak |
|---|---|---|
| Natural color | Pale cream to light tan | Pink, salmon, reddish tan |
| Grain character | Strong, straight, usually bold | Strong, open, often more visibly varied |
| White finish result | Cleaner and brighter | Warmer, sometimes slightly pink or gray-beige |
| White pigment in pores | Works very well for cerusing and liming | Works well, but the red background affects the final color |
| Typical cost | Often moderate; availability varies by region | Usually widely available and economical |
| Best choice when | You want a pale, clean, Scandinavian-style finish | You want visible grain and do not mind warmth |
Choose ash for a cleaner white finish
Ash is the easier starting point when the goal is a light, neutral surface. Its base color is usually pale enough that a white-pigmented oil, hardwax finish, or water-based stain can look close to the color on the label. The grain remains prominent because the earlywood pores absorb more finish than the dense latewood.
Ash is particularly suitable for furniture, cabinet doors, shelving, and wall panels where you want a whitewashed appearance without completely hiding the wood. A thin white stain can leave the hard grain mostly visible while softening the tan background. A heavier coating can make the surface look painted but still allow the cathedral grain to show.
The main failure mode with ash is excessive contrast. If white pigment collects heavily in the pores while the surrounding wood stays dark, the piece can look striped or artificially distressed. This is more likely with a very wet application, coarse sanding, or aggressive brushing. Test the complete schedule on scrap, including the clear topcoat, before committing to the project.
Choose red oak for warmth and pronounced grain
Red oak is often the cheaper and easier-to-source option, and it is perfectly suitable when a slightly warm white finish is acceptable. Its open pores take white pigment well, making it a practical choice for cerused doors, tables, trim, and rustic cabinets. The grain tends to remain visually strong even under an opaque-looking white stain.
Do not expect red oak to become truly neutral with one thin coat of white pigment. The underlying red and pink tones can show through, especially on flat-sawn boards and end grain. The result may look cream, blush, pale peach, or gray-beige depending on the product and lighting. Water-based white stains generally preserve more of the wood’s natural color, while a more opaque glaze or paint reduces it.
Red oak also has a larger color shift between boards than many buyers expect. One board may be pink, another tan, and a third noticeably darker. If you are buying rough lumber, select and arrange the boards before finishing. For a small project, the lower price of red oak may outweigh the extra color correction. For a large built-in or a tightly matched kitchen, ash can save time and rejected material.
Prepare the surface for even pigment
Sand both species consistently to 150 or 180 grit for most white-pigmented finishes. Stopping at 120 grit leaves deeper scratches that catch pigment and can make the surface look dirty. Sanding much finer than 180 grit can burnish the dense latewood and reduce absorption, producing uneven color. On a tabletop or cabinet door, finish with the same grit across every part, including edges.
Remove glue thoroughly. Dried wood glue seals the pores and creates pale or dark patches that white stain will not hide. Scrape squeeze-out before it dries, then sand or remove any remaining film. Check the surface under raking light and wipe it with a clean, slightly damp cloth. Water will reveal glue spots and uneven sanding better than normal room light.
Do not rely on a pre-stain conditioner to solve the usual problem here. Conditioners are mainly intended to reduce blotching in unevenly absorbent woods. Ash and red oak already have strong open-pore structure, and a conditioner may reduce the contrast you want. It can also make a white stain look weak or cloudy.
Pick the right white-pigmented product
For a translucent result, look for a white wood stain, whitewash stain, or tinted hardwax oil. These are easier to wipe back and leave more visible grain. For a stronger white effect, use a white glaze or a paint system designed for wood. A glaze sits closer to the surface and can be brushed or wiped into the pores, while paint forms a more continuous film.
For cerusing, apply the white product, work it across the grain with a stiff synthetic brush, and remove excess from the surface while leaving pigment in the pores. A dedicated stiff synthetic grain brush is useful for this step. Brush gently enough to avoid gouging the softer earlywood.
Water-based products dry quickly and usually keep ash bright, but they can raise the grain. Let the coat dry fully, then lightly sand with 220 grit before the next coat. Oil-based products often add amber warmth, which can make red oak even less white. Hardwax oils are convenient for a natural feel, but they are not as opaque or abrasion-resistant as a properly built paint finish.
Test color and protect the finish
Make a sample at least 12 by 18 inches using the actual species, sanding schedule, white product, and topcoat. Apply the finish to both an earlywood-rich area and a plain-grain area. Look at it in daylight and under the room’s artificial lighting. A clear coat can deepen the color, and some water-based topcoats leave white pigment looking cooler or slightly hazy.
For a durable clear protective layer, use a compatible matte water-based wood topcoat. Two or three thin coats are usually safer than one heavy coat. Sand lightly between coats only as directed by the manufacturer; aggressive sanding can cut through white pigment on edges and corners.
If the sample is too pink, apply a more opaque white glaze or choose ash instead of trying to overpower red oak with many thin coats. If the sample is too stark, a lightly tinted clear coat or a warmer white pigment can soften it. The cheapest sound approach is red oak with a translucent finish when warmth is acceptable. Choose ash when a clean, pale white result matters more than the initial board price.



0 Comments