What's inside
As an Amazon Associate I earn from qualifying purchases. This post may contain affiliate links at no extra cost to you.
A light gray stain is easiest to control on wood with a pale, even color and a fairly consistent grain. On naturally amber or reddish boards, the same stain can look taupe, brown, or faintly purple instead. Species matters, but so do sanding, the stain formula, and any finish applied over it. Test the complete schedule on an offcut or hidden area before treating a finished piece.
As an Amazon Associate we earn from qualifying purchases at no extra cost to you.



Our Top Picks
 1/2 pt Minwax 13407 Clear Pre-Stain Wood Conditioner1/2 Pint3 x 3.25 x 3 inches0 PoundsCheck on Amazon



Best species for a predictable light gray
Maple is a strong choice when you want a clean, contemporary gray with quiet grain. Its light base color keeps the result from looking muddy, though its dense, tight grain can make penetrating stain blotch or absorb unevenly. A gel stain or a dye-and-sealer approach is often easier to control than wiping ordinary penetrating stain straight onto bare maple.
Birch is widely available and usually costs less than maple. It takes gray well in many cases, but can blotch, especially on solid boards with mixed grain or on plywood with thin, variable face veneer. Use a conditioner or thin washcoat if testing shows uneven absorption; too much conditioner can leave the color weak or streaky.
White oak suits furniture where visible grain is part of the look. Its open pores accept pigment and can produce a distinctive gray with strong grain contrast. The trade-off is that the grain may read darker and busier than on maple or birch. Red oak is less predictable for a neutral gray: its pinkish cast can shift the stain toward mauve or warm brown.
Alder and poplar can be practical budget options for painted or lightly grained furniture, but neither guarantees an even stain. Alder can have color variation; poplar may show green or brown streaks that remain visible beneath a pale gray. For a uniform, opaque look, paint is often a better fit than a transparent stain on these species.
How the common choices compare
| Species | Typical gray result | Main risk | Best fit |
|---|---|---|---|
| Maple | Pale, subtle, relatively clean | Uneven absorption | Modern furniture with restrained grain |
| Birch | Light gray with moderate grain | Blotching or veneer variation | Value-conscious projects |
| White oak | Grain-forward, often darker in pores | Strong contrast; can look rustic | Visible, pronounced grain |
| Red oak | Often warmer or less neutral | Pink undertone | Only after a successful sample |
| Poplar | Variable, sometimes muted | Green or brown streaks | Paint-grade work, or tested samples |
Choose a stain by its color and behavior
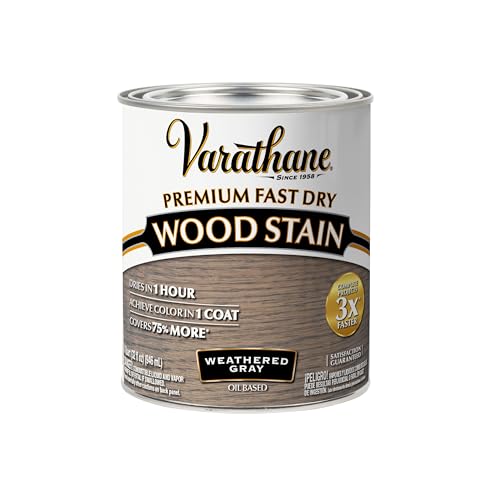
“Light gray” is not a standardized color. One product may look like weathered silver, another like greige. Compare samples in the room where the furniture will be used: warm bulbs and yellow-toned walls can make a cool gray seem warmer. Also check the color after the clear coat; many finishes add amber warmth, while water-based finishes generally preserve a paler appearance.
For visible grain, a gray furniture stain can be a straightforward starting point, but read the label for compatible wood and topcoat. Pigment stains emphasize pores; dyes color the wood more evenly but can make grain contrast less pronounced. Gel stains stay near the surface and can help on blotch-prone woods, though they may look more like a thin coating than a deeply absorbed stain.
White oak with a gray or black pore treatment can produce a dramatic result, but that is a multi-step finish, not a guaranteed effect from one can of stain. Follow the product directions and test whether the pore color stays crisp after wiping and sealing.
Prepare the surface without creating sanding marks
Remove old finish completely if you want a consistent stain color. A stain applied over leftover varnish or oil will sit unevenly, leaving pale islands or dark edges. Start with a scraper or suitable remover where needed, then sand. For most furniture, work through 120 and 150 grit, finishing at 180; sanding much finer can reduce absorption and make some stains look lighter or patchier. Follow the stain maker’s instructions if it specifies a different final grit.
Sand with the grain and use a sanding block on flat areas. On veneered furniture, keep pressure light: thin face veneer can be sanded through surprisingly quickly, especially at corners and edges. Vacuum thoroughly, then remove remaining dust with a clean, dry cloth or the method recommended for the product. Water-based stain can raise grain, so a light pass with 220 grit after a dampening step may help; do not sand through the colored surface after staining.
Test, apply, and seal
Make a sample from the same species and, if possible, the same board or veneer. Sand it exactly as you plan to sand the furniture. Apply the stain according to its stated coverage and wipe-off time; on a small test, record the timing so you can repeat it. A pre-stain wood conditioner may reduce blotching on birch or maple, but test both conditioned and unconditioned areas. Conditioner is not a fix for leftover finish or poor sanding.
Apply thin, even coats rather than flooding the surface. Wipe off excess before it gets tacky, including along end grain and inside corners, where color can build up. If the first coat is too pale, a second coat may deepen it, but check the label: some stains require a particular drying time or are not designed for recoating. Never leave oily stain rags crumpled; they can heat up and ignite. Lay them flat outdoors to dry or store and dispose of them as the product label directs.
Seal only after the stain is fully dry. A water-based clear furniture finish is a sensible choice when you want to limit ambering; an oil-based finish can warm the gray and make it look beige. Apply the recommended number of thin coats, lightly sanding between coats only when the finish instructions call for it. For a dining table or frequently handled furniture, prioritize a finish rated for that use rather than choosing solely by sheen.
A practical buying decision
Choose maple for a pale, quiet gray if you are willing to test for blotching; choose birch when cost matters and a sample confirms the color; choose white oak when you want the grain to show strongly. Avoid selecting red oak or poplar from a stain-chip display alone—the wood’s own color can change the result. The cheapest stain can be fine when it produces the tested color and is compatible with your clear coat. Spending more will not compensate for the wrong species, uneven preparation, or a sample that was tested on different wood.

0 Comments