What's inside
As an Amazon Associate I earn from qualifying purchases. This post may contain affiliate links at no extra cost to you.
A blush-toned dye finish works best on light, fine-grained wood that will accept color evenly without overpowering the pink, rose, or dusty-red tint. The right species matters more than the dye brand. A pale, uniform board can look softly colored and clean; a blotchy or naturally yellow board can turn muddy, orange, or unexpectedly brown.
As an Amazon Associate we earn from qualifying purchases at no extra cost to you.
Our Top Picks
 Varathane Water-Based Ultimate Satin PolyurethaneHalf Pint (Pack of 1)3 x 3 x 3 inches0.64 poundsCheck on Amazon

Best species for blush-toned dye
Hard maple is usually the safest choice. It has a pale, nearly neutral background, tight pores, and a restrained grain pattern. A pink or mauve dye stays clear on maple instead of collecting in deep pores. The downside is that maple can show sanding scratches and uneven absorption, especially around end grain and glue joints.
Birch is another strong option and is often cheaper than hard maple. It has a light color and attractive, subtle grain, but it is more prone to blotching. A water-based dye can produce dark patches on birch if the surface is not prepared evenly. Use a washcoat or a careful pre-dampening process, and test on the actual board rather than relying on a sample from a different birch panel.
Alder accepts blush dye readily and is easy to machine and sand. It has a warmer, slightly peachy base than maple, so it can make a pink dye look richer and more coral. Alder is also soft enough to dent and burnish during sanding. Those compressed areas absorb less dye and may appear as pale streaks.
Beech provides a uniform, pale surface with a fine texture. It can produce a clean blush finish, although its natural color is less neutral than maple and may push the result toward warm salmon. Beech moves significantly with humidity, so it is better suited to interior projects that will not see wide seasonal moisture swings.
Cherry can work when you want a deeper rose or wine-tinged result, but it is not a neutral canvas. Fresh cherry is warm and naturally darkens with light exposure. A blush dye applied to cherry may look pink at first and then become redder and browner over time. Choose it for a deliberately warm finish, not for a pale cosmetic pink.
| Wood species | Typical blush result | Main risk | Best use |
|---|---|---|---|
| Hard maple | Clean, pale pink to rose | Visible scratches and glue spots | Furniture, boxes, trim |
| Birch | Soft pink with light grain | Blotching | Panels and budget projects |
| Alder | Peachy pink or coral | Dents and burnished patches | Cabinet parts and small furniture |
| Beech | Warm, even salmon-pink | Seasonal movement | Interior furniture |
| Cherry | Deep rose to reddish brown | Darkening with age | Warm, high-color projects |
Choose the dye before choosing the topcoat
Water-soluble dye is the most flexible option for a blush finish. It penetrates rather than sitting as an opaque film, so the grain remains visible. It also gives you time to dilute the color accurately. Start with a weak solution and build color in thin applications; removing excess dye is much harder than adding another coat.
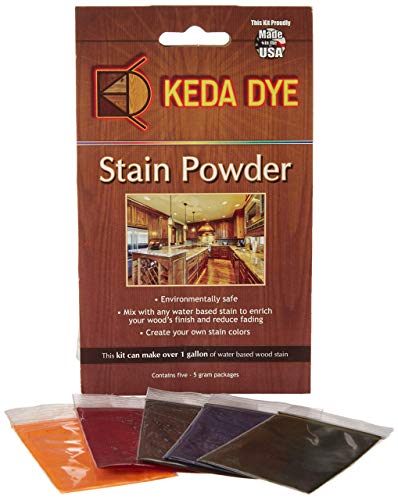
Alcohol-soluble dye dries faster and raises less grain, but it can flash off unevenly on large surfaces. It is useful for small parts and repairs, not always the easiest choice for a first full-size panel. Ready-to-use water-based wood dye powder is economical because one packet can make several test concentrations.
Do not confuse dye with a pigment stain. Pigment stain sits more heavily in pores and can make a fine-grained species look dirty or cloudy. It is a reasonable choice on open-grained oak or ash when you want the grain emphasized, but those woods are poor candidates for a delicate, even blush effect unless you want a strongly textured result.
Prepare the surface for even absorption
Sand flat, clean wood through 150 grit, then finish at 180 grit. On maple and birch, 220 grit can be useful for a final pass, but sanding much finer than that may polish the surface and reduce dye absorption. Use fresh abrasive and a firm sanding block on flat areas. Random-orbit sanding alone can leave circular scratch patterns that become obvious under translucent color.
Ease sharp edges slightly with one or two light hand passes. Dye concentrates on end grain, so a crisp edge can become a dark pink line. Do not round the edge aggressively unless that matches the design.
Remove glue completely. Even a thin glue smear can resist dye and leave a pale, unmistakable patch. Scrape dried squeeze-out before sanding, then inspect the surface under raking light. Wipe with a clean, slightly damp cloth to expose scratches and glue residue. Let the wood dry fully before coloring.
For birch or alder, test both untreated wood and a wood dye pre-stain conditioner or washcoat. A thin washcoat reduces blotching but also reduces color intensity. A practical starting point is a 1-pound cut shellac diluted roughly 1:1 with denatured alcohol, though you should confirm compatibility with the dye and local regulations. Apply a thin coat, let it dry, and lightly scuff with 320 grit before dyeing.
Test the exact schedule
Make a sample from the same species, preferably from the same board or plywood sheet. Apply the intended sanding, dye concentration, number of coats, and clear finish. A blush color can change dramatically after topcoating. Test at least three dye strengths, such as a 1:4, 1:8, and 1:16 dilution from the same stock solution.
Apply dye with a synthetic brush, sponge, or lint-free cloth while keeping a wet edge. Work quickly on large surfaces and avoid stopping in the middle of a panel. Overlap marks can create darker bands. If the first coat is too strong, do not scrub aggressively; let it dry and adjust the next coat with a lighter mixture or a controlled clear coat.
Raise the grain before final sanding if you are using water dye. Wipe the bare surface with a damp cloth, let it dry completely, and sand lightly with 220 grit. This prevents the first dye coat from lifting loose fibers and leaving a rough texture.
Protect the color without warming it too much
For the least color shift, use a water-based clear finish labeled non-yellowing. Oil-based varnish and amber shellac can add attractive warmth, but they may turn a pale blush into peach or orange. Apply two or three thin coats, sanding only as directed by the finish maker. A satin sheen usually hides minor surface irregularities better than gloss.
Spray lacquer can preserve a bright dye color and build quickly, but it requires strong ventilation and appropriate respiratory protection. For most home workshops, a water-based satin clear wood finish is the cheaper and simpler option, particularly on a small project. If the wood will receive heavy handling, prioritize the finish’s durability rating over a perfectly unchanged color.
Common failures and fixes
Dark edges usually mean the end grain absorbed more dye. Sand the edge evenly, apply a thin washcoat there, or reduce the dye concentration for the edge coat. Pale spots usually come from glue, burnishing, or uneven sanding; they cannot be reliably repaired with more dye alone. Sanding back and recoloring is often the cleanest fix.
If the finished color looks too orange, the wood species or clear coat is adding too much warmth. Use maple instead of alder or cherry, choose a cooler red-violet dye, and test a non-yellowing water-based topcoat. If the result is too weak, add dye in several thin coats rather than jumping to a very concentrated mixture.

0 Comments