What's inside
- Stain Color Families Compared at a Glance
- How the Same Stain Colors Look on Common Woods
- 3 Variables That Change Stain Colors More Than the Can Suggests
- Stain Type Specs: What Affects Color and Workflow
- How to Test Stain Colors So the Sample Matches the Project
- Decision Matrix: Pick Stain Colors by Your Situation
- Coverage and Cost Calculation: Buy the Right Amount
- Durability and Ownership Realities
- FAQ
- Stain Color Families Compared at a Glance
- How the Same Stain Colors Look on Common Woods
- 3 Variables That Change Stain Colors More Than the Can Suggests
- Stain Type Specs: What Affects Color and Workflow
- How to Test Stain Colors So the Sample Matches the Project
- Decision Matrix: Pick Stain Colors by Your Situation
- Coverage and Cost Calculation: Buy the Right Amount
- Durability and Ownership Realities
- FAQ
As an Amazon Associate I earn from qualifying purchases. This post may contain affiliate links at no extra cost to you.
The best stain colors for your project depend on wood species, sanding grit, and topcoat sheen more than the label on the can, so always compare color families on your actual wood and test a sample board before you commit to a full piece.
As an Amazon Associate we earn from qualifying purchases at no extra cost to you.


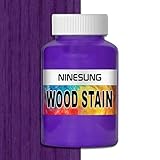

Stain Color Families Compared at a Glance
Most stain colors fall into six families. Understanding their undertones helps you narrow choices without buying dozens of cans.
- Natural / Clear: Adds minimal pigment, deepens the wood’s natural tone slightly. Best when you want to showcase figure in white oak, walnut, or cherry without changing the hue.
- Light Blonde and Honey: Yellow-amber undertones like Minwax Natural, Ipswich Pine, and Varathane Sun Bleached. Brightens pine and poplar, keeps maple from looking blotchy.
- Warm Medium Browns: The most forgiving family. Shades like Minwax Early American, Special Walnut, and Varathane Early American have orange-brown bases that even out variation on red oak and ash.
- Cool Medium Browns / Greige: Taupe and gray-brown blends such as Minwax Classic Gray, Weathered Oak, and General Finishes Gray Gel Stain. Mutes yellow in pine and creates a modern look on white oak, but can look muddy on cherry or mahogany.
- Dark Walnut and Espresso: Deep brown-black pigments like Minwax Dark Walnut, Jacobean, and Varathane Espresso. Hides grain contrast and evens out sapwood, but obscures figure if applied too heavily.
- Reds and Warm Ambers: Reddish undertones like Minwax Red Mahogany, Sedona Red, and General Finishes Merlot. Intensifies the natural red in cherry and mahogany, can look very orange on pine if not conditioned first.
How the Same Stain Colors Look on Common Woods
Wood species controls the final shade because density, tannin content, and open vs. closed grain affect absorption. Red oak absorbs heavily and skews warm, maple absorbs unevenly and stays lighter, pine blotches without conditioner, and walnut is already dark so light stains barely show.
| Stain Color (Oil-Based Example) | Red Oak | White Oak | Hard Maple | Pine (with conditioner) | Walnut |
|---|---|---|---|---|---|
| Natural | Light amber, grain prominent | Pale cream to light tan | Very light cream, minimal change | Light honey | Slightly deepened chocolate brown |
| Early American | Medium warm brown, golden undertone | Medium tan, fairly even | Light to medium tan, can blotch | Even light brown with yellow cast | Darkens slightly, little contrast |
| Classic Gray | Warm greige, grain picks up gray | True light gray, even | Pale gray, uneven without gel stain | Soft weathered gray | Mutes brown, can look ashy |
| Special Walnut | Medium brown with olive undertone | Medium brown, balanced | Light warm brown, needs gel for evenness | Medium brown, moderately even | Blends sapwood, deep brown |
| Dark Walnut / Jacobean | Deep chocolate brown | Deep brown, rift grain stays visible | Medium-dark brown, streaky if liquid stain | Dark brown, end grain much darker | Near black-brown, obscures figure |
If you work with maple, birch, or pine, use a gel stain like General Finishes Gel Stain or Varathane Premium Gel Stain instead of a thin liquid. Gel sits on top rather than soaking deep, which reduces blotching and gives you more control over depth.
3 Variables That Change Stain Colors More Than the Can Suggests
1. Final Sanding Grit
Sanding grit determines how much pigment the wood can hold. Sanding to 120-grit leaves scratches that trap more pigment and reads 1-2 shades darker. Sanding to 180-220 burnishes the surface and reads lighter and more even. For stain, most manufacturers recommend stopping at 150 or 180-grit. Jumping from 150 to 220 on maple can lighten a medium walnut stain to the point it looks like a different color. Sand evenly and vacuum thoroughly, then wipe with mineral spirits or water depending on your stain base to raise dust.
2. Wood Grain and Preparation
End grain, sapwood, and figured areas absorb 30-50% more stain. Pre-stain wood conditioner (for softwoods) or a 1 lb cut of dewaxed shellac partially seals the wood and limits blotching, but it also lightens the final color by about half a shade. Apply conditioner, wait 10-15 minutes, then stain within 2 hours. For porous woods like red oak, grain filler is an optional step if you want a smooth, uniform color instead of dark pores.
3. Topcoat Type and Sheen
Topcoat deepens and warms stain colors. Oil-based polyurethane adds a distinct amber cast that makes grays look greige and light browns look honeyed. Water-based polyurethane like Bona Mega or Varathane Water-Based Poly keeps colors truer and lighter but can appear slightly milky on very dark stains. Hardwax oils like Rubio Monocoat or Osmo Polyx-Oil add very little film build, so the color stays closer to the freshly stained look with a matte, natural feel. Higher gloss also reflects more light and makes color appear slightly lighter, while matte flattens and deepens it.
Stain Type Specs: What Affects Color and Workflow
Choosing between oil, water-based, gel, and hardwax oil matters for open time, cleanup, and how color builds.
| Stain Type | Typical Can Sizes | Coverage per Quart | Working Time Before Wipe | Dry to Topcoat | Best For |
|---|---|---|---|---|---|
| Oil-Based Liquid (e.g., Minwax Wood Finish) | 8 oz, 1 qt, 1 gal | 275-325 sq ft | 5-15 minutes | 8-24 hours | Open-grain woods, even color on oak and ash |
| Water-Based Liquid (e.g., Varathane Premium Water-Based) | 8 oz, 1 qt, 1 gal | 300-350 sq ft | 2-5 minutes, fast dry | 2-4 hours | Low odor, keeps light grays and whites true |
| Gel Stain (e.g., General Finishes Gel Stain) | 1 pt, 1 qt, 1 gal | 200-250 sq ft | 10-20 minutes, stays workable | 12-24 hours | Maple, pine, plywood, vertical surfaces |
| Hardwax Oil with Pigment (e.g., Rubio Monocoat Oil Plus 2C) | 350 ml, 1 L | 300-400 sq ft per liter (single coat) | 3-5 minutes, then buff off | 36-48 hours cure, 5-7 days full cure | Single-coat color + finish, matte natural look |
How to Test Stain Colors So the Sample Matches the Project
Do not judge stain colors from the lid or a store chip. Use offcuts from your actual project that have been sanded exactly the same way.
- Step 1: Prepare a test board. Cut 3-4 strips from the same lumber, at least 3 inches wide and 12 inches long. Mark the sanding grit and whether you used conditioner on the back.
- Step 2: Sand identically. Sand the test and the project to the same final grit (typically 150 or 180). Remove all cross-grain scratches and vacuum with a brush attachment.
- Step 3: Apply the candidates. Stir thoroughly without shaking. Apply a liberal coat with a foam applicator or lint-free cloth, let sit for 5 minutes, then wipe with the grain. For a depth comparison, make a second set where you leave the stain for 10-15 minutes before wiping.
- Step 4: Label and topcoat half. Once dry, brush your intended topcoat on half of each swatch. The topcoated half is the true final color. Evaluate in daylight, warm indoor light, and next to flooring or trim the piece will live with.
- Step 5: Adjust before committing. To lighten, dilute with compatible reducer or wipe sooner. To darken, apply a second coat after 4-6 hours (oil) or use a darker shade rather than leaving a single coat excessively thick, which causes tackiness and poor adhesion.
Decision Matrix: Pick Stain Colors by Your Situation
| Your Situation | Recommended Family | Stain Type to Use | Why |
|---|---|---|---|
| First project on pine or poplar, want even color | Warm Medium Brown (Early American, Special Walnut) | Gel stain + pre-stain conditioner | Forgiving, minimal blotching, hides sapwood variation |
| White oak floors or table, modern light look | Natural, Weathered Oak, Classic Gray | Water-based or hardwax oil | Keeps tone light without ambering, shows grain |
| Red oak cabinets that look too orange | Cool Medium Brown, Special Walnut, Provincial with gray undertone | Oil-based liquid | Olive-brown pigments counter orange/red cast |
| Walnut with uneven sapwood | Dark Walnut, Jacobean | Oil-based or gel, thin application | Blends light streaks without painting the wood opaque |
| Small shop, low ventilation, need fast recoat | Any family in water-based line | Water-based stain + water-based topcoat | Low odor, 2-hour recoat, easy soap-and-water cleanup |
| Want one-step color and finish, matte feel | Light to medium browns in hardwax oil range | Rubio Monocoat, Osmo | Single coat coverage reduces layering errors, matte sheen |
Coverage and Cost Calculation: Buy the Right Amount
Stain rarely covers as far as paint, and a second coat halves coverage. Use this quick math before ordering.
Formula: (Surface Area in sq ft / Coverage per Quart) x Number of Coats = Quarts Needed. Add 15-20% waste for rags, end grain, and touch-ups.
Worked example for a 6-foot dining table: Top is 42 x 72 inches (21 sq ft) plus apron and legs adds roughly 18 sq ft = 39 sq ft total. With an oil-based stain rated at 300 sq ft per quart, one coat needs 39 / 300 = 0.13 quart, but you will buy a full quart as the smallest practical size. For a more demanding project like 400 sq ft of white oak flooring with two coats: (400 / 300) x 2 = 2.67 quarts, plus 20% = 3.2 quarts, so round up to 1 gallon. Hardwax oils cover about 350 sq ft per liter in one coat, so the same 400 sq ft floor needs about 1.2 liters – buying two 350 ml cans will not be enough, you need a 1 L can plus a 350 ml can for the same batch.
Durability and Ownership Realities
Stain itself provides almost no protection, the topcoat does. What fails first is rarely the color, it is the film or the maintenance routine.
- What wears first: On tabletops, water-based poly shows fine scratches sooner but resists yellowing. Oil-based poly yellows slightly over 1-2 years but handles heat and scuffs well. Hardwax oil shows wear in high-traffic paths within 12-24 months and needs a refresh coat, not a full strip.
- Consumables to budget: Applicator pads, lint-free wiping cloths, stirring sticks, nitrile gloves, and mineral spirits (for oil) or synthetic brushes (for water-based). Gel stains consume more applicators because you buff rather than wipe thin.
- Cleaning: Never use harsh cleaners that leave stain rags at risk of spontaneous combustion. Lay oil-soaked rags flat outside to dry or soak in water in a sealed metal container before disposal. Water-based rags can be dried and discarded normally.
- Common mistakes that change color: Over-applying and not wiping enough leaves a sticky film that peels and looks darker and blotchy. Skipping the topcoat test makes grays look cooler than they will after oil-based poly. Sanding through veneer while trying to even blotching creates light spots that cannot be stained to match – use gel stain or glaze instead of aggressive sanding.
FAQ
Can I mix stain colors to get a custom shade?
Yes, if they are the same base and brand. Mixing two oil-based Minwax colors or two Varathane water-based colors works. Do not mix oil and water-based lines, and always mix enough for the entire project at once. Measure by volume, record the ratio, and test on scrap with topcoat.
Why does my stain look lighter after it dries?
Wet stain always looks darker. Solvent evaporation lightens the color by 10-20%. Topcoat will deepen it again, but rarely to the wet-look depth. If the dried color is too light, a second thin coat after the recommended dry time is more reliable than leaving the first coat wet longer.
Do I need wood conditioner on hardwood?
Conditioner is essential on pine, poplar, birch, and maple. On red and white oak, ash, and walnut it is optional and will lighten the stain. If your test shows blotching on hardwood, switch to a gel stain rather than adding conditioner.
0 Comments