What's inside
As an Amazon Associate I earn from qualifying purchases. This post may contain affiliate links at no extra cost to you.
Black dye looks simple on a color chart, but the wood underneath determines whether the result is deep and even or blotchy and gray. For the most consistent finish, choose a close-grained, light-colored hardwood with moderate absorption. Maple is usually the safest choice, while birch, beech, and poplar can work when properly prepared. Open-pored woods such as oak and ash can also become black, but their pores remain visible and may absorb more color than the surrounding surface.
As an Amazon Associate we earn from qualifying purchases at no extra cost to you.


Our Top Picks
 Varathane Total Control Ebony Gel StainHalf Pint (Pack of 1)2.88 x 2.88 x 2.97 inchesCheck on Amazon
 Varathane Water-Based Ultimate Satin PolyurethaneHalf Pint (Pack of 1)3 x 3 x 3 inches0.64 poundsCheck on Amazon


Best wood species for black dye
Hard maple is the best all-around option for an even black dye finish. Its tight grain and pale color provide a relatively uniform starting point, and it does not have large pores that fill with excess dye. Maple still requires careful sanding because rough areas absorb more color and show as dark patches. Use dye on figured maple when you want the curl to remain visible, but expect the figure to create some natural variation.
Soft maple is often cheaper and easier to find than hard maple. It is a good choice for painted-looking black surfaces, drawer parts, signs, and furniture components. Its density varies more from board to board, so test scraps are especially important. A washcoat or sanding sealer can reduce uneven absorption, but too much sealer will make the dye look weak.
Birch produces a clean black color and is common in plywood and inexpensive solid stock. The downside is its tendency to develop blotches, particularly on end grain and areas where the grain direction changes. Birch plywood can be a practical budget choice for panels, but inspect the face veneer for patches, seams, and sanding-through before buying.
Beech has fine pores and a fairly uniform texture. It accepts black dye well, although its dense surface may need a slightly longer wetting time or an additional coat. Beech can move noticeably with changes in humidity, so it is better suited to interior projects that are properly sealed on all sides.
Poplar is the inexpensive option. It is easy to machine and commonly available, but its green, gray, and purple streaks can remain visible under a transparent black dye. Use it when low cost matters or when the project will receive a very dark topcoat. For a genuinely uniform black, paint-grade poplar is usually more predictable with opaque paint than with dye.
| Wood species | Evenness with black dye | Color and grain behavior | Best use |
|---|---|---|---|
| Hard maple | Very good | Pale, tight grain; clean and consistent | Furniture, trim, small projects |
| Soft maple | Good | More variable density; may blotch | Budget furniture and parts |
| Birch | Good with preparation | Can show blotches and veneer defects | Plywood panels and boxes |
| Beech | Good | Fine texture; dense and fairly neutral | Interior furniture and turned parts |
| Poplar | Fair | Green or purple streaks may remain visible | Low-cost work or opaque topcoats |
| Red oak or ash | Fair | Large pores create a pronounced grain pattern | Textured, ebonized-looking surfaces |
Species that are harder to dye evenly
Red oak, white oak, and ash absorb dye strongly into their open pores. This is not necessarily a defect: it creates a black surface with visible grain lines and a rustic, high-contrast appearance. If you want a flat, uniform black, these species require pore filling or a sanding sealer before dyeing. If you want the grain emphasized, skip the sealer and accept the variation.
Walnut, cherry, and mahogany can take black dye, but their natural brown or red tones affect the result. Black dye does not always hide those undertones, especially after the surface is lightly sanded or viewed in strong light. These species make more sense when you want black with visible warm grain rather than a neutral black.
Avoid oily woods such as teak unless you are prepared to clean and test them carefully. Natural oils can interfere with water-based dyes, causing weak color, fisheyes, or uneven drying. Exotic woods also vary greatly between boards, making a small sample less representative.
Preparation for an even result
Sand the surface evenly through the grits. For most furniture work, stop at 180 grit; 220 grit is reasonable for a smoother final surface, but sanding much finer can reduce dye penetration. Remove every scratch from the previous grit. Black dye highlights cross-grain scratches that may be nearly invisible on bare wood.
Use a sharp scraper or fresh abrasive on end grain, where possible. End grain can turn nearly black while the face remains dark gray. A thin coat of wood sanding sealer or a carefully diluted washcoat can reduce this contrast. Test the dilution first: the goal is to slow absorption, not create a plastic film.
Raise the grain before using a water-based dye. Wipe the sanded surface with a damp cloth, let it dry completely, then sand lightly with 220 grit. This prevents the first coat of dye from raising loose fibers and leaving a rough surface. If you use an alcohol- or solvent-based dye, follow its preparation requirements instead.
Applying black dye
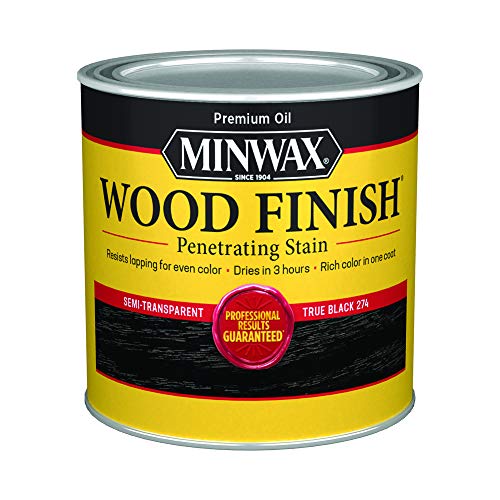
Use a concentrated black wood dye when you want the color to penetrate rather than sit on top like paint. Apply two or more thin coats instead of one heavy coat. Keep a wet edge, work with the grain, and avoid stopping in the middle of a panel. Overlap marks are especially visible on maple and birch.
Let each coat dry according to the manufacturer’s instructions, commonly between 1 and 4 hours for water-based products. Do not judge the final color while the surface is wet. Make a sample using the exact species, sanding schedule, dye dilution, number of coats, and clear finish. A black dye can look charcoal before topcoating and become much darker after a waterborne or solvent-based clear coat.
Protecting the dyed surface
Dye alone has poor resistance to handling and water. Once the color is fully dry, apply a compatible clear finish. Waterborne polyurethane generally preserves a neutral black, while some oil-based finishes add a warm cast and can make the surface look slightly brown. Spray application gives the most even result on large panels, but a quality brush or foam applicator is adequate for smaller pieces.
For a smooth black surface, lightly scuff between clear coats with 320 or 400 grit after the finish has cured enough to sand without clogging. Do not sand through the clear coat into the dye; those thin spots will appear as gray or pale marks. A water-based clear finish is a sensible default for maple, birch, and beech.
If the project must be perfectly opaque and the wood species is streaky, cheap, or inconsistent, use black paint instead. Dye is worthwhile when you want depth, visible grain, or a natural-looking surface. For the most predictable purchase, choose straight-grained hard maple, prepare it to 180 or 220 grit, test the dye on a scrap, and seal the color with several thin clear coats.

0 Comments