What's inside
As an Amazon Associate I earn from qualifying purchases. This post may contain affiliate links at no extra cost to you.
A stained coat rack is a small project, but the wood choice affects nearly everything: how evenly the stain absorbs, how well screw holes hold, how much sanding it needs, and whether the finished rack looks intentional or blotchy. For most indoor coat racks, hard maple, oak, ash, cherry, and pine can all work. They simply produce different results.
The best all-around choice is usually red oak or hard maple. Oak is easier to stain evenly and gives you visible grain. Maple is harder and cleaner-looking, but it needs more careful preparation because it can develop uneven color. Pine is the budget choice and is perfectly adequate for a painted or rustic rack, but it is the least predictable under dark stain.
As an Amazon Associate we earn from qualifying purchases at no extra cost to you.

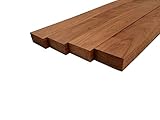
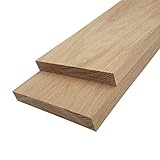

Our Top Picks
 Barrington Hardwoods Red Oak Lumber Board3/4" x 2" x 48"100 x 100 x 50 Centimeters5 poundsCheck on Amazon
 Barrington Hardwoods Domestic Variety Pack 5 Walnut3/4" x 2" x 12"12 x 2 x 0.75 inchesCheck on Amazon
 Varathane Water-Based Ultimate Satin PolyurethaneHalf Pint (Pack of 1)3 x 3 x 3 inches0.64 poundsCheck on Amazon


Best Wood Species for a Stained Coat Rack
| Wood | Stain result | Strength and workability | Best use |
|---|---|---|---|
| Red oak | Even, strong grain; accepts medium and dark stains well | Strong, easy to machine and sand | Traditional stained coat racks |
| White oak | Similar to red oak, usually slightly less pink and more refined | Very strong; can be harder on tools | Premium furniture-style racks |
| Hard maple | Light, subtle grain; can turn blotchy with penetrating stain | Hard and durable, but more difficult to shape | Modern designs and light finishes |
| Cherry | Warm, rich color that darkens naturally over time | Stable and easy to work | High-end racks with a warm finish |
| Pine | Often uneven, especially with dark stain | Cheap, soft, and easy to cut; dents easily | Budget, rustic, or painted projects |
| Poplar | Usually dull or greenish under clear stain | Soft and easy to work | Painted coat racks, not usually stained ones |
Oak: The Safest Staining Choice
Oak is the easiest recommendation when you want a conventional stained appearance. Its open pores absorb stain consistently, and the pronounced grain remains visible after finishing. Red oak is generally cheaper and more widely available than white oak. It can have a pink or salmon cast under some stains, so test it if you want a neutral brown.
White oak costs more, but it has a slightly more subdued appearance and is a good match for contemporary or Scandinavian-style hardware. Both types are hard enough for repeated use, and their dense structure holds coat-hook screws reliably. Use a board at least 3/4 inch thick; 1 inch is better if the rack will carry heavy winter coats or bags.
For a straightforward build, look for oak project boards rather than construction lumber. They are usually flatter, drier, and have fewer defects.
Maple, Cherry, and Other Hardwoods
Hard maple makes a durable coat rack with a clean, pale appearance. It is a good choice if you want a light stain or a natural finish, but dark penetrating stains can look patchy on its relatively closed grain. A gel stain or a dye-based color can produce more consistent results than a standard oil stain.
Cherry is easy to work and stains well, although many woodworkers leave it natural or use a clear finish. It starts pinkish and deepens to a reddish brown with exposure to light. If you need the rack to match another piece immediately, do not rely on that color change; make a sample and finish it before choosing your stain.
Avoid assuming that every hardwood is suitable simply because it is hard. Beech and birch can both show uneven absorption, while walnut is attractive but often expensive for a basic rack. Exotic woods may also require different glue or finishing procedures.
When Pine Is Good Enough
Pine is the sensible low-cost option when the rack will be painted, distressed, or used lightly. It is easy to find in long boards and easy to cut with basic tools. The problem is its soft earlywood: sanding pressure and stain can create dark bands, while knots may bleed resin through the finish.
If you stain pine, choose a board with straight grain and few knots. Sand it uniformly to 150 or 180 grit, then apply a wood conditioner or a washcoat before staining. Conditioner reduces contrast but can also make the color lighter, so test both approaches on scrap. A wood conditioner for pine is inexpensive insurance when matching color matters.
For a rustic rack, uneven color is not necessarily a defect. For a clean, furniture-like rack, pine usually takes more work than its low price suggests. The cheaper board is worthwhile when you plan to paint or when visible variation is acceptable.
Prepare the Wood Before Staining
Start by checking the board for twist, cracks, loose knots, and cupping. Fill small dents before final sanding, but do not expect ordinary wood filler to take stain exactly like the surrounding wood. If a defect is visible, use a stainable filler on a test piece first.
Sand flat surfaces through 120, 150, and finally 180 grit. Going much finer than 180 or 220 grit can burnish the surface and reduce stain penetration, especially on maple and birch. Sand end grain carefully because it absorbs far more color than face grain. A final pass with 180 grit on end grain often prevents black or overly dark ends.
Remove dust with a vacuum and a clean, lightly damp cloth. Do not flood the surface with water; raised grain will require another sanding pass. Round sharp exposed edges with two or three light sanding passes. Stain collects on razor-sharp edges and can make them look much darker than the rest of the rack.
Stain and Finish for a Coat Rack
Always test the complete process on an offcut: sanding, conditioner if used, stain, and topcoat. Apply stain in the direction of the grain, wait the manufacturer’s stated time, and wipe off the excess. Leaving excess stain on the surface can create sticky areas or a weak film that remains soft for days.
For indoor use, two or three coats of water-based polyurethane provide good abrasion resistance and dry quickly. Oil-based polyurethane adds warmth and generally gives more working time, but it smells stronger and may take 24 hours or longer between coats. Lightly sand cured finish with 320 grit before the final coat. Do not mount hardware until the finish has hardened; “dry to touch” is not the same as fully cured.
Use water-based polyurethane when you want low odor and minimal color change. Choose an oil-based finish when extra warmth and a longer open time are more important.
Hardware and Common Failure Modes
Pre-drill holes for coat hooks, particularly in oak, maple, and near board ends. The pilot hole should match the screw’s solid-shank diameter, not the full thread diameter. A screw that is too large can split the board; one that is too short can pull out under a heavy load. For a 3/4-inch board, use hooks with screws roughly 1/2 to 5/8 inch long unless the hook design specifies otherwise.
Mount the finished rack into wall studs when possible. If studs do not align with the rack, use suitable wall anchors and a mounting strip rather than relying on two small screws in drywall. Even strong oak cannot compensate for weak wall attachment.
For the best balance of price, appearance, and predictable staining, choose red oak. Choose maple for a cleaner modern look, cherry for warmth, and pine when low cost or rustic character matters more than uniform color.

0 Comments