What's inside
As an Amazon Associate I earn from qualifying purchases. This post may contain affiliate links at no extra cost to you.
A coat rack is a good project for showing off wood grain because the board is usually wide, flat, and viewed at eye level. The best species depends on the look you want, how much you want to spend, and whether the rack will carry heavy coats. For a stained finish, choose a species with attractive grain and reasonably even porosity. Soft, blotchy, or very pale woods can still work, but they need more careful preparation.
As an Amazon Associate we earn from qualifying purchases at no extra cost to you.

Our Top Picks
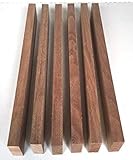
 Walnut Lumber Sheets Unfinished Walnut Wood Sheets Thick17x4x7/8 Inch - 1PCS3.93 x 7.87 x 0.8 inches1.4 PoundsCheck on Amazon
 10 Walnut Boards for Making Cutting Boards24"L x 2"W x 3/4"Th24 x 2 x 0.75 inches8 PoundsCheck on Amazon
 Varathane Water-Based Ultimate Satin PolyurethaneHalf Pint (Pack of 1)3 x 3 x 3 inches0.64 poundsCheck on Amazon
Best species for visible grain
Oak is the safest all-around choice. Red oak has bold, open grain and takes most stains readily, producing a traditional, high-contrast finish. White oak has a tighter, more refined appearance and usually looks better with medium brown, walnut, or natural-toned stains. Oak is hard enough for screw-mounted hooks and resists dents better than pine.
Walnut is the premium option when the wood itself is the feature. Its natural brown color often needs only clear finish, or a very light brown stain to even out the tone. Dark stain can hide walnut’s grain and waste much of what you paid for. Walnut costs more and is somewhat softer than hard maple, but it is stable and machines cleanly.
Hard maple has subtle, tight grain rather than dramatic cathedral patterns. It is excellent for a clean, modern rack, especially with a clear coat or light amber stain. Dark stain can turn maple uneven and muddy because its dense areas absorb less color than end grain and softer sections.
Ash resembles oak but has a slightly lighter, more open grain. It is a useful lower-cost substitute for white oak when you want strong grain lines and good durability. Ash generally accepts stain well, although its large pores can create a more pronounced contrast than expected.
Pine is the budget choice, and it is perfectly adequate for a small coat rack in a bedroom, mudroom, or rental. Its soft surface dents easily, and its resinous, uneven grain commonly causes blotching. Use a conditioner or a gel stain, and expect a more rustic result rather than a furniture-grade, uniform color.
| Wood | Grain character | Staining difficulty | Best use |
|---|---|---|---|
| White oak | Strong, refined, open | Easy | Durable traditional or modern rack |
| Red oak | Bold and highly visible | Easy | Lower-cost high-contrast finish |
| Walnut | Rich, naturally dark | Easy with light stain | Premium furniture-style project |
| Ash | Oak-like and open | Easy | Value alternative to white oak |
| Hard maple | Fine and understated | Moderate to difficult | Light, contemporary finish |
| Pine | Knotted and variable | Difficult | Low-cost rustic rack |
What to buy for the board
For most projects, use a board between 3/4 and 1 inch thick and at least 5 1/2 inches wide. A 1×6 board is nominally 3/4 inch thick, which is usually enough for four or five hooks. Choose straight, kiln-dried stock without cracks near the screw locations. If the rack will be longer than 36 inches, a 1-inch-thick board gives it a more substantial appearance and reduces the chance of sagging or twisting.
Clear, knot-free boards are worth paying for on walnut, oak, and ash. On pine, paying for premium clear stock can approach the price of a better hardwood, so selectively buying a few knots may be the cheaper option. Avoid construction lumber unless you can tolerate movement, dents, and uneven moisture content.
For solid hardwood, compare boards by appearance rather than simply buying the cheapest piece. Grain direction should run along the rack, and a visible straight grain usually looks better than a section with short, broken figure. If you prefer the look of several narrow strips, edge-glued panels are stable, but the glue lines will remain visible under a transparent stain.
Sand and prepare the surface
Start by trimming the board square and easing the edges with a small round-over bit or 120-grit sandpaper. Sharp edges stain darker and chip more easily. Sand the broad faces through 120, 150, and finally 180 grit. On open-grained oak or ash, stopping at 180 usually gives better stain absorption than polishing to 220 grit. Over-sanding can leave the surface too closed, creating a pale, uneven result.
Remove dust with a vacuum and a clean, slightly damp cloth. Do not flood the board with water; raised fibers will need another sanding pass. Test the complete finish schedule on an offcut or the back of the rack. The same stain can look dramatically different on red oak, pine, and walnut.
For pine, spruce, and other blotch-prone softwoods, apply a wood conditioner for staining according to its label. It reduces contrast but can also make the final color lighter. Gel stain is another practical choice because it sits closer to the surface and is less dependent on uneven absorption. The trade-off is less crisp grain definition.
Apply stain and protect the rack
Use a lint-free cloth or a quality synthetic brush to apply stain with the grain. Let it sit for the label’s stated time, then wipe off the excess before it becomes sticky. Work one section at a time and maintain a wet edge. A second coat often darkens the color, but it will not correct blotching or sanding marks.
Oil-based stain usually gives oak and ash strong pore contrast and longer working time. Water-based stain dries faster and keeps light woods from turning as amber, but it can raise the grain. If using water-based products, lightly dampen the bare board, let it dry, then sand the raised fibers with 180 grit before staining.
After the stain dries fully, apply two or three thin coats of finish. A water-based polyurethane keeps white oak, ash, and maple relatively light and dries quickly. Oil-based polyurethane adds warmth and depth but may amber pale wood. Sand lightly with 320 grit between coats only if the label calls for it or the surface feels rough.
Mounting details that matter
Finish the board before installing hooks, but drill pilot holes after the finish cures. For common hook screws, a pilot hole around 1/8 inch is often suitable; verify the screw’s core diameter first. Do not rely on short screws driven only into the board if the rack will hold winter coats. Locate wall studs where possible, or use rated anchors and a mounting strip.
The most common failures are blotchy color, visible sanding scratches, stain that remains tacky, and a rack pulled loose from drywall. Avoid all four by testing the finish, sanding consistently, allowing stain to dry completely, and treating mounting hardware as a structural part of the project. For a dependable balance of price, grain, and ease, white oak or ash is hard to beat; choose pine only when its lower cost and rustic character are genuinely useful.

0 Comments