What's inside
As an Amazon Associate I earn from qualifying purchases. This post may contain affiliate links at no extra cost to you.
A stain repair is easiest to see when its color, sheen, or edge differs from the surrounding finish. The goal is not to cover the whole area with a darker stain. It is to identify which layer is damaged, match the existing color in small steps, and restore the protective topcoat without creating a shiny or raised patch.
As an Amazon Associate we earn from qualifying purchases at no extra cost to you.


Our Top Picks
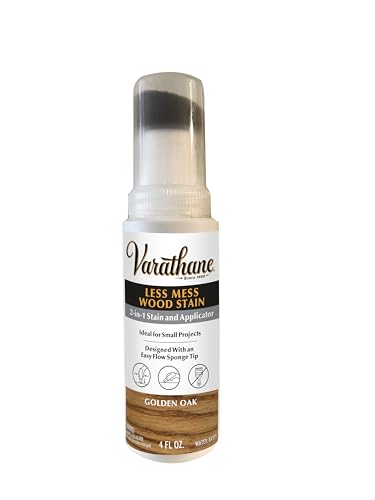 Varathane Less Mess Golden Oak Wood Stain &4 Ounce (Pack of 1)1.75 x 1.75 x 6.5 inches0.25 poundsCheck on Amazon
 Minwax Fast Drying Polyurethane Spray11.5 Ounce (Pack of 1)2.7 x 2.7 x 8.15 inches0.9 poundsCheck on Amazon
Identify what needs repair
Wipe the area with a dry cloth, then inspect it in bright, angled light. If the wood looks pale but feels smooth and the clear finish is intact, the color layer may have faded or been removed. If you can feel a rough edge, see bare fibers, or find flaking finish, the topcoat is damaged too. A white ring may be moisture trapped in the finish; sanding it immediately can turn a small blemish into a larger repair.
Before using a cleaner, solvent, or new coating, test it in an inconspicuous spot. An unknown finish might be lacquer, shellac, varnish, or a modern water-based coating, and some solvents soften certain finishes. If the piece is valuable, veneer is lifting, or the damaged area is large, stop before sanding: veneer can be less than 1/16 inch thick.
Match color before committing
Clean grease and wax from the repair area with a cleaner suitable for the existing finish, applied to a cloth rather than poured on the wood. Let it dry fully. If the surface is bare, test color on scrap from the same species when possible. Oak, pine, maple, and walnut absorb stain differently, and even boards of the same species can vary.
Use the lightest workable color first. Apply a small amount with a cotton swab or fine artist’s brush, wait the maker’s stated time, then wipe away excess. Many oil-based stains need roughly 5–15 minutes before wiping, but follow the label. Let the sample dry before judging it; wet stain usually looks darker. Build color with thin applications rather than one heavy coat. If the repair is still too light, add another pass. If it is too dark, removing it cleanly may be difficult.
For a small scratch on a finished surface, a touch-up marker or wax fill stick can be cheaper and faster than stain. Markers work well for narrow color loss but can look like a stripe on broad areas. Wax fills gaps but does not provide the same durable protection as a cured finish and can complicate later refinishing. Browse wood touch-up markers in assorted colors for minor scratches, and test any shade in a hidden place.
Choose a method that suits the damage
| Repair | Best for | Trade-off |
|---|---|---|
| Touch-up marker | Thin scratches and small color loss | Fast, but can look flat or too uniform |
| Stain on bare wood | Exposed, sanded wood | More natural color, but requires a compatible topcoat |
| Glaze or tinted finish | Color adjustment over an intact sealed surface | Offers control, but can leave a visible halo if applied too widely |
| Refinish a whole panel | Large, blotchy, or badly worn areas | More work; gives the most consistent result |
Stain is designed to penetrate bare wood. On a sealed surface, it often sits on top, wipes unevenly, or fails to dry properly. If the finish is intact and you need to adjust color, use a compatible glaze or tinted clear finish instead, testing first. For a bare repair, a small container of interior wood stain is usually enough; buying a large can for a few scratches is rarely worthwhile.
Prepare bare wood carefully
Sand only the damaged area when possible, following the grain. Start around 180 grit for light preparation; use 120 grit only if you need to remove a stubborn coating, then finish at 180 or 220 grit. Sanding much finer can reduce stain absorption and leave the repair lighter than its surroundings. Keep the sanding block flat and feather the edges so there is no sharp boundary. On veneer, use very light pressure and avoid power sanders.
Remove dust with a vacuum and a clean, dry cloth. Do not use a tack cloth unless its residue is known to be compatible with the finish. Apply stain sparingly and wipe off all excess. Let it dry completely—often overnight, but the product label controls—before applying a clear coat. A finish applied over oily, wet, or heavily pigmented stain may wrinkle, remain tacky, or peel.
Blend the protective finish
Match the existing sheen as well as the color. “Gloss,” “semi-gloss,” and “satin” vary between brands, so compare a dried sample under the room’s usual lighting. A satin patch on a glossy tabletop can look cloudy even if its color is close. For small repairs, a compatible clear wood finish in a small satin container may be sufficient, but do not assume water-based and oil-based finishes can be layered in either order without testing.
Apply thin coats with a fine brush, keeping each coat inside the prepared area. Follow the recoat time on the label; cool, humid conditions slow drying. If the edge stands proud after curing, level it cautiously with 600–1000 grit abrasive or a fine finishing pad, then buff to match the surrounding sheen. Avoid sanding through the new coat or abrading the original finish. A soft cloth and a very light touch are safer than aggressive polishing.
Avoid common mistakes
Do not keep adding stain to a dark patch, flood a repair with finish, or sand a broad halo into an otherwise sound surface. These shortcuts commonly leave a dark outline, a glossy bump, or a dull ring. If a test remains visibly different after a few careful attempts, the practical fix may be to refinish the whole tabletop, door, or other uninterrupted panel rather than chase an invisible spot repair.
Let the repair cure before placing objects on it. “Dry to touch” does not mean fully hardened; some finishes need several days or longer. Keep the area free of water, cleaners, and furniture polish during that period, and follow the product’s cure instructions for handling or use.

0 Comments