What's inside
As an Amazon Associate I earn from qualifying purchases. This post may contain affiliate links at no extra cost to you.
Water popping raises the grain before staining. You dampen bare, sanded wood, let it dry, then lightly sand off the fibers that stand up. The stain can then color the surface more evenly, especially on species that blotch or take stain weakly. But the process does not make every wood a good stain candidate: species, cut, sanding, and stain type still determine the result.
For a predictable, clearly visible water-popped finish, red oak and white oak are strong choices. Hard maple can also work, but it needs more careful stain selection and application. If you are choosing lumber for a project, compare boards from the same pack before buying; color and figure vary enough that species alone cannot guarantee a match.
As an Amazon Associate we earn from qualifying purchases at no extra cost to you.


Our Top Picks
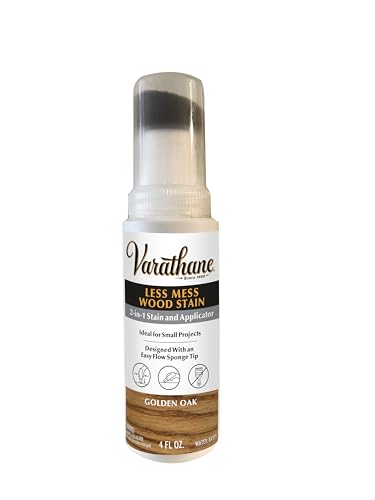 Varathane Less Mess Golden Oak Wood Stain &4 Ounce (Pack of 1)1.75 x 1.75 x 6.5 inches0.25 poundsCheck on Amazon
 Varathane Dark Walnut Wood Stain1 Quart (Pack of 1)4.25 x 4.25 x 4.9 inches2.4 poundsCheck on Amazon

What makes a species suitable
Water popping is most useful when a wood’s fibers rise noticeably with moisture and the stain benefits from an open surface. It can improve color depth, but it does not fix glue marks, uneven sanding, or an incompatible stain. On blotch-prone wood, a dye or a tested stain schedule may still be necessary.
Use the same sanding grit across the entire piece. For many furniture projects, 120 grit followed by 150 or 180 grit is a practical stopping point; going finer can reduce stain absorption and make the color lighter. Remove dust, apply water evenly with a clean cloth or sprayer, and avoid puddles. Let the wood dry completely—often overnight, depending on temperature and humidity—then make one light pass with 220-grit paper. The goal is to clip raised fibers, not sand away the prepared surface.
Best species to consider
| Species | Water-popped stain behavior | Best use | Main risk |
|---|---|---|---|
| Red oak | Open pores take stain readily; strong grain contrast | Cabinetry, tables, trim | Dark stain can emphasize pore variation |
| White oak | Open grain, usually a little less pink than red oak | Furniture and flooring | Board-to-board color variation |
| Hard maple | Fine, dense grain; water popping can improve uptake | Light or medium color furniture | Blotching and uneven dark color |
| Birch | Fine grain, but absorption can vary across a board | Paint-grade or lightly stained work | Blotching, especially with dark pigment stain |
| Cherry | Can accept stain, but natural color changes over time | Projects where a warm, natural finish is welcome | Stain may muddy the grain; color shifts with light |
Oak: the dependable choice
Red and white oak are the easiest recommendations when you want a stained finish with visible grain. Their open pores absorb stain more readily than the tight grain of maple, and water popping can help produce a richer, more even color. White oak often reads more neutral; red oak can show warmer or pinker tones, though individual boards vary.
Oak is forgiving, not foolproof. Dark pigment can collect in pores and make the grain look pronounced, which is useful for a rustic finish but less so for a quiet, uniform surface. Test the actual stain on an offcut from the project. If the pores look too dark, try a lighter color or a dye-based approach rather than applying more stain.
Maple and birch: test before committing
Hard maple’s tight grain can leave ordinary stain pale or uneven. Water popping may open the surface enough for better color, but a dark oil-based pigment stain can still turn patchy. For a more controllable result, consider a compatible dye stain or a stain-and-sealer schedule, and test it on the same wood and at the same sanding grit. A water-based wood dye stain is one option to test when you want color without relying only on pigment sitting in the grain.
Birch has a similar warning: it can look attractive with a light stain, but dark color often exposes uneven absorption. On both species, a conditioner may reduce blotching, though it can also make the stain lighter and less vivid. Do not assume conditioner plus water popping is automatically better; compare complete sample schedules side by side.
Cherry and other options
Cherry is often best left unstained or given a light, tested color. It darkens naturally with exposure to light, and heavy stain can obscure its fine grain or make it look muddy. If matching new cherry to older wood, remember that the existing piece may have changed color over years; a fresh sample will not predict that shift immediately.
For a less expensive project, poplar can be acceptable under opaque paint, but it is a poor choice for a clear, stained finish when a consistent appearance matters. Its greenish and brown streaks can show through stain. Pine is also inexpensive and widely available, but knots and earlywood/latewood differences make uniform staining difficult. If the budget points to either, use a forgiving lighter color and test first rather than expecting water popping to eliminate the wood’s natural variation.
Materials and a practical test
A small sample board is cheaper than sanding back a finished tabletop. Prepare at least two offcuts: one with your normal sanding schedule and one water-popped. Apply the same stain to both, following the label’s spread and wipe instructions, then let them dry before comparing. Check under the room’s actual lighting; wet stain often looks darker than the finished, dry surface.
For water popping, a clean spray bottle or lint-free cloth is enough. If you do not already have one, a pack of lint-free staining cloths is inexpensive and useful for applying water evenly. Avoid a soaking-wet rag: excess water can raise grain unevenly, leave marks, or prolong drying.
After the final light sanding, vacuum and remove remaining dust without re-wetting the wood. Apply stain only when the surface is dry and uniformly dull, not cool or damp to the touch. If the sample looks rough after staining, the raised fibers were not knocked back enough. If it looks lighter than expected, the sanding may have closed the surface or the stain may not suit that species. Adjust the sample schedule before treating the full piece.
Choose for the finish, not the trick
Choose oak for reliable grain and strong stain response. Choose maple when you are willing to test carefully and want a fine-grained look. Treat birch and cherry as sample-first woods, and do not buy pine or poplar expecting water popping to make them behave like oak. The best result comes from matching species, stain, and preparation—not from adding water as a shortcut.

0 Comments