What's inside
As an Amazon Associate I earn from qualifying purchases. This post may contain affiliate links at no extra cost to you.
For stained cabinet face frames, tight grain matters because the frame is highly visible and usually sits next to doors and drawer fronts. A close-grained species produces a smoother surface, but it can also absorb stain unevenly or resist color. The best choice depends on the look you want, how much preparation you are willing to do, and whether the frame must match another wood.
As an Amazon Associate we earn from qualifying purchases at no extra cost to you.


Our Top Picks


Best wood species for stained face frames
Hard maple is the safest all-around choice when you want a very tight, smooth grain. It machines cleanly, holds screws well, and takes a clear finish without much visual movement. Its pale color works with light stains, but dark stains can look weak or uneven unless the surface is carefully prepared. Maple is also prone to blotching, especially when sanded too aggressively or stained with a thin penetrating stain.
Cherry has a tight, generally even grain and is easier to stain attractively than maple. It starts pinkish or reddish brown and darkens naturally with light exposure. A clear finish often gives better results than a dark stain. Cherry is a good choice for traditional cabinets, but expect color variation between boards and gradual darkening over the first several months.
Red alder is a practical lower-cost option with a fine, relatively uniform grain. It is softer than maple or cherry, so it dents more easily during assembly, but it sands quickly and accepts medium to dark stains well. Alder can resemble cherry at a lower material cost, although it usually has less depth and can show soft, porous areas around knots or irregular grain.
Birch is another tight-grained option, often available as clear lumber or veneer. It is affordable and hard enough for face frames, but it is one of the more difficult woods to stain evenly. Birch commonly develops pale and dark patches unless you use a conditioner, washcoat, or gel stain.
| Species | Grain and workability | Staining behavior | Best use |
|---|---|---|---|
| Hard maple | Very tight, smooth, hard | Can blotch; dark colors need careful prep | Clean modern frames and light finishes |
| Cherry | Tight, attractive, moderately hard | Usually even; darkens naturally | Clear-coated or warm traditional cabinets |
| Red alder | Fine grain, soft, easy to machine | Accepts medium and dark stains fairly well | Lower-cost cherry-like appearance |
| Birch | Tight grain, affordable, stable | Strong blotching tendency | Budget frames with controlled finishing |
| Poplar | Fine grain, soft, easy to work | Often turns green or muddy under stain | Painted frames, not first choice for stain |
Species that are poor choices for this job
Poplar is excellent for painted face frames because it is inexpensive, stable, and easy to sand. Under stain, however, its green, gray, and brown tones can look muddy. It can work with a very dark gel stain or a custom dye, but it is not the economical shortcut many people expect.
Oak is strong and stains predictably, but its open pores create a pronounced grain pattern. If your goal is a tight, quiet surface, oak is the wrong material even though it is easy to finish. Ash has the same basic problem. Pine and other softwoods are cheap, but resin, earlywood, and knots make color control difficult. Use them only when a rustic, variable appearance is acceptable.
What to buy for the face frame
Choose straight, dry stock with consistent color and few runout defects. For a typical face frame, 1-by-2 and 1-by-3 material is commonly milled to approximately 3/4 inch thick, though many shops mill their own parts from wider boards. Buy extra material—about 15 percent for straight stock and closer to 25 percent if you need to match color or avoid knots.
Match the species and, when possible, the board source used for the doors. A maple frame beside cherry doors will not look like a deliberate stain match; it will look like two different woods wearing similar color. If you are using veneer-core or plywood cabinet sides, confirm the face veneer before selecting the frame lumber.
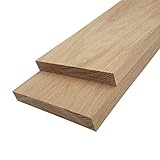
For a small project, hard maple cabinet lumber can be a sensible purchase. The cheaper option is fine when the frames will be painted, hidden by applied molding, or finished in a light, forgiving color.
Sanding and surface preparation
Mill the parts first, then sand them consistently. Start at 120 grit if the stock has planer marks, followed by 150 and 180 grit. Stop at 180 or 220 grit for most penetrating stains. Sanding much finer than 220 can partially close the surface and reduce color uptake, especially on maple and birch.
Break sharp outside edges with one or two light passes. Do not leave a crisp edge: it absorbs more stain and finish than the face, creating a dark line. Avoid rounding the edge heavily, because the joint will then look soft and poorly fitted.
Remove glue squeeze-out before staining. Even a thin glue film can leave a pale stripe that sanding will not always remove evenly. Scrape cured glue, then sand the area with the same grit sequence used on the rest of the frame. Dry-fit joints and mask adjacent surfaces if you are applying glue near finished areas. For face-frame joints, a quality PVA woodworking glue is adequate; use a thin, complete film rather than flooding the joint.
How to prevent blotching
Test the complete schedule on offcuts from the same boards. A stain that looks good on a sample from one board may look different on another because tight-grained species vary in density.
For maple or birch, consider a pre-stain conditioner, a thin washcoat, or a gel stain. A conditioner partially fills the surface so the stain does not rush into isolated soft areas, but it can also make the final color lighter. A washcoat made from finish diluted according to the product instructions gives more control, but it adds a step and can reduce adhesion if applied too heavily.
Gel stain stays nearer the surface and is often easier to control on tight grain. Apply a thin coat, wipe it uniformly, and do not leave puddles in inside corners. For a more transparent result, a dye followed by a compatible stain or clear coat can work, but it requires more testing than a typical homeowner project.
Keep the shop temperature between roughly 60 and 80 degrees Fahrenheit and follow the product’s drying time. Rushing a second coat over a still-wet stain can create lap marks and uneven sheen. Use lint-free rags and dispose of oil-stained rags safely in a sealed water-filled container or approved oily-waste can.
Topcoat and final selection
After the stain is fully dry, apply two or three thin coats of a compatible clear finish. Water-based polyurethane keeps maple and birch relatively pale; oil-based polyurethane adds amber color and makes cherry deepen faster. Scuff-sand between coats with 320 grit only after the finish has cured enough to powder rather than gum up.
For the least risk, choose cherry with a clear or lightly tinted finish. For the smoothest modern appearance, choose hard maple and test a conditioner or gel stain. For the best budget compromise, choose alder. Choose birch only when you are prepared to control blotching, and reserve poplar for painted face frames.

0 Comments