What's inside
As an Amazon Associate I earn from qualifying purchases. This post may contain affiliate links at no extra cost to you.
For stained cabinet crown molding, the best wood is usually the one that matches the cabinet doors and face frames—not the one with the highest price or hardest surface. Red oak suits oak cabinets, maple works with maple, and poplar is a practical choice when you plan to paint. If the molding has to match existing cabinetry, buy a sample first: species, grain, and stain color all affect the result.
As an Amazon Associate we earn from qualifying purchases at no extra cost to you.


Our Top Picks
 DoubleFill 2 Pack Solid Red Oak Hardwood Crown3/4'' × 2-5/8''49.61 x 4.13 x 2.76 inches4.3 PoundsCheck on Amazon
 EWCR12 Crown 3/4" x 3-5/8" Unfinished 2-7/8" High94 inches94 x 0.75 x 3.6 Inches5.78 poundsCheck on Amazon


Start with the cabinet wood
Wood species take stain differently. Even the same stain can look noticeably different on oak and maple, while two boards from one species can vary in color and grain. For a close match, use the same species as the cabinets and test the actual stain on an offcut from the molding stock.
Oak has open grain that remains visible under stain. Maple is fine-grained and can look smooth, but it may blotch or take stain unevenly. Cherry darkens with age and can shift noticeably in color over time. Alder is relatively soft and can develop a warm, varied appearance with stain. Poplar is inexpensive and easy to machine, but its greenish or gray streaks can show through many stains, so it is usually a better paint-grade choice.
Compare common molding woods
| Wood | Stain result | Best use | Main drawback |
|---|---|---|---|
| Red oak | Pronounced open grain; generally accepts stain consistently | Oak cabinets or a visible grain pattern | Distinctive grain may not match fine-grained cabinets |
| Maple | Fine grain; can blotch, especially with darker stain | Maple cabinets and a clean, subtle grain | Needs careful testing and preparation for an even color |
| Cherry | Warm, close grain that darkens with age | Cherry cabinetry and traditional finishes | New molding may not match aged cabinets at first |
| Alder | Usually takes stain readily, with natural color variation | Cabinets where a warm, varied look is acceptable | Soft surface dents more easily than oak or maple |
| Poplar | Can show green or gray streaks under stain | Painted crown molding | Unreliable choice for a natural stained finish |
Buy stock that suits the job
For a stained finish, look for solid-wood molding or straight, clear boards that can be milled to the required profile. Check each piece for twists, bows, knots, and color changes before buying. A long crown run makes defects obvious, and a board that is only slightly bowed can be difficult to hold tight against both the wall and ceiling.
If the profile is available only in a different species, compare a sample against the cabinets before committing. A close stain color cannot make mismatched grain disappear. Avoid assuming that a stain labeled “oak” or “maple” will match your cabinetry; those names describe the intended color, not a guaranteed match.
For painted trim, poplar is often a sensible, cheaper option. Knots and grain irregularities matter less under an opaque finish, though dents still need filling. For stained trim, spend the extra time—or money—to find a closer species and better-matched stock.
Prepare the surface and test stain
Sand raw molding evenly, following the grain. Start around 120 grit if the surface is rough, then finish at 150 or 180 grit. Very fine sanding can burnish some woods and reduce stain absorption. Remove dust with a vacuum and a clean, lint-free cloth; sanding dust left in the grain can muddy the finish.
Test stain on an offcut from the same board, sanded through the same grits. Apply it as directed, wipe away excess at the same interval you plan to use on the molding, and let it dry fully before judging the color. Test the topcoat too: clear finish can deepen or warm the appearance. If maple or another blotch-prone wood looks uneven, try a compatible wood conditioner or a thin washcoat, but test that combination first because it can also make the final color lighter.
For a more controlled application, use a wood stain sample set or small containers in likely colors. Buy enough of the chosen finish to complete the run; different batches can vary slightly.
Install with seasonal movement in mind
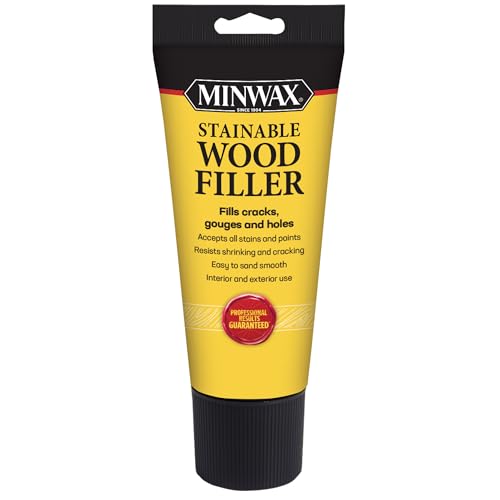
Let molding acclimate indoors for several days before installation, especially if it has been stored in a cold garage or damp warehouse. Wood changes size as humidity changes. Fasten crown into framing or cabinet backing where possible, and use finish nails suited to the molding thickness. Fill nail holes with a filler that accepts stain, but test it: many fillers remain visible as pale dots after finishing.
Cope inside corners when practical, particularly where walls are not square. Crown molding that is simply mitered at an uneven corner can leave a gap that widens as the pieces move. Make test cuts on short offcuts before cutting full-length stock. Leave a little extra length for fitting; a piece cut too short is costly to hide on a stained run.
Apply stain and clear finish according to the label, and coat all accessible faces before installation if the back will be exposed to moisture or temperature changes. Keep stain and finish off the cabinet doors, walls, and ceiling. Use a stainable wood filler for small nail holes, but do not expect filler to disappear in open-grain oak or strongly patterned wood. For a durable protective coat, test a compatible clear wood finish on the sample before coating the whole installation.
Avoid the common mismatches
The most frequent disappointment is choosing molding by stain name alone. A dark stain on maple can look flat or blotchy, while the same color on oak emphasizes the grain. Another is using poplar for a stained job because the raw boards looked pale and uniform; streaks can become more obvious after stain. Finally, skipping the sample board risks discovering the mismatch after the molding is cut and installed.
For a close, durable match, choose the cabinet species, inspect the molding in good light, and test the full sanding-and-finishing schedule on an offcut. If the trim will be painted, save the budget and use straight poplar or another paint-grade stock.

0 Comments