What's inside
As an Amazon Associate I earn from qualifying purchases. This post may contain affiliate links at no extra cost to you.
Our Top Picks
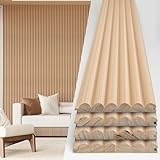
 Art3d 108 x 5.7 Inch Slat Solid Wood108 x 5.7 Inch Pack of 4107.87 x 5.71 x 0.67 inches6.61 poundsCheck on Amazon
 1/2 pt Minwax 13407 Clear Pre-Stain Wood Conditioner1/2 Pint3 x 3.25 x 3 inches0 PoundsCheck on Amazon
 Varathane Total Control Dark Walnut Gel StainHalf Pint (Pack of 1)2.88 x 2.88 x 2.97 inchesCheck on Amazon

Choosing the right wood
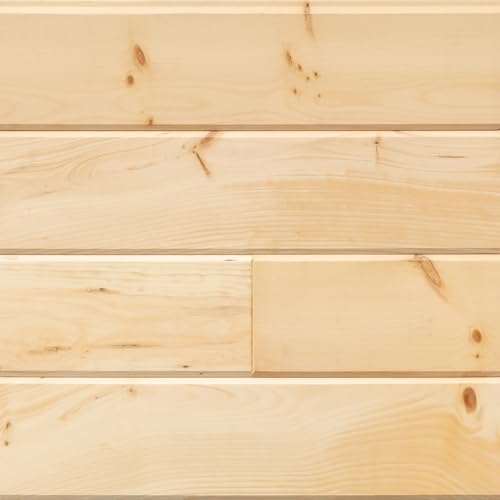
For stained living-room paneling, the best choice depends on the look you want, the stain color, and how much sorting and finishing work you’re willing to do. Oak is a reliable pick when you want visible grain and an even, traditional finish. Walnut gives a darker, richer look but costs more. Pine is cheaper and widely available, but its soft, uneven grain can blotch under stain.
Before buying, decide whether the paneling will be solid boards, plywood sheets, or veneer-faced panels. Solid wood can be sanded and refinished more times, but it expands and contracts across its width with seasonal humidity. Quality plywood is more dimensionally stable and often a practical choice for large wall areas. Check samples in the room: daylight and warm lamps can make the same stain look noticeably different.
As an Amazon Associate we earn from qualifying purchases at no extra cost to you.

Wood options compared
| Wood | Appearance and stain behavior | Cost and best use |
|---|---|---|
| Red oak | Pronounced open grain; takes many stains fairly evenly, though grain stays prominent. | Mid-priced and easy to find. A solid all-around choice for classic paneling. |
| White oak | Strong grain with a slightly less pink cast than red oak; can look especially good with medium or dark stains. | Usually costs more than red oak. Choose it when its color and grain suit the room. |
| Walnut | Dark brown, varied grain; often attractive with clear or lightly tinted finishes. | Expensive. Worth considering when the natural color is the point; dark stain on cheaper wood may be more economical. |
| Maple | Fine, subtle grain; pale and smooth, but can show blotchy color with ordinary stain. | Mid- to high-priced. Better for a restrained look if you’re prepared to test and condition it. |
| Pine | Knots and strong contrast between earlywood and latewood; prone to uneven stain. | Often the least expensive option. Fine for a rustic finish or painted paneling, with careful preparation for stain. |
Solid wood or plywood
Solid boards make sense for narrow tongue-and-groove paneling, wainscoting, and rooms where natural variation is part of the design. Let boards acclimate indoors for several days, ideally longer if they arrived very dry or damp. Leave the manufacturer’s recommended expansion gap at edges, and don’t tightly trap boards between rigid trim. Seasonal movement can open joints or push paneling out of plane.
For broad, flat panels, use stain-grade plywood with a real-wood face veneer rather than low-grade construction plywood. The visible veneer may be thin, so aggressive sanding can cut through it; follow the panel maker’s sanding guidance and start with a light touch. Plywood costs more than basic pine boards but can install faster over a prepared wall and is less likely to develop wide seasonal gaps.
Inspect every sheet for veneer defects, patches, and color variation before purchase. If using multiple sheets, arrange them on the floor first and alternate or group tones deliberately. A stain won’t hide mismatched veneer or poor patches.
Prepare the surface for stain
Sand solid wood evenly with the grain. For most paneling, 120 grit followed by 150 or 180 grit is a practical sequence; finer sanding can reduce stain uptake and make color lighter or less even. Don’t try to sand out deep dents by digging into one spot, since that can leave a visible low area. Remove dust with a vacuum and a clean, lint-free cloth. Avoid oily tack cloths unless the finish manufacturer confirms they’re compatible.
Test the full finish schedule on an offcut from the same batch: sanding, conditioner if used, stain, and topcoat. Apply stain for the same length of time you plan to use on the wall, then wipe it consistently. A small patch on the front of a finished wall is a poor substitute; it won’t show how end grain, joints, and board-to-board variation will look together.
Pine and maple can absorb pigment unevenly. A compatible pre-stain conditioner may reduce blotching, but it can also make the final color lighter. Gel stain is another option when you want more control over color on difficult surfaces. Neither is a guarantee, so test first. For products, compare a pre-stain wood conditioner or gel wood stain and follow the label for wood type, drying time, and compatible topcoats.
Choose stain and topcoat together
Oil-based stains generally provide more open working time than many water-based products, which can help on a large surface. Water-based stains may dry faster and have less odor, but can raise the grain; a light sanding after the first coat may be needed if the product instructions call for it. Don’t assume stain alone protects paneling from scuffs or cleaning. Add a clear topcoat that is compatible with the stain and suited to the room.
For a living room, satin or matte finishes usually show fewer surface flaws than gloss. Apply thin, even coats rather than one heavy coat, and keep a wet edge on broad panels. Follow the specified recoat times and ventilation instructions. A coat that feels dry to the touch may not be ready for sanding or another layer. Poorly cured stain, excess stain left on the surface, or an incompatible topcoat can lead to tackiness, peeling, or uneven sheen.
Buying and installation checklist
Buy enough material from the same production run to limit color variation, plus roughly 10 percent extra for cuts and defects; intricate layouts may need more. Bring home several offcuts and compare them in the room before committing to a stain. If you’re choosing between oak and pine, oak is usually the easier route to a predictable stained finish. Pine remains a reasonable budget choice when knots and variation fit the style and you accept extra testing.
For installation, use fasteners and adhesive appropriate to the panel type and substrate. Avoid relying on adhesive alone where the panel manufacturer calls for mechanical fastening. Keep stain and finish off the back and edges only where the installation system requires it; sealing all faces can help balance moisture uptake, but follow the panel instructions. A careful sample, consistent sanding, and a compatible finish matter more than choosing an expensive species by default.

0 Comments