What's inside
- Why one stain looks different on different woods
- Choose the color you want to match
- How common species respond
- Prepare every species the same way
- Dye vs pigment stain: the most useful tool for mixed species
- Test, compare, and adjust
- Matching new wood to an existing piece or older finish
- Mistakes that cause mismatches
- Frequently Asked Questions
- Related Guides
As an Amazon Associate I earn from qualifying purchases. This post may contain affiliate links at no extra cost to you.
Matching stain across different wood species is possible, but the same stain rarely produces the same color on every board. Wood color, grain, density, and absorbency all affect the result. The reliable approach is to choose a target color, prepare each species consistently, and test the full finish schedule on scraps before coating the project.
As an Amazon Associate we earn from qualifying purchases at no extra cost to you.

Our Top Picks
 1/2 pt Minwax 13407 Clear Pre-Stain Wood Conditioner1/2 Pint3 x 3.25 x 3 inches0 PoundsCheck on Amazon
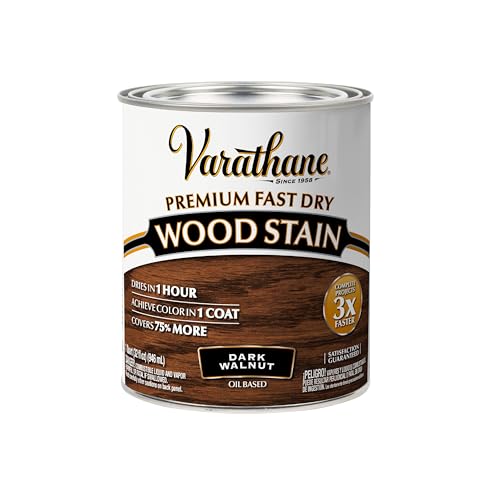
 Varathane Total Control Dark Walnut Gel StainHalf Pint (Pack of 1)2.88 x 2.88 x 2.97 inchesCheck on Amazon

Why one stain looks different on different woods
Stain adds color, but it does not hide the wood underneath. A dark stain on pale maple may look like a muted brown; the same stain on reddish cherry can turn warmer or redder. Oak’s open grain holds pigment and makes the grain stand out, while fine-grained maple may take color unevenly or look blotchy.
Absorption matters as much as the stain color. End grain can absorb far more than face grain, and glue residue can block stain entirely, leaving pale patches. Even boards of the same species can vary in color and density. A test on one offcut is a starting point, not a guarantee for every board.
Choose the color you want to match
Decide whether the goal is an exact visual match or a coordinated finish. Exact matching can require different stain colors or application methods for each species. A coordinated finish—similar in overall warmth and darkness while allowing grain and undertones to differ—is usually easier and looks more natural.
Use the finished reference as your target, not a stain label or a wet sample. Clear topcoats often deepen color and add warmth; oil-based finishes typically shift the appearance more than many water-based finishes. Test with the same topcoat you plan to use, and let samples dry fully before judging them.
How common species respond
| Wood | Typical challenge | Useful adjustment |
|---|---|---|
| Oak | Open grain takes pigment strongly; grain contrast can dominate | Use a lighter application or a less opaque color if the sample looks too dark |
| Maple | Dense, fine grain can stain unevenly or appear blotchy | Test a conditioner or a gel stain; keep application time consistent |
| Cherry | Natural reddish tone can push brown stains redder | Choose a less red-leaning stain and compare after the topcoat |
| Pine | Soft earlywood and harder latewood absorb differently | Use a conditioner or gel stain, and inspect for stripes before sealing |
| Birch | Can develop cloudy or blotchy patches | Make a large test panel and consider a conditioner or gel stain |
Prepare every species the same way
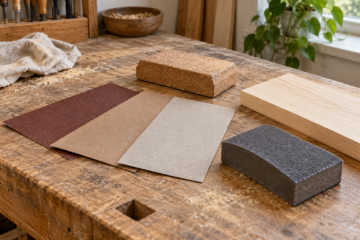
Sand to a consistent grit, usually 150 or 180 for a typical penetrating stain. Going much finer can reduce absorption and make the color lighter; sanding too coarsely can leave scratches that collect pigment. Remove dust with a vacuum and a clean, lint-free cloth. Avoid steel wool before water-based finishes because stray fibers can rust.
Check for glue before staining. Dampen the surface lightly with mineral spirits for an oil-based stain or water for a water-based stain, depending on the product instructions. Glue spots often show as areas that repel the liquid. Scrape or sand them clean, then repeat the inspection. Do not rely on a dark stain to cover residue—it usually makes the mismatch more obvious.
On blotch-prone species, test a wood stain conditioner. Conditioner can even out absorption, but it can also make the final color lighter or less vivid. Follow its timing instructions closely. A gel stain sits closer to the surface and can reduce absorption differences, though it may obscure some grain and can show lap marks if applied unevenly.
Dye vs pigment stain: the most useful tool for mixed species
Most canned stains are mainly pigment: fine colored particles in a binder that lodge in pores, scratches, and soft earlywood. Dyes are dissolved colorants that soak into the wood fibers more evenly. That difference explains many mismatches between species.
| Colorant | How it colors | Strength | Weakness | Best matching use |
|---|---|---|---|---|
| Pigment stain | Particles lodge in pores and surface texture | Strong grain emphasis on oak and ash | Blotches on maple, birch, cherry, and pine; can look muddy when built up | Open-grained species where you want visible grain |
| Dye stain | Dissolved color penetrates fibers | Even, clear color on dense woods; no muddiness | Less UV-stable in some formulas; can still blotch on very uneven woods | Bringing maple, birch, or poplar up to a darker species |
| Gel stain | Thick pigment that sits near the surface | Reduces absorption differences | Hides some grain; lap marks if uneven | Pine and blotch-prone woods next to hardwoods |
| Toner (tinted finish) | Color suspended in a clear coat | Shifts color gradually without sanding | Needs even application, best sprayed | Final adjustments once species are close |
A common professional sequence for a cabinet built from maple panels and cherry or walnut frames is to dye the paler wood first to bring its base tone closer, seal it with a thin washcoat, and then apply the same pigment stain or glaze over everything. The dye narrows the gap; the shared top layer ties the pieces together. A small kit of water-soluble aniline dye powders lets you mix base tones in small batches and record the ratio for repeat batches.
As an Amazon Associate we earn from qualifying purchases at no extra cost to you.
Mixing a custom stain and recording the recipe
When no single stain works, mixing is often the answer. Stay within one product line or at least one chemistry, oil with oil and water with water, because different binders and solvents can separate or dry unevenly. Measure with syringes or measuring spoons rather than by eye, mix enough for the whole project in one batch, and write the ratio on the test board. If you need a little more red, add a small amount of a redder stain; to tone down orange, a small addition of a stain with a green or gray undertone can neutralize it. Make the adjustments in small steps and retest each time.
Test, compare, and adjust
Make test pieces from the actual species, sanded to the same grit as the project. Include face grain and, if visible in the finished work, end grain. Apply the stain with the same tool and wipe-off timing you plan to use. For example, compare samples wiped after one minute with samples wiped after five; longer contact can deepen color, but it will not correct every difference in undertone or grain.
Label each sample with the wood species, stain, preparation, and timing. Let it dry for the period on the product label, then apply the intended topcoat. Compare samples side by side under the room’s normal lighting. If one species is too dark, shorten the stain’s dwell time or apply less; if it is too light, test a longer dwell time or a second coat only if the product allows it. Change one variable at a time so you can tell what helped.
For a closer match, use different stain formulations or colors on each species rather than forcing one stain onto all of them. You can also use a tinted sealer or toner after the first coat to shift color gradually. Toners offer control, but they require even spraying or application; heavy passes can create dark bands and muddy grain. A pigmented stain sample pack is useful for small tests, but check that its products are compatible with your chosen topcoat.
Matching new wood to an existing piece or older finish
Matching a new board to existing furniture, cabinets, or trim adds variables that a fresh project does not have: aging, sun exposure, and an unknown original finish. Work through these steps before mixing any stain.
- Identify the species. Check an unfinished area such as the underside, the back, or the inside of a drawer. Matching a pine replacement part to an oak table is far harder than matching oak to oak.
- Identify the topcoat. A drop of denatured alcohol softens shellac quickly; lacquer thinner softens lacquer; polyurethane and catalyzed finishes resist both. The topcoat affects sheen and color, so your sample needs the same type.
- Clean the reference surface. Wax and grime darken and dull a finish. Wipe the area you are matching with a mild cleaner or mineral spirits so you are comparing against the true color.
- Account for aging. Cherry darkens strongly with light exposure; oak and many oil-based finishes amber over the years; walnut often lightens. New wood will keep changing, so aim slightly lighter on cherry and expect it to deepen.
- Use color chips as a start, not an answer. Store color charts and sample chips show stain on a specific species under store lighting. Use them to narrow choices, then make your own test boards.
- Compare in place. Hold the dried, top-coated sample against the original piece in its actual room, under both daylight and evening lighting, and view it from normal viewing distance.
Some paint and finish stores can custom-tint stain to a sample you bring in. Bring both a piece of the finished original (or a removable part, such as a drawer front) and an unfinished offcut of the new wood so the match is mixed for the right species.
When a perfect match is not necessary
Horizontal surfaces such as tabletops catch light differently than vertical sides, so even identical finishes can look different. On floors, scattered touch-ups, and mixed-wood designs, a close coordinated tone usually reads as intentional. Save the time-consuming exact matching for pieces that sit right next to each other, like a new cabinet door beside old ones.
Mistakes that cause mismatches
Do not compare a wet stain sample with a dry finished board. Wet stain can look darker, and clear coat changes the appearance again. Do not sand different species to different grits, skip preparation on a hidden face, or assume that adding more stain will fix blotching. Excess stain can sit on the surface, dry tacky, or wipe unevenly.
When matching existing furniture or trim, a small sample may not capture changes caused by age, sunlight, or prior finishes. Test in an inconspicuous area and confirm the old finish is compatible before recoating. If the match needs to be close across a large visible surface, use sample boards large enough to reveal grain variation, and expect to adjust each species separately.
Frequently Asked Questions
Can you use the same stain on different wood species?
You can, but the color will rarely match exactly. Each species has its own base color, grain structure, and absorbency, so one stain may look amber on oak, pink-brown on cherry, and blotchy on maple. Use the same stain when you want a coordinated look, and adjust each species separately, with dye, conditioner, or a different formula, when you need a closer match.
How do you make pine look like oak with stain?
Pine lacks oak’s open pores and has a yellow base, so a straight oak-colored stain usually looks blotchy and orange. Apply a conditioner or use a gel stain to control absorption, choose a stain slightly browner and less orange than your target, and consider a light glaze or toner to add depth. Expect a similar tone rather than an identical grain pattern.
How long should stain dry before you judge the color?
Wait at least the full dry time on the product label, often overnight and up to 24 hours for oil-based stains, then apply the topcoat you plan to use and let that dry too. Wet stain looks darker and richer than the final result, and the clear coat shifts color again, so judging too early leads to wrong adjustments.
Can you mix different brands of wood stain?
Mixing within the same chemistry, oil-based with oil-based or water-based with water-based, often works, but different binders and solvents can separate, dry at different rates, or react with your topcoat. Always mix a small batch, test it on scrap, and let it cure before committing. Never mix oil-based and water-based stains together.
Why does my stained cherry not match after a few months?
Cherry darkens noticeably with light exposure, especially in the first months after finishing, so a match made on day one can drift. Newly cut cherry next to aged cherry will often catch up over time. If you are matching cherry to another species, test with this in mind and avoid adding heavy stain to new cherry just to match an older piece.
Do you need to remove the old finish to match stain on existing furniture?
Only if you are re-staining the old piece. To match new wood to an existing finish, leave the original alone, clean it well, and build your sample to fit it. If the old finish is damaged and you want to change its color, you will need to strip or sand to bare wood, because stain cannot penetrate an intact topcoat.
0 Comments