What's inside
As an Amazon Associate I earn from qualifying purchases. This post may contain affiliate links at no extra cost to you.
A light, transparent brown stain is easiest to control on wood that already has a fairly even color and grain. The stain should tint the surface, not cover it. Species matters because woods absorb stain differently: a result that looks subtle on oak can turn blotchy on pine, while maple may barely change color.
For most projects, start with red oak, white oak, or a clear, straight-grained softwood such as Douglas fir. Choose maple or birch when a fine, quiet grain matters more than strong stain color. Whatever the species, test the full finishing schedule on an offcut from the same board. “Light brown” on a can does not predict the result on every wood.
As an Amazon Associate we earn from qualifying purchases at no extra cost to you.

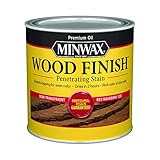
Our Top Picks
 1/2 pt Minwax 13407 Clear Pre-Stain Wood Conditioner1/2 Pint3 x 3.25 x 3 inches0 PoundsCheck on Amazon


Best species for a transparent brown finish
White oak is a strong choice when you want a pale brown with visible, pronounced grain. Its open pores take stain readily, so the color tends to look clear rather than muddy. White oak usually has a cooler, less pink cast than red oak, though board color and stain formula still matter. It costs more than common pine and may be harder to find in wide boards.
Red oak is often the practical pick for furniture, flooring, and trim. It has open grain, accepts stain predictably, and is widely available in several grades. Its natural pink or red undertone can show through a light brown stain. If that warmth is unwanted, test before buying enough material; a different stain color may not completely cancel it.
Douglas fir offers a more restrained grain than oak and is often cheaper for construction-scale projects. Clear, straight-grained boards can take a light brown stain well, but fir has pronounced differences between earlywood and latewood. Those bands may become more obvious after staining. Choose boards with consistent grain and avoid knots if you want a calm finish.
Maple and birch have fine grain and a light starting color, which can suit a subtle, even-toned look. Their dense, less porous surfaces make color harder to build with ordinary penetrating stain. Uneven absorption can leave dark patches, especially on maple. They work best when the goal is a small color shift and you are willing to test a conditioner or a dye-based finish.
Species comparison
| Species | Light-brown result | Main risk | Best use |
|---|---|---|---|
| White oak | Clear color with strong grain | Higher material cost; grain can dominate | Furniture, cabinets, trim |
| Red oak | Easy, visible stain color | Pink undertone may remain | General interior projects |
| Douglas fir | Warm brown with striped grain | Uneven bands or knots stand out | Doors, shelves, larger built-ins |
| Maple or birch | Subtle color and fine grain | Blotching or weak stain uptake | Clean, quiet surfaces |
| Pine | Warm, rustic brown | Blotches and strong earlywood contrast | Budget furniture and utility projects |
When pine is good enough
Pine is inexpensive and perfectly reasonable for shelves, shop furniture, and projects where knots and variation are part of the look. It is not the safest choice for a smooth, uniform light-brown finish. Soft earlywood absorbs more stain than dense latewood, so the surface can develop stripes, dark patches, or a muddy appearance. Knots may stay much darker than the surrounding board.
To reduce blotching, sand evenly and consider a thin coat of pre-stain wood conditioner on pine, maple, or birch. Follow the label’s timing: many conditioners need stain applied within a limited window. Conditioner can make the color lighter, so test whether you need a second coat. It helps; it does not make pine behave exactly like oak.
Prepare the surface before staining
Sand flat surfaces with the grain, usually ending at 150 or 180 grit for penetrating stain. Going much finer can burnish dense wood and reduce color uptake; stopping too coarse can leave scratches that stain dark. Remove glue squeeze-out, since even a thin glue film can create pale spots. Vacuum the dust and wipe with a clean, dry cloth. Avoid steel wool before water-based finishes, because stray fibers can rust and discolor the wood.
Do not rely on a stain sample made on a different species or sanded to a different grit. Use an offcut, prepare it exactly like the project, and test the stain, any conditioner, and the planned clear coat together. Apply a thin coat, wipe off excess according to the label, then let it dry fully before judging the color. A clear finish often makes brown look deeper and warmer.
Choose stain for the level of control
A standard penetrating stain is a simple, forgiving option on open-grained oak. On blotch-prone woods, a gel stain tends to sit nearer the surface and can produce a more even color, though it may obscure fine grain if applied heavily. A dye can give clear color on maple or birch, but it is less forgiving of sanding marks and uneven preparation. For an easy first attempt, compare a small can of penetrating stain with a light-brown gel stain on the same offcut rather than committing to the whole piece.
Keep the finish transparent by applying one thin coat and wiping away what the wood has not absorbed. A second coat may deepen the color, but it can also reduce grain contrast or leave a more opaque look, especially with gel stain. If you want a barely tinted surface, a tinted clear finish may offer more control than repeated stain coats.
Make the choice by appearance, not price alone
For a crisp, grain-forward result, buy white oak if the budget allows; red oak is the value alternative if its warmer undertone suits the room. For a quieter grain, maple or birch can work, but plan for careful testing and more controlled application. Douglas fir is a useful middle ground when you want a softer, striped grain at a lower cost. Pine is fine for a rustic or budget project, but not a reliable shortcut to a uniform brown surface.
When comparing boards, inspect them in the light where the finished piece will live. Check for knots, color variation, and grain changes, then take a cutoff home if possible. Spending a little time on a sample is cheaper than sanding a finished panel back to bare wood.

0 Comments