What's inside
As an Amazon Associate I earn from qualifying purchases. This post may contain affiliate links at no extra cost to you.
For interior trim, doors, cabinets, and built-ins, the wood species often matters more than the stain brand. Stain does not hide uneven absorption; it emphasizes it. A durable, attractive result starts with wood that accepts color predictably, followed by careful sanding and a finish suited to the amount of handling.
The best species depends on the look you want. Oak is forgiving and strongly grained, while maple is harder and cleaner-looking but can turn blotchy. Pine is inexpensive and widely available, but it needs more preparation. If you are buying new material, choosing the right species can save more time than switching between stains.
As an Amazon Associate we earn from qualifying purchases at no extra cost to you.



Our Top Picks
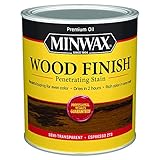
 Minwax 1 qt Minwax 70050 Espresso Wood Finish0.25 Gallon4.25 x 4.25 x 4.88 inches2 PoundsCheck on Amazon
 Minwax PolyShades Wood Stain + Polyurethane Finish0.25 Quart2.9 x 2.9 x 3 inches0.6 poundsCheck on Amazon
 Varathane Water-Based Ultimate Satin PolyurethaneHalf Pint (Pack of 1)3 x 3 x 3 inches0.64 poundsCheck on Amazon


Best species at a glance
| Wood species | Stain behavior | Best use | Main drawback |
|---|---|---|---|
| Red oak | Absorbs readily and fairly evenly | Trim, flooring-style interiors, furniture | Open grain and strong pink undertone |
| White oak | Accepts stain evenly with a refined grain | Doors, cabinets, high-end trim | Costs more and can be less available |
| Hard maple | Slow, uneven absorption; light natural color | Modern cabinets and clean-lined furniture | Blotching and streaks without careful prep |
| Cherry | Usually even, but darkens naturally | Furniture, built-ins, traditional interiors | Color changes significantly with age |
| Pine | Highly variable; soft areas absorb heavily | Budget trim, rustic projects, shelving | Blotching, dents, and uneven color |
| Alder | Generally easy to stain and relatively uniform | Cabinet doors and affordable furniture | Soft surface can dent during installation |
Oak is the safest choice for most stained woodwork
Red oak is the practical default when you want a stained finish without excessive experimentation. Its open pores absorb stain consistently, and its pronounced grain disguises small differences in color. It also takes darker brown stains more reliably than many closed-grain hardwoods.
White oak behaves similarly but has a less pink, more subdued appearance. It is a better choice for natural, gray, or contemporary stains. Both species benefit from sanding to about 150 or 180 grit. Sanding much finer can partially burnish the surface and reduce absorption, especially on end grain.
Oak is not automatically right for every room. Its grain remains visible under nearly any stain, so it is a poor choice if you want a flat, painted-looking wood surface. Red oak can also look noticeably red under medium-brown stains. Test the actual species and stain combination on scrap before cutting all of your trim.
Maple, cherry, and alder for smoother or warmer looks
Hard maple has a tight, relatively closed grain and a pale base color. That makes it attractive for modern cabinets, but it also makes stain absorption unpredictable. Dark pigment may sit on the surface in some areas and penetrate more deeply in others, creating cloudy patches or stripes.
For maple, sand consistently through 120, 150, and 180 grit, remove dust, and apply a compatible wood conditioner or a thin washcoat if the stain manufacturer permits it. A washcoat is a thinned first coat of finish that partially seals the wood. It improves uniformity but also lightens the final color, so test it first. A gel stain can be easier to control than a thin penetrating stain.
Cherry is usually easier to stain than maple, but many people prefer not to stain it at all. Fresh cherry is light reddish brown and naturally darkens with light exposure, often becoming deeper and more amber over several years. A clear finish shows this change more honestly. If you stain cherry, choose a light color and expect the final tone to continue shifting.
Alder offers a useful middle ground. It is less expensive than many hardwoods, has a relatively quiet grain, and generally accepts stain more evenly than pine or maple. Its softness is the trade-off: corners and door edges can dent during transport and installation.
Pine is fine when price and a rustic look matter
Clear pine is not a bad material; it is simply less forgiving. Its earlywood is soft and porous, while the darker growth rings are harder. A penetrating stain can soak into the soft bands and leave dark, dirty-looking patches. Knots may also bleed resin through the finish, particularly if they are not sealed.
Pine is a sensible choice for painted or rustic interior trim, basement projects, shelving, and low-cost repairs. It is also the cheaper option when small color variations are acceptable. Use a conditioner designed for softwoods, or apply a washcoat, then test the stain on the same grade of pine. Avoid judging the result on a smooth store sample if your project boards contain knots and wide grain variation.
For knotty pine, seal resinous knots with a shellac-based primer or sealer before staining or finishing. Ordinary water-based primer may not reliably stop resin bleed. Let the sealer dry, scuff-sand it, and keep the sealed areas as thin as practical to avoid visible halos.
Preparation determines durability as much as species
Stain itself is not a protective coating. It adds color, but it does little to resist abrasion, moisture, fingerprints, or cleaning chemicals. After the stain dries fully, protect interior woodwork with a compatible clear finish. Water-based polyurethane stays clearer and dries faster; oil-based polyurethane adds warmth and usually gives more open working time. Hard-wearing cabinets and doors generally deserve at least two finish coats, with light sanding between coats when required by the label.
Start with clean, flat wood. Remove mill marks with 80 or 100 grit only when necessary, then progress through 120 and 150 grit. Use 180 grit on hardwoods when the stain instructions call for it. Do not skip grits, and do not press hard enough to create uneven polished spots. Ease sharp edges slightly; stain and clear finish tend to build thinly on knife-sharp corners and wear through there first.
Before staining, vacuum dust and wipe the surface with a clean, dry cloth. Avoid soaking the wood with water unless you are deliberately using a water-pop process. Water popping raises the grain and can deepen color, but it adds another variable and requires consistent application across every piece.
For the most reliable color, buy matching boards from the same supplier and finish all related pieces in the same session. Stir stain rather than shaking it, apply it evenly, and wipe according to the product directions. Leaving excess stain in corners or end grain often causes sticky areas, dark edges, and slow drying.
Choose the stain system for the wood
Penetrating oil stains are forgiving on open-grained oak and produce a traditional appearance. Gel stains stay closer to the surface and can be easier on maple, pine, and previously finished surfaces, although they may obscure some grain. Water-based stains dry quickly and offer strong color choices, but they can raise the grain and show lap marks if applied slowly or unevenly.
For a first project, use a wood conditioner for staining on pine, maple, or alder, and keep a matching scrap for testing. A gel wood stain is often the simpler choice when blotching is the main concern. For the protective topcoat, compare a water-based polyurethane with an oil-based polyurethane based on color, drying time, and expected wear.
The best value is usually oak when you want predictable staining, pine when a rustic or budget result is acceptable, and alder when you want a quieter grain without paying for premium hardwood. Whatever species you choose, make a sample board using the complete process: sanding, conditioner or washcoat, stain, and every finish coat. That test reveals more than a color chart ever will.

0 Comments