What's inside
As an Amazon Associate I earn from qualifying purchases. This post may contain affiliate links at no extra cost to you.
The best wood for stained decorative ceiling beams is usually Douglas fir or pine for a practical, affordable project, and white oak when a pronounced grain and higher-end finish justify the added cost. The right choice depends on the look you want, whether the beams are solid or hollow, and how consistently you can prepare the surface. Stain cannot make unlike woods look identical: grain, knots, and uneven absorption remain visible.
As an Amazon Associate we earn from qualifying purchases at no extra cost to you.


Our Top Picks
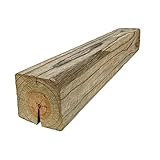
 Ekena Millwork 5 1/2"W x 5 1/2"H x5.5-in. W x 5.5-in. H x 8-ft. L96 x 5.5 x 5.5 InchesCheck on Amazon
 Heritage Timber Reclaimed Axed Cut Faux Wood Beam3.5-in. W x 3.5-in. H x 6-ft. L72 x 3.5 x 3.5 Inches3.6 PoundsCheck on Amazon
 1/2 pt Minwax 13407 Clear Pre-Stain Wood Conditioner1/2 Pint3 x 3.25 x 3 inches0 PoundsCheck on Amazon


Choose by appearance, cost, and beam construction
For most interior faux beams, appearance and workability matter more than structural strength. Hollow beams made from boards or veneer are lighter and easier to install overhead than solid timbers. If the beams will carry a load, treat them as structural framing and have the size and connections specified appropriately; decorative beam choices are not a substitute for structural design.
Look at full-length boards before buying. A small stain sample can hide how knots, grain direction, and color variation will read across a long ceiling. Ask the supplier whether boards are kiln-dried and acclimate them in the room for several days before finishing and installation. Damp wood can shrink as it dries, opening joints or exposing unstained edges.
Wood comparison for stained beams
| Wood | Typical appearance | Staining considerations | Best fit |
|---|---|---|---|
| Douglas fir | Strong, straight grain; often warm-toned | Earlywood and latewood can absorb stain differently, creating stripes; test first | Rustic or traditional beams at moderate cost |
| Pine | Light color with visible knots | Can blotch, especially with dark stain; a compatible conditioner or washcoat may help | Budget projects and casual, knotty looks |
| White oak | Prominent open grain and strong figure | Usually stains clearly; open pores make grain contrast pronounced | Distinctive, higher-end beams |
| Poplar | Fine, relatively plain grain | Can turn muddy or uneven under dark stain; often easier to paint | Painted beams or light, controlled colors |
| Red oak | Open, familiar grain; pinkish cast may show | Accepts many stains, but its grain is more prominent than pine’s | Traditional interiors where visible grain is wanted |
Douglas fir is a dependable middle ground when you want a substantial grain without paying for oak. Pine is cheaper and perfectly reasonable for a rustic ceiling, but its knots and soft patches make color less predictable. White oak is not automatically the best choice: its strong grain can dominate a room, and the material and milling generally cost more. For a smooth painted finish, poplar may be a better buy than staining wood with a plain grain.
What to buy for a consistent result
For stained beams, buy boards from the same species and, if possible, the same batch. Choose matching grain and knot patterns rather than assuming stain will unify them. If a uniform, furniture-like color matters, consider oak veneer on stable plywood or a matching prefinished product instead of mixing solid boards. A veneer-faced beam still needs careful edge treatment, and sanding through the thin veneer is an easy, irreversible mistake.
Solid lumber is the straightforward option for small beams, but a hollow beam built from three or four boards reduces weight and uses less expensive material. Check that the inside corners fit tightly and that the face boards have similar grain. Fill nail holes with a stainable filler only after testing it: many fillers take stain differently and show as pale or dark dots. For hidden fasteners, plan the attachment before finishing so you do not have to patch conspicuous holes overhead.
Prepare and test before staining
Sand new boards evenly, working with the grain. Start at 80 or 100 grit only if the surface has milling marks, then progress to 120 or 150 grit; finish around 180 grit for many stain jobs. Sanding too finely can close the surface and reduce stain penetration, while skipping grits leaves scratches that become obvious under a dark color. Remove dust with a vacuum and a clean, lint-free cloth. Avoid wetting the wood unless you intend to raise the grain and sand again.
Make a sample using offcuts from every board type in the project. Sand them exactly as you will the beams, then test the stain, any conditioner, and the topcoat. A interior wood stain labeled for floors or furniture is not automatically suitable for overhead work; follow its stated interior use and drying instructions. If pine or fir goes blotchy, test a compatible pre-stain wood conditioner on the sample. Conditioner can even out absorption, but it may also lighten the result or reduce color depth.
Apply stain in manageable sections and wipe off excess as directed. Leaving a thick, wet layer can produce sticky patches and uneven sheen, especially in corners and end grain. Stain is not a protective finish by itself. Once it has dried for the time stated on the label, apply a compatible clear coat if the beams need added cleanability or abrasion resistance. Do not apply finish over tacky stain.
Avoid the common failures
Dark stain exaggerates scratches, glue smears, filler, and uneven sanding. Check joints under raking light before staining, and remove dried glue completely: stain will not penetrate glue-covered spots. End grain absorbs more color than face grain, so sand it carefully and test it separately. On a ceiling, differences are especially visible from across the room once the whole beam is installed.
If low cost is the priority, pine is fine when knots and natural variation suit the room. If you want cleaner grain at a moderate price, compare clear Douglas fir boards before choosing oak. Spend extra on white oak when you specifically want its open, pronounced grain, not because you expect it to hide preparation errors. In every case, the test board is the cheapest way to catch a color or blotching problem before it is overhead.

0 Comments