What's inside
As an Amazon Associate I earn from qualifying purchases. This post may contain affiliate links at no extra cost to you.
Our Top Picks
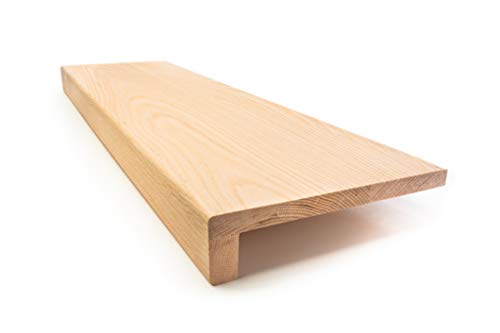
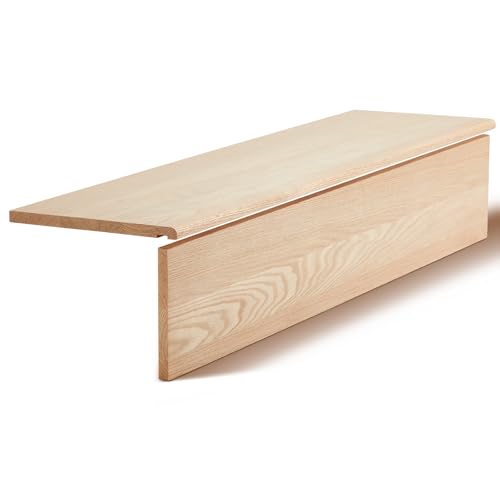
The best wood depends on the stain
For most stained indoor stair treads, red oak is the safest all-around choice: it is strong, widely available, and its open grain takes many stains predictably. White oak is similarly durable, with a tighter-looking grain and a more muted appearance. If you want a smooth, fine-grained surface, hard maple can work, but it is harder to stain evenly. Pine costs less, but dents more easily and can show blotchy color.
Choose by appearance and finish as well as strength. Stair treads take concentrated foot traffic, grit, and repeated cleaning; a soft or poorly finished tread can show wear quickly. The wood species affects how stain looks, but the clear topcoat does much of the work of protecting the surface.
As an Amazon Associate we earn from qualifying purchases at no extra cost to you.

Wood species at a glance
| Wood | Stain behavior | Durability | Best fit |
|---|---|---|---|
| Red oak | Open grain; usually accepts stain readily | Good | Traditional grain and a forgiving, widely available option |
| White oak | More subdued grain; can look brown or olive under some stains | Very good | A quieter oak look and hard-wearing stairs |
| Hard maple | Tight grain; dark stains can look uneven or muddy | Very good | Light, natural finishes or carefully tested color |
| Birch | Can blotch, especially with darker stains | Moderate | Budget projects where a test sample is acceptable |
| Pine | Often blotchy; knots and earlywood absorb differently | Fair | Low-cost stairs with light use or a rustic look |
Red oak or white oak
Red oak is a practical default if you want a recognizable grain and a medium or dark stain. Its large pores make the grain stand out, and stain generally penetrates more readily than it does on maple. The trade-off is that the pronounced grain remains visible; stain will not make oak look like a smooth, uniform-painted surface.
White oak is also hard-wearing, but its color and grain differ from red oak. It often reads less pink and more neutral, though the final tone depends on the board and finish. Don’t assume the same stain formula will look identical on both species. Put samples on offcuts from the actual tread stock, then judge them after the intended topcoat dries.
Maple, birch, and pine
Hard maple is a good choice when you want a pale, clean-looking tread or plan to use a natural clear finish. Its tight grain can make dark stain look patchy, so avoid buying maple for a dark-stained stairway without testing first. A conditioner or washcoat may reduce uneven absorption, but it can also make the result lighter; follow the stain maker’s directions and test the full finishing schedule.
Birch has a similar blotching risk and is usually best with a light color or a tested stain system. Pine is the least expensive option in many markets, and it can be perfectly reasonable for lightly used stairs or a rustic interior. Its softer growth rings dent more readily than oak or maple, while knots and resinous areas can resist stain. For a busy main staircase, the lower purchase price may be offset by visible wear.
Buying treads and checking the stock
Buy stair-tread stock intended for that use, not thin flooring or an ordinary board that happens to fit. Check local code and the stair dimensions before ordering: tread depth, nosing, thickness, and consistent dimensions matter for both comfort and safety. A typical solid tread may be around 1 inch thick, but dimensions vary; verify that the product suits your existing stair structure.
Inspect each piece for cracks, loose knots, cupping, and damage at the front edge. Grain and color vary even within one species, so lay the treads out in order before staining. If you are replacing only some treads, bring a removable sample to compare against the existing wood; matching old, oxidized finish exactly can be difficult. Search for solid oak stair treads to compare common stock options, but confirm dimensions and grade with the seller.
Sanding and stain preparation
Start with clean, bare wood. Remove old finish thoroughly; leftover finish creates pale spots that stain cannot penetrate. For new treads, sand evenly through a practical progression such as 80, 120, then 150 grit, following the manufacturer’s guidance. Don’t over-sand one area or jump to an unusually fine grit: polished patches can absorb less stain and appear lighter. Vacuum carefully and wipe with a clean, compatible cloth before finishing.
Test the stain on scrap from the same batch, using the same sanding and topcoat schedule. Stir pigmented stain rather than shaking it, apply it consistently, and wipe off excess as directed. Uneven application, inconsistent sanding, and stain left pooled in pores are common causes of lap marks and dark patches. On blotch-prone wood, test a conditioner or a manufacturer-approved washcoat first; neither guarantees a perfectly uniform result.
Protecting the treads
Use a clear floor finish rated for interior foot traffic, and apply the stated number of coats at the listed coverage and drying times. A common schedule is two or three coats, with light sanding between coats only when the label calls for it. Respect cure time before normal use: a surface that feels dry may still be soft enough to scratch or dent. Keep the finish thin and even rather than trying to build protection with one heavy coat.
For a straightforward system, compare water-based floor polyurethane and oil-based floor polyurethane. Water-based finishes usually keep the wood closer to its original color and dry faster; oil-based finishes typically amber the wood and need longer drying between coats. Check that the product is suitable for floors and compatible with the stain. On the walking surface, consider a satin or matte sheen, which tends to show scratches and dust less than gloss. Avoid adding a slippery polish, and follow the finish maker’s safety and ventilation instructions.

0 Comments