What's inside
As an Amazon Associate I earn from qualifying purchases. This post may contain affiliate links at no extra cost to you.
Our Top Picks



Check the joint before buying glue
A loose chair rung or rail is usually a failed glue joint between a wooden tenon and a socket. First, turn the chair over and see whether the joint moves when you gently push or pull the connected parts. Don’t sit on it to test it: a partly failed joint can let go without warning.
Wood glue works when the mating surfaces are bare, reasonably clean wood and the parts fit together closely. If the joint has a visible gap, a broken tenon, a split socket, or missing wood, simply adding more glue is unlikely to make a reliable repair. Those problems may need a fitted wood repair or a furniture repairer.
As an Amazon Associate we earn from qualifying purchases at no extra cost to you.
If the chair was previously glued, try to separate the joint by hand or with light, controlled pressure. Don’t hammer hard on a thin rail or leg. Scrape off old glue with a sharp chisel or scraper, taking care not to remove sound wood. A glossy film or thick ridge of dried adhesive can stop the new glue from bonding directly to the wood.
Choose glue for the joint and conditions
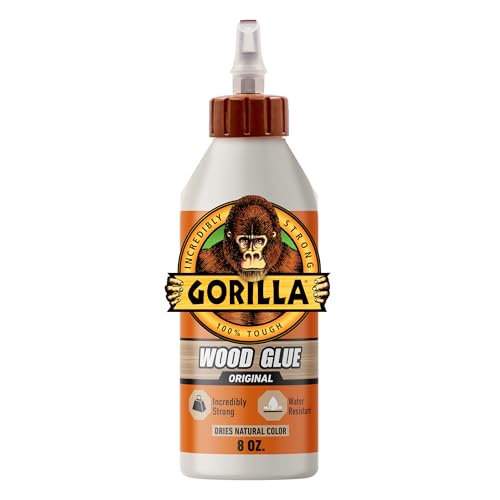
For most indoor chairs, ordinary PVA wood glue is the practical choice. It is inexpensive, easy to clean up with a damp cloth while wet, and plenty strong when applied to a close-fitting, clean joint. A bottle of PVA wood glue is enough for most repairs.
Use a water-resistant PVA if the chair may regularly be exposed to damp conditions, but don’t treat “water-resistant” as permission to leave furniture outdoors. Polyurethane glue can fill small voids better, but its foaming expansion can push a joint apart, and the cured squeeze-out is harder to remove. It is not a fix for a badly fitting joint. Epoxy can suit a damaged or irregular repair, but it is less convenient to reverse and requires careful measuring and mixing.
| Glue type | Good fit for | Trade-off |
|---|---|---|
| Standard PVA | Close-fitting joints on indoor chairs | Not intended for repeated wet exposure |
| Water-resistant PVA | Indoor furniture that may get occasional moisture | Costs more; still needs a sound, tight joint |
| Polyurethane | Some joints with slight gaps or damp exposure | Foams, makes a mess, and does not replace missing wood |
| Epoxy | Selected repairs with damaged or irregular surfaces | More preparation; harder to undo and clean up |
Prepare the joint and the chair
Take apart only the loose joint, not the entire chair, unless other joints are also failing. If the chair has several connected joints, label the parts with masking tape so they go back in the right orientation. Remove old adhesive from both the tenon and the inside of the socket. A narrow scraper or small chisel can reach into a socket; work slowly rather than widening it.
Dry-fit the parts before opening the glue. They should seat fully with firm hand pressure or a few light taps from a rubber mallet. If they stop short, find out why: a glue ridge, dirt, swollen wood, or a tight spot may be blocking them. Don’t sand a tenon until it becomes loose just to make assembly easy. A tenon that rocks in its socket has too much clearance for a reliable PVA repair.
Lay out clamps before applying glue. A strap clamp or suitable bar clamps can hold chair parts in line; protect finished surfaces with scrap wood or soft pads. If you need to remove old glue from nearby finish, mask the area. Keep a damp cloth handy for fresh PVA squeeze-out.
Apply glue and clamp the joint
Brush or spread a thin, even coat over the tenon and the inside wall of the socket. Cover the bonding surfaces, but don’t fill the socket with glue: excess can prevent the tenon from seating fully and create a hydraulic cushion. For a narrow socket, a small brush or glue syringe helps reach the inside. A small glue brush is inexpensive and reusable if rinsed promptly.
Assemble the joint promptly and push it fully home. Wipe away wet squeeze-out, then clamp just firmly enough to close the joint and keep the chair square. More force is not better; excessive clamping can distort a frame or starve the joint of glue. Check that legs and rails remain aligned and that the chair does not rock on a flat floor. A basic pair of bar clamps is useful if you don’t already own clamps, though a strap clamp can be easier for a multi-sided frame.
Follow the glue label for open time and clamp time. Many common PVA glues need about 30 minutes of clamping, but temperature, humidity, and the particular product change that figure. Leave the chair unloaded for at least 24 hours before use unless the label specifies longer. Don’t remove clamps early because the joint feels firm; the adhesive needs time to cure.
Avoid repairs that fail again
Glue on top of old adhesive is a common cause of repeat failure. So is forcing a loose joint together with a heavy clamp, which can conceal a poor fit without improving the bond. If the tenon is visibly undersized or the socket is split, stop and repair the wood itself rather than relying on a thicker layer of glue.
Another mistake is using a finish or stain to disguise glue residue before the adhesive has cured. Glue left on the surface can block stain and leave a pale patch. Once cured, scrape away any remaining residue carefully; sand lightly only where needed, since sanding through a chair’s finish can make the repair more noticeable. If the joint opens again after a careful reglue, inspect for movement in adjacent joints or damaged wood before trying a different adhesive.



0 Comments