What's inside
As an Amazon Associate I earn from qualifying purchases. This post may contain affiliate links at no extra cost to you.
Our Top Picks


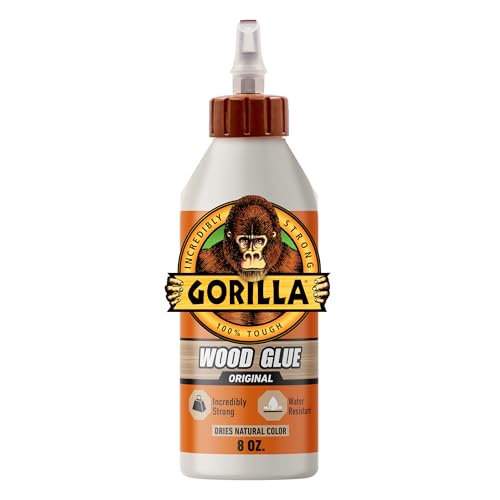
Choose the right PVA glue
PVA wood glue is a good choice for most indoor furniture, cabinets, boxes, and trim. It dries clear to translucent, cleans up with water while wet, and is usually stronger than the wood around a well-made joint. It cannot compensate for a poor fit: the mating surfaces need to contact closely, with no visible gaps.
For ordinary indoor projects, standard yellow interior wood glue is usually the economical choice. If the joint may get damp, choose a water-resistant formula and check its stated rating. “Water-resistant” does not mean waterproof or suitable for a joint that stays wet. For outdoor exposure, use a glue specifically rated for that service and follow its label; PVA formulas vary, and some exterior jobs are better served by a different adhesive.
As an Amazon Associate we earn from qualifying purchases at no extra cost to you.
| Glue type | Best use | Trade-off |
|---|---|---|
| Interior PVA | Dry indoor furniture, panels, and small repairs | Often inexpensive; not for regular wetting |
| Water-resistant PVA | Kitchens, bathrooms, or occasional damp exposure | Costs more; ratings and water resistance vary |
| Fast-setting PVA | Small assemblies with quick clamping | Shorter open time leaves less room to correct alignment |
When buying, compare the label’s open time, clamp time, and service rating rather than relying on color alone. A standard interior wood glue is fine for most dry-room work. For damp locations, look for a clearly stated water-resistance rating on a water-resistant PVA glue.
Prepare the wood
Dry-fit the parts before opening the bottle. Check that edges meet along their full length and that the assembly can be clamped without shifting. A gap wider than a thin sheet of paper is a warning: correct the cut or joint instead of trying to fill it with glue. PVA is not a reliable gap filler, and a thick glue line is weaker and more visible than a close wood-to-wood fit.
Make sure the wood is dry, clean, and free of dust, oil, and wax. Wipe sanding dust away with a dry cloth or vacuum. Avoid soaking the joint with water or solvent. For most joints, a freshly cut or lightly sanded surface gives dependable results; heavily polished or burnished edges can reduce glue penetration. If you sand the joint faces, use a sharp abrasive and avoid rounding the edges.
Some oily or resinous woods, including teak and rosewood, can be difficult to glue. Make a test joint from offcuts and follow the adhesive maker’s advice for that species. Do not assume that a glue that works well on pine will behave identically on every wood.
Apply a thin, even coat
Spread glue over the mating face in a continuous, thin film. A small brush, roller, or glue spreader helps on wide panels; a nozzle is usually enough for a narrow edge joint. Use enough to wet the surface without leaving puddles. On many ordinary joints, a film on one face is sufficient. Very porous end grain may need a first coat that soaks in; let it absorb briefly, then apply a fresh coat before assembly if the label and working time allow.
As a practical starting point, work in a room around 65–75°F (18–24°C). Cold glue and cold wood slow setting, while heat, wind, and dry air can shorten the time available to assemble. Check the bottle: open time may be only several minutes, especially for fast-setting products. Spread glue on one joint at a time if the assembly is complex.
Bring the parts together and slide them slightly back and forth once to distribute the glue. Then align them and clamp. A narrow, fairly continuous bead of squeeze-out along the seam generally indicates coverage; large rivers of glue mean you likely used more than necessary. No squeeze-out at all can be a sign of a dry joint, though it is not proof by itself.
Clamp without distorting the joint
Use enough pressure to close the joint, not enough to bow a panel or crush soft wood. Place clamps so pressure is distributed along the seam, and add cauls—straight scrap strips—when needed to keep a panel flat. Protect finished faces with clean pads or scrap blocks. Check alignment before the glue grabs; a joint can look closed while the assembly has twisted out of square.
Clamp and handling times differ by product, temperature, wood, and joint size. Many PVAs need roughly 30 minutes to a few hours under clamp, but the label takes precedence. Leave the piece undisturbed for the stated clamp period and avoid heavy loading for at least 24 hours unless the manufacturer specifies otherwise. A joint that feels firm early may not have reached full strength.
If a joint slips, add a stop block or use a less slippery assembly method next time. Tightening harder is not always the fix: excessive pressure can squeeze out too much glue or distort the parts. For long assemblies, arrange clamps, cauls, and a square within reach before spreading adhesive.
Remove squeeze-out cleanly
Wipe fresh glue with a barely damp cloth, taking care not to spread it over the surrounding wood. Excess water can raise the grain, so use as little as practical. For visible furniture joints, another option is to let the bead turn rubbery and lift it with a plastic scraper or chisel held carefully. Do not gouge the surface.
Clear glue residue before staining. Dried PVA can be nearly invisible on bare wood but blocks stain, leaving pale patches or uneven color. Scraping or sanding after the glue hardens can help, but sanding may smear glue into pores, especially on open-grain woods. Use raking light to find residue and test the stain on an offcut. For the most reliable finish, prevent squeeze-out from spreading and remove any film before it dries.
Spot common failures
A joint that opens after curing usually points to a poor fit, insufficient coverage, contamination, unsuitable wood moisture, or movement before the glue set. A brittle, thick glue line is not a substitute for accurate joinery. If a joint fails, clean away old adhesive as completely as possible, refit the parts, and make a test repair before rebuilding an important assembly.
For hidden, load-bearing joints, make a sample when changing glue, wood species, or finish schedule. For decorative joints where glue squeeze-out could spoil a stain, spend more time on dry fitting and masking than on cleanup. Those small preparations do more for a strong, invisible seam than adding extra glue.



0 Comments