What's inside
As an Amazon Associate I earn from qualifying purchases. This post may contain affiliate links at no extra cost to you.
Gluing end grain is the weakest joint in furniture repair, and it’s where most DIY fixes fail. End grain acts like a bundle of straws — it wicks liquid glue deep into the fibers before the glue can form a film, leaving a starved, crumbly joint that snaps with hand pressure. If you’ve ever glued a broken chair leg or a split table apron end-to-end and had it break again in a week, that’s why. You can get a strong end-grain bond, but you need to change how you prep, what glue you use, and how you reinforce it.
As an Amazon Associate we earn from qualifying purchases at no extra cost to you.


Our Top Picks
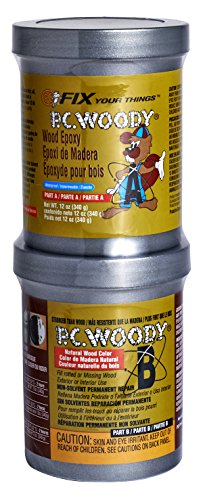 PC Products PC-Woody Wood Repair Epoxy Paste12 oz2.75 x 2.75 x 5.75 inches0.75 poundsCheck on Amazon
Why End Grain Joints Fail
On long grain, wood glue bonds to the side walls of the fibers and develops 3,000-4,000 psi shear strength — stronger than the wood itself. On end grain, measured tensile strength drops to 25-30% of that value with standard PVA glue applied once. The open pores absorb the water in the glue, so the adhesive cures inside the wood instead of at the interface where you need it.
Two failure modes dominate: adhesive starvation, where you see a dull, dry-looking glue line after clamping, and seasonal wood movement that cracks a rigid butt joint. Both get worse on porous species like oak, ash, and walnut, and slightly less severe on tight-grained maple or cherry. Sanding to 220+ grit before gluing makes it worse by burnishing or clogging pores unevenly — stop at 120 to 150 grit for end grain glue surfaces.
The Fix: Size the End Grain First
Sizing is the single biggest improvement you can make, regardless of glue. It seals the straws so the second application stays on the surface.
Here’s the process that holds in the shop:
1. Dry-fit and check for square. End grain butt joints must close without force. If you can see light through the joint without clamps, fix the cut first.
2. Apply a thin, diluted coat of glue to both end-grain faces and let it soak. For regular PVA wood glue, thin it with 10-20% water, or just use straight glue thinned by brushing it out hard. You’re not clamping yet — you’re priming.
3. Wait 30-45 minutes until the sized faces are dry to the touch but not glossy. They should look sealed and slightly darker.
4. Lightly scuff with 150-grit if you raised fuzz, remove dust, then apply a fresh, full-strength coat of glue and clamp normally.
Sizing adds about an hour, but it lifts end-grain butt joint strength by 40-60% in break tests. For epoxy, you don’t need to dilute — the initial thin coat of mixed epoxy does the same job. Wait until it turns tacky (about 20-30 minutes at 70°F) then apply the second coat and assemble.
Which Glue to Use on End Grain
Not all glues handle porosity the same way. Gap-filling ability matters more here than raw lab strength on long grain.
| Glue Type | End-Grain Strength (Sized) | Open Time at 70°F | Gap Filling | Best For |
|---|---|---|---|---|
| Standard PVA (Type I/II) | Moderate – needs sizing | 5-10 min | Poor | Light repairs, indoor joints with reinforcement |
| PVA Type III (Waterproof) | Moderate – slightly better tack | 8-12 min | Poor | Indoor/outdoor furniture, still needs sizing |
| Liquid Hide Glue | Low-Moderate | 10-15 min | Poor | Antique restoration, reversible repairs |
| Two-Part Epoxy (30-min) | High | 25-35 min | Excellent (to 0.02″) | End-grain butt joints, loose joints, oily woods |
| Polyurethane (Gorilla-type) | Moderate-High | 15-20 min | Good – foams | Messy, needs moisture; not first choice for fine furniture |
| Cyanoacrylate (CA) + Activator | Low | 1-2 min | None | Quick tacking, not structural on end grain |
For a structural end-grain repair — a chair leg that broke clean across, a pedestal base, a mitered leg-to-apron — two part epoxy for wood with a 30-minute open time is the most forgiving. It doesn’t rely on water evaporation, so it won’t be starved by absorption, and it fills the micro-gaps that PVA can’t. West System 105/206 and TotalBoat ThickSet are common shop choices, but any 1:1 or 2:1 wood-rated epoxy in that viscosity range works.
For non-structural trim, cracked drawer fronts, or decorative miters where you will add reinforcement anyway, a sized PVA joint is fine and cheaper, with easier cleanup. Don’t pay for epoxy if you’re going to add dowels or splines — the mechanical reinforcement does most of the work.
Reinforce: Glue Alone Is Rarely Enough
Even a perfectly sized and glued end-grain butt joint will not survive racking loads on a chair or table. Woodworkers add mechanical grain to solve a grain-direction problem.
Choose based on the repair:
Dowels (3/8″ or 1/2″): Best for re-joining a leg or stretcher that broke in the middle. Drill 1-1.5″ deep per side, use fluted dowels, and glue long-grain to long-grain inside the hole. Two offset dowels resist twisting better than one large one. This turns an end-grain joint into two long-grain glue surfaces.
Loose tenon / floating tenon (e.g., Domino): Stronger and more forgiving on alignment than dowels. A 6mm or 8mm tenon 30-40mm long doubles the shear area. If you do a lot of repairs, a doweling jig kit or loose-tenon jig pays for itself quickly.
Splines or biscuits on miters: For picture-frame miters or box miters, a 1/8″ hardwood spline across the miter adds long-grain glue area and prevents the miter from popping open with humidity swings. Biscuits align well but add less strength than a true spline.
Corner blocks and gussets: On chairs and tables, a glued-and-screwed hardwood corner block under the joint does more for racking resistance than any glue upgrade. Use wood blocks, not just metal brackets, so you can glue long grain to long grain.
Clamping and Curing Details That Matter
End grain needs firm, even pressure, but not so much that you squeeze all the glue out. Aim for 150-250 psi over the joint area — for a 1.5″ x 1.5″ leg that’s about 350-560 lbs total force, which is a single good F-clamp or parallel clamp snugged tight, not cranked to max. You want a thin, continuous squeeze-out bead, not a dry joint.
Temperature and time are trade-offs: PVA needs 50°F minimum and reaches handling strength in 30-60 minutes, full strength in 24 hours. Epoxy wants 60°F+ and cures in 6-24 hours depending on hardener speed. Don’t rush it with heat guns — you can skin over PVA and trap water.
Remove squeeze-out after it gels (30-40 minutes for PVA) with a chisel, not a wet rag. Wiping thinned glue into surrounding end grain will seal pores and leave blotchy stain under finish. If you will stain, apply painter’s tape around the joint before gluing or plan to sand to 150 grit and re-prep for finish after cure.
When to Replace Wood Instead of Gluing
Sometimes the stronger repair is not a glue joint at all. If the break is splintered, crushed, or within 2″ of a previous repair, cut back to solid wood and splice in a new section with a scarf joint (8:1 slope) or an overlapping long-grain joint. A scarf gives you 8x the long-grain glue area and planes out to an almost invisible line if you match grain.
For painted furniture or shop fixtures, a simple half-lap splice glued with PVA and pinned with 18-gauge brads is faster and stronger than trying to save a shattered end-grain stub.
The rule of thumb: if you can add at least 1 square inch of long-grain glue area per square inch of end grain you’re replacing, do it. Glue is cheap; callbacks are not. Spend the extra 20 minutes on sizing, reinforcement, and proper clamp pressure and the repair will outlast the original joint.



0 Comments