What's inside
As an Amazon Associate I earn from qualifying purchases. This post may contain affiliate links at no extra cost to you.
End-grain boards expose the ends of their wood fibers, so they absorb glue quickly. That can leave a starved joint: the surfaces look coated during assembly, but too little adhesive remains between them. The good news is that end grain can make a strong panel if you prepare it carefully, use the right glue, and clamp the pieces without gaps or excessive pressure.
As an Amazon Associate we earn from qualifying purchases at no extra cost to you.


Our Top Picks
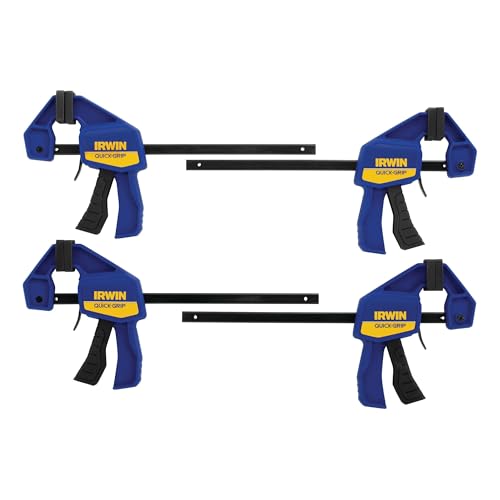 IRWIN Quick-Grip 1964758 One-Handed Mini Bar Clamp 44 Count (Pack of 1)21 x 8 x 2.5 Inches1 poundsCheck on Amazon
Choose the right glue
For most indoor panels, yellow aliphatic-resin woodworking glue is an inexpensive, dependable choice. Look for a Type I or Type II PVA glue if the panel may get wet; Type II offers water resistance, while Type I is intended for dry interior conditions. Neither makes an ordinary panel suitable for prolonged outdoor exposure or immersion. For outdoor work, choose an adhesive specifically rated for the exposure and compatible with your wood.
| Glue type | Good fit | Trade-off |
|---|---|---|
| Yellow PVA woodworking glue | Most indoor panels and straightforward shop projects | Short open time; needs close-fitting joints and clamping |
| Type II PVA | Panels that may face occasional moisture | Water-resistant, not waterproof in every use; cured glue can be harder to remove |
| Epoxy | Irregular gaps or jobs requiring a longer working time | Costlier, messier, and unnecessary for well-fitted indoor joints |
A standard yellow woodworking glue is usually the sensible buy for a dry indoor panel. Don’t reach for epoxy just because the joint is end grain: epoxy can help with imperfect fits, but it does not compensate for loose, poorly aligned boards.
Prepare the boards
Joint the mating edges straight and square, then dry-fit the boards in their final order. Press the edges together under light hand pressure. A visible gap, rocking board, or joint that closes only when forced indicates a fit problem to correct before gluing. Glue fills tiny irregularities; it is not a substitute for accurate edge preparation.
Arrange the boards so their faces are flush and the grain looks balanced. Mark alignment across the seams with a pencil. If the panel will be wide, use cauls—straight clamping bars that span the panel—to limit steps between boards. Cover cauls with packing tape or another glue-resistant layer so squeeze-out does not bond them to the work.
For boards wider than about 3 inches, consider sealing the end grain before the final glue-up. Brush a thin coat of the same glue onto each mating end-grain surface and let it soak in for roughly 5–10 minutes. Apply a second, fresh coat and assemble while it is still wet. This “sizing” step reduces how much glue the thirsty end grain pulls from the joint. It takes extra time, but is useful for wide boards, absorbent species, or a panel where a failed seam would be costly. Follow the adhesive label if it gives different instructions.
Apply glue and clamp evenly
For a narrow board edge, spread a continuous, thin film across the full joint face. On an end-grain joint, use enough glue to wet the surface evenly; after sizing, the fresh coat should leave a visible film rather than disappearing immediately. A small brush or glue spreader makes coverage more reliable than squeezing a bead and hoping it spreads. Keep a damp cloth nearby for fresh squeeze-out, but avoid flooding the panel.
Place clamps across the seams at intervals of roughly 8–12 inches, alternating them above and below the panel if possible. Tighten until a small, continuous bead of glue appears along the joint. More force is not better: extreme pressure can bow boards, close a joint unevenly, or squeeze out too much adhesive. Add cauls across the panel and check alignment before the glue sets.
Work within the glue’s open time—the period from application until it can no longer form a reliable bond. Many common woodworking PVAs allow only several minutes, and warm, dry conditions shorten that window. For a large panel, rehearse the clamp sequence first or glue up smaller sections. Leave the assembly clamped for the time stated on the bottle, commonly 30–60 minutes, and avoid stressing the panel for at least 24 hours. Full cure can take longer.
Avoid common failures
A seam that opens after unclamping often points to a gap, poor coverage, or glue starvation. Check the mating edges for twist and light showing through the dry fit. If the boards are very absorbent, use the sizing method rather than simply adding a thick puddle of glue. Thick glue lines can weaken a joint and make alignment harder.
Another frequent problem is a panel that dries with uneven faces. Clamping pressure alone will not flatten twisted stock. Start with straight boards, use cauls, and tighten clamps gradually while checking the surface with a straightedge. If one board is cupped or twisted, flatten it before assembly or replace it.
For end-grain-to-end-grain joints, strength is inherently more limited than a long-grain edge joint because the adhesive bonds to exposed fibers that absorb glue. When the design permits, add mechanical reinforcement such as a spline, loose tenon, or suitable joinery. These features improve alignment and add bearing area; they are not a fix for a badly fitted joint.
Clean up and finish the panel
Scrape rubbery squeeze-out after it has partly set, or wipe fresh glue carefully without spreading it into the wood pores. Dried glue can block stain and leave pale patches. Before staining, inspect the panel under raking light and remove residue with a sharp scraper or careful sanding. Sand evenly through progressive grits—often 120, 150, then 180 for many projects—without rounding the edges or sanding one board much more than its neighbors.
If the panel is a cutting board or will contact food, use a glue and finish explicitly suitable for that application, and follow their instructions. A water-resistant glue does not by itself make the entire panel food-safe or waterproof. For ordinary furniture panels, a well-fitted joint, a fresh coat on sized end grain, and controlled clamping matter more than buying the most expensive adhesive.



0 Comments