What's inside
As an Amazon Associate I earn from qualifying purchases. This post may contain affiliate links at no extra cost to you.
Our Top Picks
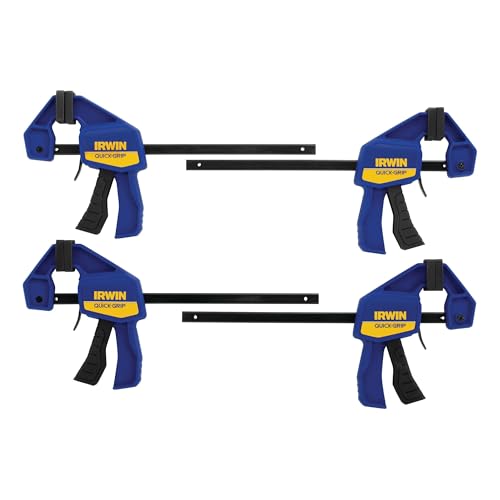 IRWIN Quick-Grip 1964758 One-Handed Mini Bar Clamp 44 Count (Pack of 1)21 x 8 x 2.5 Inches1 poundsCheck on Amazon

Why Edge-Glued Panels Bow During Glue-Up
An edge-glued panel doesn’t cup after it dries because the wood moved. It cups while the glue is still wet because clamp pressure is uneven. Bar clamps and pipe clamps apply force in a single plane, right at the edge of the boards. If one board is 3/32″ thicker than its neighbor, or if a clamp jaw tilts even a degree or two, the boards slide vertically against each other and freeze in place as the glue grabs. With PVA glue you have about 5-10 minutes of open time before that misalignment becomes permanent.
Moisture plays a smaller but real role. Fresh PVA adds water to the joint line, and the face that gets more glue or more exposure can swell slightly and crown. This is worse with kiln-dried soft maple or cherry that wasn’t acclimated, or with boards that were milled right before glue-up and still have internal stress. Cauls don’t fix bad stock selection or wet wood, but they force the faces into a single plane while the glue cures so you don’t have to sand out 1/16″ to 1/8″ of step between boards.
As an Amazon Associate we earn from qualifying purchases at no extra cost to you.

What Cauls Actually Do (And What They Don’t)
Cauls are stiff beams placed across the faces of the panel, perpendicular to the glue joints, usually in pairs – one on top, one on bottom – clamped together at the ends. They don’t provide edge pressure to close the joint. Your parallel or pipe clamps do that. Cauls provide surface pressure to keep the boards flush.
A good caul system does three things: it bridges across 3-5 boards so a single high board can’t lift, it distributes light even pressure across the full 20″ to 36″ width, and it resists bending when your main clamps try to bow the assembly. What it won’t do is flatten badly warped or twisted boards. If a board rocks on a flat table, needs more than about 1/32″ of force to bring down, or has twist over 1/16″ across its length, cauls will just lock in stress that later shows up as a cracked glue line or a panel that won’t stay flat after you remove the clamps. Joint and plane your stock straight first, then use cauls to keep it straight.
Types of Cauls Compared
The classic choice is between flat cauls and slightly bowed (cambered) cauls. Both work, but they behave differently, and aluminum vs. wood changes how much prep they need.
| Caul Type | Best For | Pressure Pattern | Trade-offs |
|---|---|---|---|
| Flat Hardwood Cauls (3/4″ x 1-1/2″ maple) | Narrow panels under 24″ wide, occasional use | Even if cauls are truly straight and stiff | Cheap and easy to make; will flex on wide panels unless quite thick; must be waxed or taped or glue will bond them to the panel |
| Bowed / Cambered Hardwood Cauls | Most edge-glued panels 24″ to 36″ wide | High pressure in the middle, light at ends where you clamp | Applies pressure where you need it most without over-tightening the ends; takes 10 minutes to make with a hand plane or jointer; needs consistent camber of about 1/16″ over 24″ to 30″ |
| Aluminum C-Channel or Box Cauls | Large tabletops, frequent glue-ups | Very even, very stiff | Won’t flex, won’t stick, won’t warp with humidity; more expensive; need plastic shims or tape to protect softwoods from denting |
| Unistrut / Steel Box Tube Cauls | Maximum stiffness on a budget | Extremely rigid | Heavy and can dent panels if over-tightened; needs tape or cork liner; cheap if you have scrap |
For most small shops building panels for doors, shelves, and tops, a set of four bowed maple cauls will handle 90% of glue-ups. If you are gluing up 40″ wide white oak tops every week, it is worth buying aluminum cauls for panel glue up that stay straight forever.
How to Make a Set of Bowed Cauls
You need four cauls for one panel (two pairs). Make them 4″ to 6″ longer than your widest common panel. For panels up to 30″ wide, a good size is 36″ long, 1-1/2″ tall, 3/4″ thick hard maple or straight-grained white oak.
To create the camber, mark the center of each caul and make a mark 1/32″ to 1/16″ from the edge at the center. At each end, mark about 1/8″ in from the end on the same edge. Connect the marks with a straight line to each end and remove the waste with a jointer or hand plane. You are creating a very shallow point in the middle, not a curve. When you lay two cauls together face to face, they should touch in the middle and show a 1/16″ to 1/8″ gap at each end. That gap closes when you clamp the ends, forcing the center down onto the panel.
Seal them. Bare wood cauls will glue themselves to squeeze-out and will move seasonally. Apply two coats of paste wax, or better, wrap the contact face with 2″ clear packing tape for glue up. Tape is faster and more reliable than wax, and dried PVA peels right off it. Label pairs A-A and B-B so you keep matched camber together.
How to Use Cauls Without Creating New Problems
Dry-fit first. Lay out your boards in final order, check for flush at the ends and center, and make sure your parallel clamps for woodworking can reach without hitting the cauls. Arrange cauls so they sit 3″ to 6″ in from each end of the panel, not right at the very edge. For panels over 36″ long, add a third pair in the middle.
Apply glue and bring the panel together with light clamp pressure – just enough to close the joints and get a small, continuous bead of squeeze-out. You should be able to slide the boards flush with hand pressure at this stage. If you have to crank the clamps to close a gap, stop and fix the joint.
Now add the cauls. Place the bottom caul, set the panel on it, place the top caul directly above it, and clamp the caul ends together with small F-clamps or C-clamps. Alternate tightening a quarter-turn per side until the camber flattens and the caul contacts the panel across its full width. You want firm contact, not extreme force. If you have to lean on the clamp handle, you are crushing fibers. Tighten just until you feel resistance and see the boards come exactly flush.
With the cauls snug, re-check your main clamps and add final edge pressure. Check for flush by running your fingertips across the joints, not just by eye. Let the panel cure fully clamped. With Type II PVA at 70F, leave cauls on for 45-60 minutes minimum. Don’t remove them early to reuse them – the joint is weakest in the first 30 minutes. Scrape squeeze-out after 30-40 minutes when it is rubbery, but leave the cauls alone until the hour is up.
Common Mistakes That Lock In a Bow
The most common failure is over-tightening the main clamps before the cauls are on. Heavy edge pressure on slightly misaligned boards forces one board up and the cauls then have to fight that offset. Sequence matters: light edge pressure, then cauls, then final edge pressure.
Second is using flat cauls and clamping only the ends. Flat cauls with end pressure actually bow up in the middle and leave the center of the panel unsupported. That’s why a 1/16″ camber matters – it converts end clamping into center pressure. If you only have flat cauls, add a clamp in the middle of the caul or shim the center with a single layer of blue tape.
Third is forgetting a barrier. PVA will bond a bare maple caul to a cherry panel stronger than you expect, and prying it off will tear grain. Always use packing tape, wax, or a strip of wax paper. And don’t use silicone-coated parchment – silicone contaminates the surface and will cause fisheye in your finish.
Finally, don’t leave cauls and clamps on overnight thinking more is better and then skip flattening. Cauls get you 95% flat, not perfect. After curing, remove the clamps, scrape, and check with a straightedge. You should need only a light pass with a No. 5 or No. 7 hand plane or 80-grit on a flat sander to hit flush. If you still need aggressive sanding, your stock wasn’t flat to begin with, and no caul setup will save the next panel. Fix the milling instead of adding more clamp pressure.



0 Comments