What's inside
As an Amazon Associate I earn from qualifying purchases. This post may contain affiliate links at no extra cost to you.
Live-edge slabs look great until you notice the small knots, worm holes, bark inclusions, and hairline cracks that come with them. These voids are rarely structural, but if you leave them open they collect dust, snag cloth, and telegraph through your finish. For holes from pinhole size up to about 1/2 inch wide and 1/4 inch deep, you can fill them invisibly with the right material and a little prep. Anything larger is a pour job that needs damming and deep-pour epoxy, which is a different process.
As an Amazon Associate we earn from qualifying purchases at no extra cost to you.

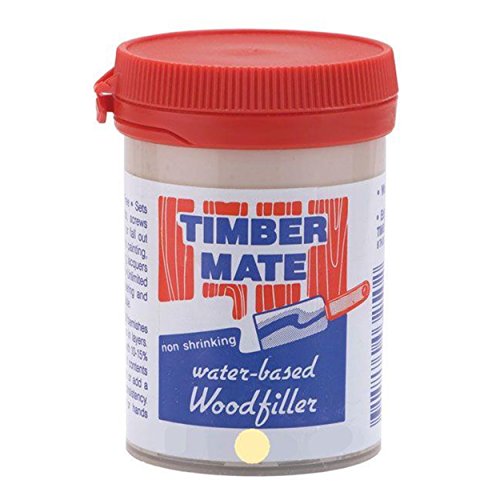


Our Top Picks
- Aqua Coat Water-Based Clear Wood Grain Filler GelPint3.55 x 3.55 x 4.2 inches1.14 PoundsCheck on Amazon
What Counts as a Small Void
On live-edge material, a small void is any defect you can fill in one or two applications without building a form around the edge. Typical examples: pin knots under 1/4 inch, cracks 1/16 to 1/8 inch wide, small bark pockets, and beetle galleries. If you can cover the bottom with tape and the filler will stay put, it is small. If the void runs through the slab or follows the live edge where there is no wall to contain liquid, you need to dam it or it is not a small void anymore.
Stability matters more than size. Probe the void with a pick or compressed air. If there is loose bark, punky wood, or crumbly rot inside, dig it out until you hit solid wood. Filler bonded to loose material will pop out with seasonal wood movement. For soft punky areas, harden them first with thin CA or epoxy before you fill.
Choosing a Filler: Trade-offs That Matter
There are three practical options for small voids, and none is perfect for everything. Your choice depends on void size, whether you want clear or tinted fill, and what topcoat you plan to use.
| Filler Type | Best For | Working Time | Sanding / Finishing | Watch Out For |
|---|---|---|---|---|
| Two-part clear epoxy (1:1 or 2:1) | Cracks, knots, and holes 1/8 to 1/2 inch; clear or tinted fill | 15-45 minutes, cures 24 hours | Sands well, takes any finish, can be polished clear | Needs taped bottom; can form bubbles if poured too deep; shrinks very little |
| Cyanoacrylate (CA) glue + accelerator | Pinholes, hairline cracks under 1/8 inch; quick stabilization | 10-60 seconds with accelerator, 5-10 minutes without | Very hard, sands flush but can leave witness line under clear finish | Brittle in larger voids; cracks with wood movement; fumes are strong |
| Solvent or water-based wood filler / epoxy putty | Surface blemishes you will paint or stain dark | 10-20 minutes, dries 2-8 hours | Easy to sand, but does not take stain like wood; looks flat under clear coat | Shrinks, crumbles at edges, poor for through-holes or transparent finish |
For most live-edge tables and shelves under a clear finish, clear epoxy resin for wood is the most versatile choice. It levels itself, it does not shrink, and you can tint it to match or to create a contrasting river speck in a knot. Save wood filler for painted projects or for nail holes in trim, not for live-edge voids you want to disappear.
Thin CA glue for woodworking is the fastest option for hairline cracks and it is excellent for stabilizing. Keep both on hand if you do live-edge work regularly. Use CA for the tiny stuff, epoxy for everything you can see from two feet away.
Preparation Before You Pour
Fill before your final sanding, typically after you have flattened to 80 or 100 grit but before 120 grit. That way you can sand the filler flush without dishing the surrounding wood.
Clean the void thoroughly. Blow it out with compressed air, then pick out any bark with a dental pick or small chisel. Wipe with isopropyl alcohol or acetone on a cotton swab and let it dry completely. Any oil, sawdust, or moisture trapped underneath will cause bubbles or poor adhesion. If the wood is very porous around the void, seal the interior walls with a thin brush coat of the same epoxy thinned slightly or with shellac. This prevents air from the end grain bleeding into your clear fill and forming a foam of micro-bubbles.
Tape the bottom and open edges. For through-holes and edge-adjacent voids, use aluminum HVAC tape or sheathing tape, not blue painter’s tape, which epoxy will seep under. Press the tape firmly and burnish the edges. If the void is deep, back it with tape and consider a first shallow seal coat 1/8 inch deep to lock the tape line before filling full depth.
Warm the shop to 65-75F. Cold wood and cold resin are the number one cause of bubbles and slow cures. Do not try to fill below 60F.
Method 1: Clear or Tinted Epoxy for Voids 1/8 to 1/2 Inch
Mix small batches precisely by volume or weight according to the label. For small voids, 20-40 ml total is often enough. Stir slowly for two minutes, scraping the sides and bottom, then let it rest for one minute to let introduced air rise. Do not whip it.
If you want the fill to disappear, tint to match the wood. Use epoxy-specific liquid pigments or dry mica powder. A tiny amount goes a long way, start with a toothpick tip. For walnut, a mix of brown and black gets you close; for maple, amber and a touch of white keeps it from going too dark. Test a drop on scrap or on tape next to the void before pouring.
Pour in layers no deeper than 1/4 inch for standard tabletop epoxy. Overfill slightly, about 1/32 inch proud, because you will sand it flat. Pop surface bubbles with a quick pass of a heat gun held 6-8 inches away for 2-3 seconds. Do not hold heat in one spot or you will yellow the epoxy and scorch the wood. If bubbles keep rising from porous walls, you skipped the seal coat.
Let it cure for the full manufacturer time, usually 24 hours, even if it feels hard after 6-8 hours. Sanding too early gums the paper and leaves a concave, rubbery fill. Once cured, sand flush starting at 100 or 120 grit on a hard block, not a soft pad sander alone, which will dish the epoxy below the wood surface. Work up through 180 grit before finishing.
Method 2: CA Glue for Hairlines and Pinholes
For cracks narrower than 1/8 inch, CA is faster and less messy. Use thin viscosity CA for hairlines so it wicks deep, and medium for pinholes. Flood the void, let it soak for 10 seconds, then add sanding dust from the same species if you want a wood-toned fill. The dust darkens slightly when wetted, so use dust from 120 grit or finer for a better color match. Spray accelerator lightly from 8 inches away if you are in a hurry, but know that accelerator can leave a white haze and make the CA more brittle. For the most invisible repair, let it cure naturally for 5-10 minutes.
Build in layers for depth. Two or three thin fills level better than one thick flood that foams or overheats. CA gets very hot in volume and can crack or turn milky white if poured too thick. Once proud of the surface, scrape flush with a card scraper, then sand at 150 grit. CA is harder than the surrounding wood, so keep the block flat to avoid creating a high spot.
Sanding and Finishing Over Fills
After the fill is level at 120 grit, continue your normal sanding sequence to 180 or 220 grit for most film finishes like polyurethane or hardwax oil. Vacuum thoroughly and wipe with a tack cloth. Epoxy and CA both show every sanding scratch under a glossy clear coat, so do not skip grits. Sand to at least 220 grit on the epoxy itself if you want a glassy clear knot that you can see into.
Most finishes adhere to cured epoxy and CA without issues, but oil-heavy fills like epoxy putty can repel water-based finishes. If you used epoxy, you can apply oil, lacquer, or water-based poly directly after sanding. If you used conventional wood filler, seal the fill with a thin coat of dewaxed shellac first to prevent uneven finish absorption and a dull halo around the patch.
Mistakes That Cause Fills to Fail
Over-sanding the wood around the fill is the most common error. The filler is level but the surrounding wood is scooped, so light catches a dip. Use a hard sanding block and check with a straightedge.
Pouring epoxy too deep in one go traps heat and air. If the void is deeper than 1/4 inch, do it in two pours. The first locks in bubbles, the second finishes clear.
Trying to stain filler to match wood rarely works. The filler does not absorb stain the same way. Always tint the filler itself before it cures and test the color. For a natural look under clear finish, it is better to go slightly darker than the base wood rather than lighter, dark fills read as natural knots while light fills look like putty.
Finally, do not fill wood that is still above 12 percent moisture content. As it dries it will shrink and the rigid fill will crack or stand proud. Let the slab acclimate and check with a pin meter before you start.



0 Comments