What's inside
As an Amazon Associate I earn from qualifying purchases. This post may contain affiliate links at no extra cost to you.
Gluing hardwood to plywood can produce a flat, strong cabinet panel, but the joint needs to account for wood movement. The biggest mistake is treating a wide solid-wood board like a sheet of plywood. Solid hardwood expands and contracts across its grain as humidity changes; plywood moves much less because its layers run in alternating directions. A rigid glue joint across a wide panel can split, bow, or pull apart.
As an Amazon Associate we earn from qualifying purchases at no extra cost to you.


Our Top Picks
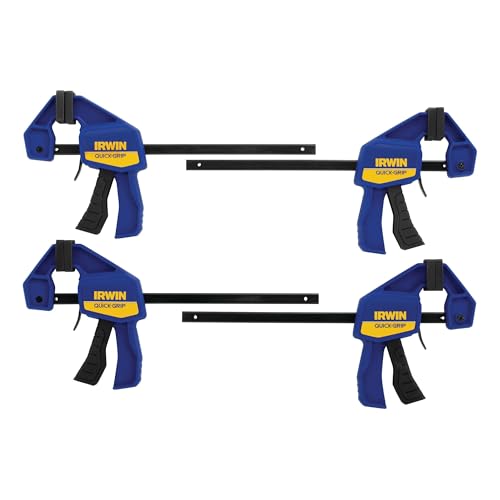 IRWIN Quick-Grip 1964758 One-Handed Mini Bar Clamp 44 Count (Pack of 1)21 x 8 x 2.5 Inches1 poundsCheck on Amazon


Choose the Panel Construction
First decide whether the hardwood is a thin veneer, a narrow solid-wood edging, or a wide solid face. Each requires a different approach.
| Construction | Best adhesive | Main concern |
|---|---|---|
| Wood veneer over plywood | Veneer glue or PVA | Even pressure and preventing bubbles |
| Solid hardwood edging, up to about 2 inches wide | Interior PVA | Keeping the strip aligned while clamping |
| Solid hardwood face, more than 4 inches wide | Usually not a rigid full-surface glue-up | Wood movement and panel cupping |
For a cabinet door or side panel, the safest design is usually plywood with solid hardwood edging, or a plywood center panel held in a hardwood frame. If you want the appearance of a wide hardwood slab, consider using a hardwood veneer over cabinet-grade plywood rather than gluing a thick board over the entire surface.
Select the Right Glue
For ordinary interior cabinet work, a quality Type II or Type III PVA wood glue is the economical choice. It cleans up with water while wet, sands reasonably well, and forms a stronger joint than the surrounding wood when the surfaces fit properly. Type III PVA is preferable where the panel may encounter occasional moisture, such as a kitchen or laundry-room cabinet.
Use a Type III wood glue when you need improved water resistance. Waterproof polyurethane glue can bond wood, but it foams as it cures and does not fill badly fitting joints reliably. It also requires lightly dampened surfaces and careful cleanup. It is rarely a better choice than PVA for a clean, tight cabinet joint.
Contact cement is suitable for some plastic laminates, not for a structural hardwood-to-plywood joint. Epoxy works on difficult or imperfect surfaces, but it costs more, is harder to sand, and can leave a visible glue line. Use it when you specifically need gap filling or bonding to a material that PVA will not hold.
Prepare the Hardwood and Plywood
Let both materials acclimate in the cabinet shop or room for at least several days. Store them flat with stickers between larger pieces so air can reach both faces. A common target is about 6% to 8% moisture content for heated indoor furniture, although the correct level depends on your local climate.
Check the plywood for a flat, sound face. Cabinet-grade birch, maple, or veneer-core plywood is easier to use than construction plywood, which may have voids, rough patches, and excessive internal stress. Do not glue to a dusty, oily, waxed, or heavily finished surface. If the plywood has a factory-sanded face, lightly scuff it with 120- or 150-grit abrasive and remove the dust.
Mill the hardwood flat and straight. Sanding alone will not correct a twisted board. Plane or joint the mating face, then make a final pass with a sharp blade. A smooth freshly cut surface is good; polishing it with very fine sandpaper can reduce glue penetration. If sanding is necessary, stop around 120 grit.
Dry-fit the parts before opening the glue. Check that the hardwood covers the plywood evenly, that corners are square, and that clamps can reach every part of the joint. For a wide glue-up, make a clamping caul from straight scrap covered with packing tape or clamp cauls so the clamps do not dent the panel.
Apply Glue and Clamp Correctly
Spread a thin, continuous coat over the plywood and the hardwood mating surface. A glue roller, small notched spreader, or stiff scrap of cardboard works well. You should see complete coverage without puddles. Too much glue increases squeeze-out and can make the panel slide out of position.
For solid edging, apply glue to both parts if the surfaces are narrow or especially absorbent. Position the hardwood slightly proud of the plywood, then use masking tape, a temporary brad, or a few spring clamps to stop it from walking. Place bar clamps about every 6 to 8 inches, alternating them above and below the panel to reduce bowing. Tighten until a small, continuous bead appears; more force is not better and can squeeze out the glue film.
For a veneer or thin hardwood skin, use even pressure over the entire surface. A vacuum press is ideal, but a flat caul with many clamps can work on small panels. Protect the finished face with wax paper or plastic film. Ordinary PVA generally needs at least 30 to 60 minutes of clamp time, but leave the panel undisturbed for 24 hours before heavy machining. Cool or damp conditions slow curing.
Avoid Movement-Related Failures
The grain direction matters. Hardwood expands mostly across the grain, not along it. A 12-inch-wide plain-sawn board can change by roughly 1/8 inch or more between dry winter and humid summer conditions, depending on species and moisture range. Plywood will not follow that movement.
For that reason, do not permanently glue a wide solid board across a plywood panel unless the solid layer is thin enough to behave like veneer. Instead, attach solid edging only at the edges, use elongated screw holes or figure-eight fasteners, or redesign the part as a hardwood frame with a floating plywood panel. If the hardwood face is narrow, under about 2 inches, the movement is usually small enough for a conventional glue joint in indoor furniture.
Trim, Sand, and Finish
After curing, trim the hardwood flush with a router, hand plane, or sharp block plane. A flush-trim bit works well, but take light passes to avoid tearing the plywood veneer. Sand the joint starting at 120 grit and progress to 150 or 180 grit. Stop when the surfaces are flush; aggressive sanding can create a hollow beside the glue line or sand through a thin veneer.
Remove glue squeeze-out before finishing. Dried PVA can resist stain and leave pale spots. A damp cloth is effective while the glue is fresh, but do not flood unfinished plywood or force glue into end grain. For cured residue, pare it away with a scraper or chisel, then sand lightly.
Test the stain or paint system on an offcut. Hardwood and plywood may absorb color differently, especially when their species or veneer cuts differ. A sanding sealer or wood conditioner can reduce blotching on species such as pine, cherry, and maple, but it can also reduce stain intensity. If a uniform painted panel is the goal, fill minor defects, sand to 180 grit, and use a suitable bonding primer before the topcoat.
What to Buy
For most cabinet panels, spend money on flat plywood, accurately milled hardwood, and enough clamps rather than exotic adhesive. A Type II wood glue is fine for dry interior cabinets. Choose Type III for added moisture resistance, and buy a wood moisture meter if you are working with valuable lumber or a large batch of panels. Accurate preparation and a movement-tolerant design matter more than using the strongest glue on the shelf.



0 Comments