What's inside
As an Amazon Associate I earn from qualifying purchases. This post may contain affiliate links at no extra cost to you.
A bathroom mirror frame needs more than attractive grain. It must tolerate humid air, occasional splashes, temperature changes, and repeated cleaning without turning gray, swelling at the joints, or developing a cloudy finish. For a clear-finished frame, the best wood is usually a stable, straight-grained species with low movement and a surface that does not need heavy stain to look good.
For most projects, white oak is the safest all-around choice. Hard maple is a good choice for a light, modern frame, while walnut provides a darker appearance without stain. Poplar and pine can work when cost matters, but they require more careful finishing and are less convincing under a clear coat.
As an Amazon Associate we earn from qualifying purchases at no extra cost to you.



Our Top Picks
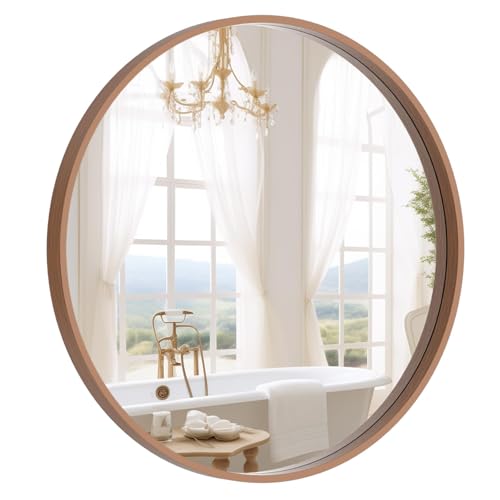 WallBeyond Wood Round Mirror with Wood Frame 2424"L x 24"W23.6 x 23.6 x 1.8 inches5 poundsCheck on Amazon
 Varathane Water-Based Ultimate Satin PolyurethaneHalf Pint (Pack of 1)3 x 3 x 3 inches0.64 poundsCheck on Amazon


Best wood species for a clear-finished mirror frame
| Wood | Appearance under clear finish | Bathroom performance | Best use |
|---|---|---|---|
| White oak | Strong grain, tan to medium brown | Very good when sealed on all sides | Best general-purpose choice |
| Hard maple | Very light, subtle grain | Very good; stable and dense | Clean contemporary frames |
| Walnut | Rich brown, distinctive grain | Good, but costs more | Premium dark frames |
| Cherry | Warm reddish brown that darkens | Good with complete finish coverage | Traditional or furniture-style frames |
| Poplar | Pale greenish or gray-green, often uneven | Acceptable in a well-ventilated bathroom | Painted frames or low-cost projects |
| Pine | Visible knots and strong variation | Fair; soft and prone to dents | Rustic frames and tight budgets |
White oak is the easiest recommendation for a natural clear finish. It has attractive grain, reasonable dimensional stability, and enough hardness to resist dents around the mirror. Quarter-sawn or rift-sawn oak is especially stable and gives a straighter, less dramatic grain pattern.
Hard maple is dense and durable, but its pale color shows sanding scratches, glue spots, and uneven finish more readily than oak. Use it when you want an almost white frame. It is not the easiest species to stain evenly, so a clear finish is usually the better plan.
Walnut is a strong choice if the frame is meant to be a feature. It generally looks good with clear water-based or oil-based finish and does not need stain. The trade-off is price: walnut may cost several times more than poplar or common pine.
Woods that need extra caution
Do not confuse “moisture resistant” with “waterproof.” Any solid wood frame can move if one face absorbs more humidity than the other. Avoid using a thin, wide solid-wood board as a single uninterrupted frame rail. Narrower pieces, properly joined corners, and finish on every surface reduce the risk.
Highly figured or highly unstable woods can be used, but they are poor choices for a first bathroom frame. Green, freshly milled, or improperly dried lumber may twist after installation. Check boards with a straightedge and reject pieces with cup, bow, open end checks, or obvious internal cracks.
Pressure-treated lumber, construction studs, and outdoor decking are also unsuitable. They are usually too wet, too rough, or chemically treated for an indoor finish-quality project. If you like the look of cedar, remember that its soft surface dents easily and its aromatic oils can interfere with some finishes.
Construction and joinery
Use kiln-dried furniture-grade boards with a moisture content around 6% to 10% for a typical heated home. Let the wood acclimate in the bathroom or an adjacent room for at least several days, then cut it. A frame made from four rails is more reliable than one assembled from wide stock with large cross-grain changes.
For a simple frame, mitered corners reinforced with splines, biscuits, or loose tenons are better than an unsupported miter. A pocket-screw joint can work on the back, but it may pull the miter out of alignment if the stock is thin. Butt joints are less decorative but often stronger and easier to make accurately.
Use a water-resistant wood glue such as a Type II or Type III PVA for normal indoor bathroom conditions. Type III is the better choice near a sink or in a bathroom with poor ventilation, but no glue compensates for a joint that does not fit. Apply glue only to the mating wood surfaces and wipe squeeze-out promptly; dried glue will show as a pale patch under clear finish.
Leave enough clearance for the mirror and its clips or backing. Do not trap the mirror tightly inside a frame that can shrink and swell. A small gap hidden behind a rabbet or rear trim is safer than forcing the glass into a rigid opening.
Choosing a clear finish
A bathroom frame should receive finish on the front, back, edges, inside rabbet, and especially the end grain. End grain absorbs water quickly and is often the first place to darken or split. Two or three thin coats are generally better than one heavy coat.
Water-based polyurethane is a practical default. It dries quickly, adds little amber color, and usually produces a hard film suitable for a bathroom. Sand lightly with 320-grit paper between coats when the label calls for it. It may raise the grain on the first coat, particularly on oak, so expect to sand after that coat.
Oil-based polyurethane gives oak, walnut, and cherry a warmer appearance and can look excellent, but it ambers over time and takes longer to dry. Allow at least 24 hours between coats in a cool or humid room. Do not install the frame until the finish has cured enough that bathroom moisture will not leave a soft or cloudy surface.
For a lower-sheen, furniture-like result, consider a hardwax oil. It is easy to repair and pleasant to touch, but it is not as thick or protective as a full film finish. It requires disciplined coverage and periodic maintenance if the frame receives frequent splashes.
Spray lacquer is fast and attractive but less forgiving for a home project. Its solvents require strong ventilation, suitable respiratory protection, and strict attention to fire safety. It is not the first recommendation for an occupied bathroom.
Sanding and finishing procedure
Mill or sand the wood flat, then work through 120, 150, and 180 grit. Stop at 180 or 220 grit for most species. Polishing the surface much finer can reduce finish adhesion and make uneven areas harder to detect. Break sharp outside edges with a light pass of 180-grit paper; a tiny radius holds finish better than a razor edge.
Before applying finish, vacuum the frame and wipe it with a clean, dry cloth. Avoid soaking the wood with water to raise the grain unless you are prepared to let it dry fully and sand again. Test the finish on an offcut. This is especially important with maple, cherry, pine, and any board with mixed heartwood and sapwood.
If you use a clear wood grain filler, apply it mainly when you want a smooth, glass-like surface on open-grained oak or walnut. It is optional for a natural satin finish. Fill nail holes and joints with a compatible product, since some colored fillers remain obvious under clear coats.
Seal the back of the frame before mounting it, and leave ventilation space between the frame and the wall when practical. In a well-ventilated bathroom, inexpensive pine or poplar is perfectly reasonable if you accept dents, color variation, and more careful sealing. If the frame is directly above a sink or you want the best chance of trouble-free service, choose white oak, maple, walnut, or cherry and finish every surface completely.



0 Comments