What's inside
As an Amazon Associate I earn from qualifying purchases. This post may contain affiliate links at no extra cost to you.
A natural satin sheen comes from two things: the wood’s own color and figure, and a finish that protects without building a thick, plastic-looking film. The best species are not always the most expensive. Even inexpensive pine can look good under a low-sheen finish, while some premium woods become blotchy, muddy, or overly dark if the preparation is wrong.
For most indoor projects, aim for a finish between roughly 20% and 40% gloss. This range leaves the grain visible, hides minor handling marks better than a gloss finish, and feels smoother than an entirely unfinished surface. Water-based polyurethane, wiping varnish, hardwax oil, and satin lacquer can all work, but each changes the color and maintenance requirements.
As an Amazon Associate we earn from qualifying purchases at no extra cost to you.



Our Top Picks
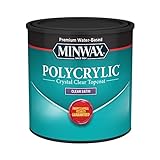
 Minwax 233334444 Polycrylic Protective Wood Finish8 fl oz2.9 x 2.9 x 3 inches0.66 poundsCheck on Amazon
 Varathane Triple Thick Polyurethane Satin Wood Finish1 Quart (Pack of 1)4.25 x 4.25 x 5 inches0.9 poundsCheck on Amazon
 1/2 pt Minwax 13407 Clear Pre-Stain Wood Conditioner1/2 Pint3 x 3.25 x 3 inches0 PoundsCheck on Amazon

Best species at a glance
| Wood species | Natural appearance | Best satin finish | Main drawback |
|---|---|---|---|
| White oak | Open grain, tan to medium brown | Water-based polyurethane or hardwax oil | Open pores need extra sanding attention |
| Walnut | Deep brown with dark grain | Clear wiping varnish or hardwax oil | Can look flat if over-sanded or heavily coated |
| Maple | Fine, pale, understated grain | Water-based satin polyurethane | Stains unevenly |
| Cherry | Warm pink-brown that darkens with age | Clear satin varnish or oil | Darkens noticeably in sunlight |
| Birch | Pale cream with subtle grain | Water-based finish over conditioner or sealer | Blotches easily with stain |
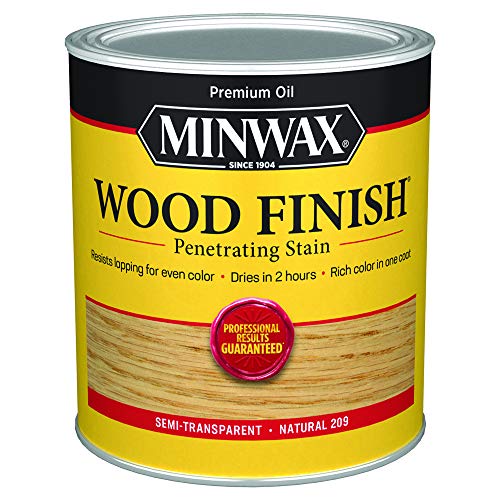
| Pine | Light color with prominent knots | Wiping varnish or water-based polyurethane | Soft surface dents and absorbs stain unevenly |
White oak: the safest all-around choice
White oak is usually the best starting point when you want a natural satin surface with visible grain. Its tan color, strong rays, and open pores remain attractive under both clear and lightly tinted finishes. It also has enough hardness for tables, shelving, cabinets, and frequently handled trim.
Use a satin water-based polyurethane when you want minimal color change and good resistance to water and abrasion. Apply three thin coats, sanding lightly with 320-grit paper between coats if the product recommends it. White oak’s open grain can collect finish dust, so vacuum thoroughly and wipe with a clean, slightly damp microfiber cloth before coating.
Hardwax oil gives oak a less uniform, more tactile appearance, but it provides less protection against standing water and abrasion than a tough polyurethane film. It is a good choice for furniture that can be wiped and maintained rather than abused.
Walnut and cherry: rich color without stain
Walnut already supplies the dark, natural color many people try to create with stain. A clear satin finish is generally better than adding pigment, which can obscure the contrast between lighter sapwood and darker heartwood. A thin wiping varnish or hardwax oil keeps the surface looking deep without creating a heavy shine.
Walnut can look dull if sanded too aggressively. Stop at 180 or 220 grit for most furniture, then remove all dust before finishing. Sanding to 400 grit does not automatically improve the result; it can burnish the surface and reduce finish adhesion.
Cherry starts pink or salmon-colored and gradually turns a deeper reddish brown. Clear finish accelerates the visual contrast between fresh and aged areas, especially near windows. If consistent color matters, keep parts from different boards together during finishing and test the finish on an offcut. Do not judge cherry from a wet sample alone; the color changes as the coating dries.
Maple and birch: pale woods that reward restraint
Hard maple has a clean, fine texture and looks excellent with a clear satin water-based finish. Because the grain is subtle, a glossy coating can make it look artificial. Satin is more forgiving and leaves the pale color intact.
Maple and birch are poor candidates for casual staining. Their tight and uneven grain absorbs pigment at different rates, producing dark patches and cloudy areas. If you want color, use a dye, toner, or a tested conditioner-and-stain system rather than applying an ordinary oil stain directly. A cheap clear finish is often the better buy when the goal is simply to protect pale wood.
For a smooth surface, sand through 120, 150, and 180 grit, then stop at 220. Between water-based coats, use 320-grit paper or a fine abrasive pad with light pressure. Heavy sanding can expose uneven areas or create visible swirl marks under the satin film.
Pine and other softwoods: inexpensive, but less predictable
Pine is fine for shelves, wall projects, utility furniture, and painted work. It offers good value, but its soft earlywood dents easily and its knots can bleed resin through some finishes. Choose boards with dry, tight knots, and let fresh lumber acclimate indoors for several days before finishing.
Stain is the common failure point. Pine’s end grain and soft bands absorb more color than dense bands, creating stripes. A pre-stain conditioner can reduce the contrast, though it may also make the final color lighter. Another reliable option is a clear satin finish, which shows the wood honestly without emphasizing every absorption difference.
Use a pre-stain wood conditioner when color consistency matters, but test it first. On some pine, conditioner makes the stain too weak. For a durable tabletop, pine benefits from a film finish, such as satin polyurethane, rather than oil alone.
Preparation determines the sheen
Flatten glue spots before sanding. Dried glue prevents stain and finish from penetrating, leaving pale outlines that are difficult to repair. Scrape or sand glue with 120-grit paper, then continue through 150 and 180 grit. Inspect the surface under raking light; scratches that are invisible overhead often show clearly after finish is applied.
Break sharp edges with one or two light passes of 180-grit paper. A perfectly sharp edge holds less finish and wears through sooner. Do not round it heavily unless that is part of the design. Remove dust with a vacuum and clean cloth. Avoid soaking bare wood with water unless you intentionally plan to raise the grain and sand it back.
Choosing a satin finish
For tables, desks, and cabinet doors, satin polyurethane is the practical choice. Oil-based products warm the wood and usually level well, but they amber over time and may require 24 hours or more between coats. Water-based products dry faster and stay clearer, but they can raise the grain slightly and show application marks if brushed too slowly.
For low-touch furniture and a natural hand-rubbed appearance, consider a satin hardwax oil. Apply thinly, wipe off excess, and follow the curing time exactly. Leaving a thick layer wet on the surface causes soft spots, streaks, and an uneven sheen.
If you want the cheapest acceptable route, use a clear satin finish on attractive wood and skip stain. Spend money on good sanding, dust control, and a sample board before upgrading the coating. Those steps have more influence on the final appearance than choosing between two similarly rated satin products.



0 Comments