What's inside
As an Amazon Associate I earn from qualifying purchases. This post may contain affiliate links at no extra cost to you.
The best wood for a clear-finished sideboard is usually walnut, white oak, or maple. The right choice depends on the look you want, how much movement and denting the piece will see, and whether you are building from solid boards, plywood, or both. Clear finish will not hide mismatched color, uneven sanding, glue spots, or poor joinery, so species selection and surface preparation matter more than they do on a painted cabinet.
As an Amazon Associate we earn from qualifying purchases at no extra cost to you.


Our Top Picks
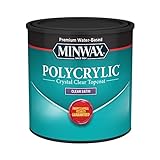
 Minwax 233334444 Polycrylic Protective Wood Finish8 fl oz2.9 x 2.9 x 3 inches0.66 poundsCheck on Amazon
 Varathane Water-Based Ultimate Satin PolyurethaneHalf Pint (Pack of 1)3 x 3 x 3 inches0.64 poundsCheck on Amazon


Best species for a clear finish
| Wood | Appearance under clear finish | Workability | Best use |
|---|---|---|---|
| Walnut | Rich brown, often with attractive grain variation | Machines well; can burn when routed or sawn dull | Premium sideboards and dark interiors |
| White oak | Warm tan to brown, prominent grain and rays | Hard and durable; can be difficult to hand-plane | Modern, Scandinavian, and heavily used pieces |
| Hard maple | Very light, clean, and subtle | Hard; prone to visible sanding marks and blotchy color from stain | Minimalist designs and light finishes |
| Cherry | Pinkish brown that darkens noticeably with light | Generally pleasant to work | Traditional furniture and warm interiors |
| Ash | Light-colored with bold, open grain similar to oak | Machines well but has open pores | Lower-cost oak alternative |
| Poplar | Greenish-white to gray, sometimes with purple streaks | Easy to cut and sand; dents relatively easily | Budget builds, usually painted rather than clear-finished |
Walnut is the safest premium recommendation if you want a dark sideboard without staining. Its natural color is forgiving of small differences between boards, and a clear oil or satin varnish brings out the grain. Walnut is expensive, however, and sapwood can be nearly white. Either accept that contrast, arrange the boards carefully, or buy selected heartwood at a higher price.
White oak is the best all-around choice for many sideboards. It is hard enough for shelves, doors, and exposed edges, and its strong grain remains visible under clear finish. Quarter-sawn or rift-sawn oak gives a calmer, more contemporary appearance than ordinary flat-sawn boards. Oak’s open pores are not a defect, but a perfectly flat, glass-like surface requires grain filling.
Hard maple works well when you want a pale, clean cabinet. It is less visually forgiving than walnut or oak: scratches, glue residue, swirl marks, and uneven finish are easy to see. Maple also tends to look bland if the design depends on dramatic grain. Use it when the geometry and proportions of the sideboard are doing most of the visual work.
Solid wood versus plywood
A sideboard rarely needs to be made entirely from solid lumber. Use solid wood for the face frame, door frames, legs, and visible edge parts, then use veneered plywood for broad cabinet sides, shelves, and the top when appropriate. Good plywood is more stable across its width and avoids large seasonal movement in wide panels.
For a 24-inch-wide solid-wood top, allow for movement across the grain. A top can change by roughly 1/8 to 1/4 inch across its width between dry winter and humid summer conditions, depending on the wood and indoor climate. Attach it with figure-eight fasteners, tabletop clips, or elongated screw holes. Do not glue a solid top rigidly to a cabinet carcass across its entire width.
Match the plywood veneer to the solid edging. A walnut sideboard with thin walnut edging over birch plywood can look excellent, while a mismatched core or noticeably different veneer can make clear finishing look cheap. Inspect plywood edges before buying; voids and thin face veneers become obvious after routing or sanding.
Stain and clear finish decisions
If you like the natural color of walnut, cherry, oak, or maple, skip stain. Stain adds another opportunity for blotches and uneven absorption, especially on end grain and sanded-through veneer. A clear finish also makes color matching easier because you can test the actual wood rather than trying to predict how a stain will behave.
For a practical sideboard, a water-based polyurethane is a good low-odor choice. It dries quickly, stays relatively clear, and allows several coats in a day. Oil-based polyurethane gives more amber warmth and usually provides a longer open time for brushing, but it smells stronger and can take 24 hours or more between coats in cool conditions.
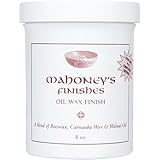
Hardwax oil is easy to repair and gives a natural, low-build appearance, but it offers less film protection than a well-built polyurethane finish. It is suitable for a sideboard in normal household use, not a piece that will routinely receive wet glasses, spilled drinks, or aggressive cleaning. For a tougher top, consider a water-based polyurethane wood finish or a quality oil-based varnish.
Surface preparation before finishing
Sand solid wood through 120, 150, and 180 grit, then stop at 180 or 220 depending on the finish manufacturer’s instructions. Sanding much finer than 220 can reduce absorption and make some finishes look uneven. Use a random-orbit sander on broad surfaces, but finish with straight hand sanding in the grain direction. Random swirl marks often appear only after finish is applied.
Break sharp exposed edges with one or two light passes of 180-grit paper. A razor-sharp edge holds almost no finish and chips easily. Do not heavily round the edge unless the design calls for it; a small eased edge looks cleaner and preserves crisp joinery.
Glue squeeze-out is a major clear-finish failure. Dried glue can prevent stain or finish from penetrating, leaving pale patches that are difficult to repair. Remove squeeze-out while it is rubbery, or let it dry and pare it carefully with a chisel. Before final sanding, wipe suspected areas with mineral spirits; glue spots often show as dull or wet-looking patches. For cabinet assembly, use a quality interior PVA wood glue and keep glue off visible faces.
Applying the finish without defects
Make a sample board from the actual wood, including the same sanding schedule and any end grain. Apply the complete finish schedule before committing to the sideboard. This reveals unexpected darkening, yellowing, raised grain, sheen, or incompatibility between stain and topcoat.
Remove dust with a vacuum and a clean, lint-free cloth. Avoid flooding corners and inside edges; runs collect there and can glue doors or drawers shut. Most film finishes need two or three thin coats, with a light sanding between coats when specified. Use 320-grit abrasive or a fine synthetic pad to remove nibs, then clean thoroughly before recoating.
Let the completed sideboard cure longer than it takes to become touch-dry. A water-based finish may feel dry in an hour but still mark under pressure. Give it several days before installing hardware or loading shelves, and avoid placing hot or wet objects on the top until the finish has fully hardened.



0 Comments