What's inside
As an Amazon Associate I earn from qualifying purchases. This post may contain affiliate links at no extra cost to you.
Our Top Picks
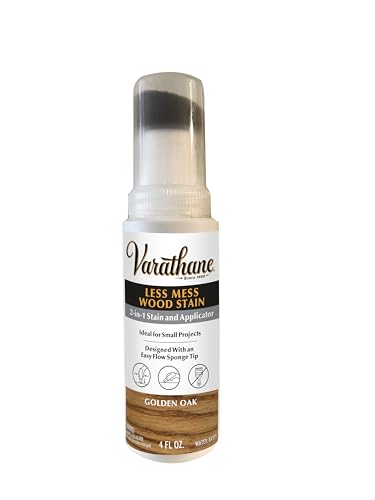 Varathane Less Mess Golden Oak Wood Stain &4 Ounce (Pack of 1)1.75 x 1.75 x 6.5 inches0.25 poundsCheck on Amazon
 1/2 pt Minwax 13407 Clear Pre-Stain Wood Conditioner1/2 Pint3 x 3.25 x 3 inches0 PoundsCheck on Amazon

What Makes a Honey Finish Blotchy
A honey finish is a warm, golden-amber tone, usually with more yellow than brown. It looks simple, but it exposes uneven absorption more than darker stains do. Any blotch, lap mark, or grain reversal shows up as a cloudy orange spot or a dark streak.
Blotching comes down to wood anatomy. Diffuse-porous woods like maple, birch, cherry, and alder have inconsistent density across the growth rings. Soft earlywood soaks up pigment fast, hard latewood resists it. Ring-porous woods like oak and ash have large open pores that grab stain differently than the surrounding fibers. Softwoods like pine have the worst of both — very soft earlywood and resin content.
As an Amazon Associate we earn from qualifying purchases at no extra cost to you.


For a uniform honey, you want either a wood that absorbs evenly on its own, or a tight, closed grain that lets you control color with a sealer or dye instead of relying on heavy pigment.
Best Species for a Uniform Honey Finish, Ranked
If your priority is even color with minimal extra steps, not every popular wood is equal. This ranking assumes you are using a standard oil-based or water-based honey stain and basic shop preparation (sanded to 180 grit, no spray equipment).
| Species | Uniformity | Grain Visibility Under Honey | Approx. Cost (4/4 lumber) | Best For |
|---|---|---|---|---|
| Alder (Knotty or Clear) | Excellent – Very even | Low to moderate, fine grain | $3.50 – $5.50 / bd ft | Cabinets, doors, trim where you want clean color |
| White Oak (quarter or rift sawn) | Excellent | Moderate, linear ray fleck | $8 – $12 / bd ft | Furniture, floors, built-ins that need durability |
| Hard Maple (with conditioner) | Good to Excellent – requires prep | Low, subtle figure | $5 – $7 / bd ft | Modern, minimal grain, but needs careful finishing |
| Beech (European) | Good to Excellent | Low, small flecks | $5 – $8 / bd ft | Workbenches, chairs, Scandinavian look |
| Ash | Good | High, bold grain like oak | $4 – $6 / bd ft | When you want oak-like grain for less money |
| Cherry | Fair – blotches without sealer | Low, smooth with gum pockets | $7 – $10 / bd ft | Warm honey that will darken naturally over time |
For most DIYers who want the easiest path to an even honey tone without spraying dye, clear alder and white oak are the most forgiving. They give you uniform color even if your wiping technique isn’t perfect.
Species Breakdown: Trade-offs and Failure Modes
1. Alder
Alder is the budget-friendly secret for honey finishes. It is a soft hardwood (590 lbf Janka) so it sands easily and stains remarkably evenly for a diffuse-porous wood. It does not have the strong pore contrast of oak, so honey stain reads as a flat, warm field with faint grain. The trade-off is softness — it dents more easily than maple or oak, so avoid it for high-impact tops or floors. Clear alder is uniform; knotty alder will have dark knots that absorb differently, which is a look, not a flaw.
2. White Oak
White oak is the most foolproof if you want visible grain. Its pores are closed with tyloses, so it absorbs slower and more predictably than red oak. With a honey stain, the ray fleck in quarter-sawn or rift-sawn boards stays slightly lighter than the pores, giving definition without blotching. It also takes water-based honey stain very well, which is useful if you want lower odor indoors. Failure mode is mainly over-sanding to 220+ before staining — that burnishes the surface and leaves a pale, weak color. Stop at 150 or 180 grit.
3. Hard Maple
Hard maple can look flawless in honey, but only with a conditioner. Without it, you will get classic blotch: dark, cloudy patches where earlywood soaked up pigment. The fix is a thin washcoat before stain — either a commercial pre-stain wood conditioner or a 1 lb cut of dewaxed shellac. Apply, let it tack for 10-15 minutes, then stain within 2 hours. Wipe stain off quickly, within 2-3 minutes, and keep a wet edge. Do not let honey stain sit for 10 minutes on maple hoping for deeper color — it just gets blotchy, not deeper. If you want darker honey on maple, use a dye or tinted topcoat instead.
4. Beech
European beech behaves like a better-behaved maple. It is diffuse-porous but more uniform in density, so it blotches less. It sands to a very smooth surface and honey stain sits evenly. Watch for tension wood — boards with a fuzzy, woolly feel after sanding will finish unevenly. Re-sand those areas to 180 and lightly dampen to raise grain before the final sand.
5. Ash
Ash is a cheaper substitute for white oak with similar grain. It stains evenly enough for honey, but its large earlywood pores will appear noticeably darker than the surrounding wood, creating a strong striped look. Some people want that contrast; if you want a flat, uniform field, ash is not the right choice. Use a grain filler if you want to even it out, but that adds a full day to the process.
6. Cherry
Cherry is tricky for honey. It is photosensitive and will darken to a deeper amber-brown on its own within 3-6 months of light exposure, so a honey stain you apply today will look different by winter. It also blotches badly with pigment stains. If you use cherry, skip heavy pigment stains and use a light honey dye, then topcoat. The natural aging will do the rest. Do not be surprised if the blotch you “fixed” reappears as the wood darkens unevenly.
The Finishing System That Keeps Honey Even
Wood choice is half the job. The other half is controlling absorption. For the most uniform result with minimal equipment:
1. Sand progressively: 120, then 150, then 180 grit. Do not skip grits. Vacuum thoroughly and wipe with a tack cloth, not a wet rag that raises grain unevenly. Break all edges lightly — sharp edges sand through stain.
2. For maple, cherry, birch, or pine: apply pre-stain conditioner. For alder, beech, oak, and ash: you can usually skip it, but a light conditioner does not hurt if you are using a strong pigment stain.
3. Stir — never shake — the stain. Test on a scraper or offcut from the same boards, sanded the same way. Honey stains shift dramatically with dwell time. Start by wiping on and wiping off within 60-90 seconds for a light honey, 2-3 minutes for medium.
4. Apply with the grain in manageable sections (2-3 feet), maintain a wet edge, and wipe off with clean cotton rags, not paper towels that redeposit pigment. Change rags often.
5. Lock the color with a sanding sealer or first topcoat. If you need to adjust color, use a dewaxed shellac sanding sealer tinted with a few drops of honey dye as a toner coat. This is far more controllable than trying to get a second coat of pigment stain to go on evenly — a second coat of pigment often lifts and streaks.
Water-based honey stains give you longer open time and less grain raising if you pre-raise the grain (wipe with distilled water, dry, re-sand at 180). Oil-based honey gives a slightly richer, deeper tone but shows lap marks faster in warm shops.
Species to Avoid If You Want Uniform Honey
Pine (especially Southern Yellow Pine): Very soft earlywood acts like a sponge. Even with conditioner, honey often looks splotchy orange and pale. If you must use pine, use a gel stain — the thick formula sits on top instead of soaking — but expect a painted look with little grain clarity.
Birch: Looks like maple on the rack but blotches worse than maple. Plywood birch is even more inconsistent due to veneer density changes. Only choose it if you are comfortable spraying dye.
Poplar: The classic paint-grade wood. Heartwood has green-purple streaks that turn muddy brown under honey stain and do not take color evenly. Sapwood is pale and stains better, but you rarely get all-sapwood boards.
Red Oak: Usable, but its open pores soak honey stain deep and read as dark brown grain lines against a yellow field. If you want subtle, even honey, white oak is worth the extra $2 per board foot.
What to Buy If You Want the Easiest Honey Finish
If you are buying new lumber for shelves, a table top, or cabinet doors and want to keep finishing simple: buy clear alder if you want a smooth, modern honey with faint grain, or rift-sawn white oak if you want visible linear grain and maximum hardness.
Both are available as S4S boards at most hardwood dealers and some home centers. Ask for boards from the same lot and check them in daylight — honey will exaggerate any color difference between boards that looked similar under warehouse lights. Buy 20% extra and color-match before you cut.
If you already have maple or birch on hand, do not replace it. Just budget an extra hour for conditioning and testing, and accept that the cheapest way to fix blotch is prevention, not a heavier topcoat to hide it.



0 Comments