What's inside
As an Amazon Associate I earn from qualifying purchases. This post may contain affiliate links at no extra cost to you.
A bathroom cabinet shelf needs more than a good-looking grain. It has to stay flat through repeated humidity changes, accept a clear finish without blotching, and tolerate wet bottles, cleaning products, and the occasional standing puddle. For most clear-finished bathroom shelves, the best choices are straight-grained hardwoods or a high-quality veneer plywood with a hardwood edge. Oak, maple, cherry, and teak all work, but they have different costs and finishing requirements.
As an Amazon Associate we earn from qualifying purchases at no extra cost to you.

Our Top Picks
 Polyurethane Wood Finish Water Based Polyurethane Clear Gloss100 ml1.6 x 1.6 x 4.7 inchesCheck on Amazon

Best wood choices at a glance
| Wood | Best use | Advantages | Drawbacks |
|---|---|---|---|
| White oak | Durable, traditional shelves | Hard, stable, attractive grain, easy to repair | Open pores need extra finish; moderate cost |
| Hard maple | Light-colored modern cabinets | Dense, smooth, relatively water-resistant | Can look plain; blotchy under some finishes |
| Cherry | Warm, furniture-style cabinets | Machines and finishes well; ages attractively | Darkens significantly with light; softer than maple |
| Teak | High-moisture or premium projects | Naturally decay-resistant and dimensionally stable | Expensive, oily, and harder to glue and finish |
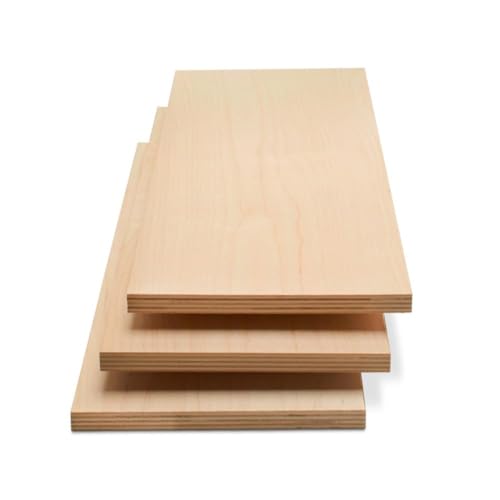
| Birch or maple plywood | Stable, budget-conscious shelves | Less likely to cup than solid boards; consistent thickness | Edges need banding or solid-wood edging |
Best overall: white oak
White oak is the safest all-around recommendation for a clear-finished bathroom cabinet shelf. It is hard enough to resist dents from bottles, has a distinctive grain under clear finish, and is less troublesome than many exotic woods. Quarter-sawn or rift-sawn white oak is especially stable and gives the shelf a cleaner, straighter appearance.
Oak is not waterproof. Water can still darken unfinished end grain and eventually cause cupping or staining. Seal every face, edge, and especially the front and rear end grain. Oak’s open pores also remain visible under a clear finish. That is usually a feature, but it is not the right choice if you want a perfectly smooth, glasslike surface without filling the grain.
For a shelf wider than about 10 inches, use quarter-sawn lumber, a plywood core, or add a substantial front nosing. A solid 12-inch-wide board can move noticeably across its width as bathroom humidity changes.
Best budget choice: hardwood plywood
A high-quality cabinet-grade birch plywood is often the practical choice. Its cross-laminated construction greatly reduces cupping and twisting, which matters more in a humid room than the species name on the face veneer. A 3/4-inch panel is suitable for many cabinet shelves, but a 1- to 1 1/2-inch hardwood front edge makes it stiffer and gives it the appearance of solid furniture.
Avoid construction plywood with football-shaped patches, thin face veneers, voids, or rough plies. Those defects can telegraph through finish and make edge treatment difficult. Sanded “utility” plywood is cheaper, but it is fine only when the shelf is hidden or painted. For a clear finish, pay for a consistent face veneer.
Apply solid-wood edge banding at least 1/8 inch thick, preferably 1/4 inch or more on the front. Thin iron-on veneer edging can work on a lightly used shelf, but it is easier to damage and harder to repair.
When maple, cherry, or teak makes sense
Hard maple is a good match for white or light-colored cabinetry. It is dense and has a fine, clean grain. Its weakness is appearance: clear finish can leave it looking almost featureless, and certain oil-based stains produce uneven dark areas. If you want maple darker, use a compatible conditioner or a dye rather than assuming ordinary stain will be uniform.
Cherry is easier to finish and has a warmer, more furniture-like appearance. It is moderately hard rather than exceptionally hard, so it can show dents around the shelf front. Cherry also darkens substantially from sunlight and age. A clear-coated cherry shelf may look noticeably deeper in color after a year or two; this is normal, not finish failure.
Teak handles moisture well, but it is rarely worth the price for an ordinary bathroom cabinet. Its natural oils can interfere with glue and finish adhesion. If you use teak, clean freshly sanded surfaces with the finish manufacturer’s recommended solvent, allow it to dry completely, and test the complete finishing schedule on scrap. Teak is a specialty choice, not a shortcut to a waterproof shelf.
Choose the finish before preparing the wood
For a clear-finished shelf, a water-based polyurethane is a strong general-purpose option. It dries quickly, adds little amber color, and makes it possible to apply several coats in one day. It can feel slightly less warm than oil-based polyurethane, and raised grain after the first coat is common.
Oil-based polyurethane gives oak and cherry a warmer tone and typically builds a forgiving film. The trade-offs are stronger odor, longer drying time, and more ambering. Bathroom ventilation matters, especially in a small room.
Use a water-based polyurethane or oil-based polyurethane rated for interior woodwork—not a thin furniture oil alone—if the shelf will regularly get wet. Penetrating oils are easy to refresh, but they do not provide the same barrier against standing water. Avoid relying on wax as the primary finish.
Preparation and application
Start with dry wood acclimated indoors for several days. Mill or sand it flat, then progress through 120, 150, and 180 grit. Stop at 180 or 220 grit unless the finish manufacturer specifies otherwise; polishing the surface too smooth can reduce adhesion. Break sharp edges with one or two light sanding passes. A razor-sharp edge holds too little finish and chips easily.
Remove dust with a vacuum and a clean, slightly damp microfiber cloth. Do not flood the surface with water. On oak, an optional grain filler can produce a smoother surface, but it also changes the look and adds a separate compatibility test. On maple, cherry, and other blotch-prone woods, test the finish on an offcut before committing to stain.
Apply at least three thin coats to the top, bottom, edges, and end grain. Sand lightly with 320 grit between coats only when the label calls for it or when dust nibs need removal. Pay special attention to the front edge and the shelf-pin holes. Do not leave raw wood inside drilled holes; brush in finish or seal the holes before final assembly.
Installation details that prevent failure
Leave a small clearance—about 1/16 inch per 24 inches of shelf width—for solid wood to expand and contract, depending on the cabinet design. Do not glue a solid shelf tightly into grooves on both sides unless the construction allows movement. For plywood, movement is less of a concern, but the exposed edges still need sealing.
Keep the shelf above areas where water routinely pools, and wipe spills rather than treating the finish as waterproof. Use shelf pins rated for the load, with supports near the front and rear edges. A 3/4-inch shelf carrying heavy bottles may sag if its span exceeds roughly 30 inches; add a center support or increase thickness.
For most projects, choose white oak for visible solid wood, or cabinet-grade birch plywood with a hardwood front edge when stability and price matter more. The finish schedule and sealed end grain will have as much influence on service life as the species itself.



0 Comments