What's inside
As an Amazon Associate I earn from qualifying purchases. This post may contain affiliate links at no extra cost to you.
A clear finish shows what the wood is doing, so species choice matters more on a figured cabinet door than it does under paint. The safest pick for a dramatic, light-colored door is hard maple with pronounced figure. If you want warmer color and a more forgiving finishing process, cherry is a strong alternative. Choose the board for its actual grain—not just the species label—and test your finish on an offcut before building the door.
As an Amazon Associate we earn from qualifying purchases at no extra cost to you.

Our Top Picks
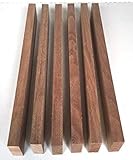
 10 Walnut Boards for Making Cutting Boards24"L x 2"W x 3/4"Th24 x 2 x 0.75 inches8 PoundsCheck on Amazon
 SKIL 5” Random Orbital Sander with Cyclonic Dust5 inches7.87 x 4.8 x 5.51 inches3.44 PoundsCheck on Amazon
 Polyurethane Wood Finish Water Based Polyurethane Clear Gloss100 ml1.6 x 1.6 x 4.7 inchesCheck on Amazon

The best choices for figured grain
| Wood | Appearance under clear finish | Workability and risks | Best fit |
|---|---|---|---|
| Hard maple | Light cream color; curly or quilted figure can have strong chatoyance | Hard and durable, but can blotch with stain; figure may tear out when planed | A crisp, pale door finished with clear coat |
| Cherry | Warm pink-brown tone; curl and fiddleback are available | Usually sands and finishes cleanly; darkens with light exposure | A warmer door with moderate contrast and straightforward finishing |
| White oak | Prominent ray fleck, especially on quarter-sawn boards | Open pores need filling for a glass-smooth finish; coarse grain can dominate | A door where bold, architectural grain is the point |
| Walnut | Dark brown, often with clear contrast in the figure | Generally easy to finish; lighter sapwood can look mismatched | A dark, high-contrast door |
| Curly birch | Strong, rippling figure with a light, sometimes golden color | Can be blotchy and is less consistently available in wide, matched stock | A distinctive door when you can inspect the boards in person |
Choose by the look you want
For a light door, buy figured hard maple if you can inspect the boards and select a finish that stays clear. Maple’s hardness helps it resist everyday dents, but its pale, tight grain makes uneven stain especially obvious. If the goal is to keep the wood light, a clear water-based finish is usually a more predictable choice than brown stain.
Cherry is the easier warm-toned option. It often needs no stain at all: a clear finish deepens its color, and sunlight gradually turns it darker and redder. That change is normal, but it means a newly made door may not match a shaded cabinet interior after a few years. Avoid cherry if you need its original pale color to stay fixed.
For strong rays rather than rippling curl, look at quarter-sawn white oak. Its medullary fleck is a natural feature, not a defect, but the open pores remain visible unless you use a pore filler. Walnut gives a darker look with less need for color adjustment; reject boards with sapwood if you want the whole door to stay consistently dark.
Buy the board, not the promise
“Figured” can mean anything from a mild shimmer to pronounced curl. Ask to see both faces of the board under angled light, then rotate it: good figure changes as the viewing angle changes. For a raised-panel door, check that the rails, stiles, and panel stock come from compatible boards. A striking panel surrounded by unrelated grain can look accidental.
For a door with a solid wood panel, allow the panel to move across its width. A 12-inch-wide panel can change by several eighths of an inch between dry winter conditions and humid summer conditions, depending on species and indoor humidity. Do not glue it rigidly into the frame; use a panel groove with room for seasonal movement. A floating panel is more important than a tight-looking fit on assembly day.
Buy extra stock for color and figure matching, particularly with curly maple or cherry. A single wide board may be cheaper and easier to match than assembling a panel from narrow strips. If the door will be painted, cheaper, straight-grained stock is fine; paying a premium for figure that paint hides makes little sense.
Prepare the surface without flattening the figure
Sharp tools matter. Curly grain reverses direction over short distances, so a planer can lift fibers and leave torn patches. Take light cuts, use a sharp blade, and switch to a cabinet scraper or a sharp card scraper where tear-out begins. Sanding away deep tear-out can flatten the surrounding surface and blur the figure.
Sand progressively, typically through 120, 150, and 180 grit for a clear film finish. On figured hardwood, stopping at 180 is often enough; sanding much finer can reduce finish adhesion or make stain absorption uneven. Follow the grain where practical, then inspect under raking light. Raise the grain before a water-based finish by wiping the surface lightly with a damp cloth, letting it dry, and removing the raised fibers with a light pass at the final grit.
For a consistent surface, use a 5-inch random-orbit sander on broad faces, but keep it moving and do not press hard. Hand-sand edges and profiles. Stationary scratches that appear after the finish goes on usually mean the earlier sanding marks were not fully removed.
Pick a finish that suits the wood
For maple, test water-based clear finish if color retention is the priority. It tends to add less amber than oil-based finishes, but can raise grain and may emphasize glue smears or sanding scratches. Apply a sample to a cutoff prepared exactly like the door, then inspect it in the cabinet’s actual lighting.
Oil-based polyurethane warms and darkens pale woods more. On cherry or walnut, that shift may be welcome. A wipe-on oil or varnish blend is simple to apply but usually offers less protection per coat than a film finish; follow the label’s recoat and cure times rather than treating “dry to touch” as ready for use. For a kitchen door, build adequate film protection on both faces and edges to reduce uneven moisture exchange.
Do not assume a stain will improve figure. Dark pigment can obscure the light-dark chatoyance that makes curl attractive, and maple can turn patchy. If you want a richer color, make samples with the intended conditioner, dye, or stain schedule before finishing the door. Use a water-based clear wood finish for a low-amber result, or test an oil-based finish if a warmer cast suits the species.
Mistakes that show up after finishing
Glue squeeze-out is a common failure: a thin smear can block stain or finish and leave a pale patch. Remove glue before it dries hard, then inspect the joint under angled light. Also avoid mixing boards with noticeably different sapwood, heartwood, or figure direction unless the contrast is intentional.
Finally, do not judge a finish sample while it is wet. Wet wood exaggerates color and figure; cured finish can look different again. Make a sample large enough to include the grain variation you plan to use, apply every coat, and give it time to cure. That small test is cheaper than sanding a finished door back to bare wood.



0 Comments