What's inside
As an Amazon Associate I earn from qualifying purchases. This post may contain affiliate links at no extra cost to you.
Hard maple and yellow birch can both look pale under a clear finish, but they do not finish identically. Hard maple is usually lighter and more uniform; yellow birch tends to show stronger grain and can take on a warmer, slightly amber cast. Either can work for a tabletop, cabinet face, or trim. The better choice depends on how even you need the color to look, what boards are available, and how carefully you are prepared to sand and finish.
As an Amazon Associate we earn from qualifying purchases at no extra cost to you.

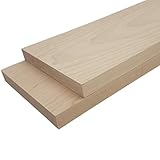


Our Top Picks
 Polyurethane Wood Finish Water Based Polyurethane Clear Gloss100 ml1.6 x 1.6 x 4.7 inchesCheck on Amazon


Quick comparison
| Factor | Hard maple | Yellow birch |
|---|---|---|
| Typical clear-finish look | Very pale, subtle grain, often fairly uniform | Pale to light golden, with more visible grain and color variation |
| Hardness | About 1,450 lbf Janka | About 1,260 lbf Janka |
| Machining and sanding | Dense; can burn or show sanding scratches | Also dense, but generally a little easier to work |
| Common finish concern | Blotchy appearance or uneven sheen | Ambering and board-to-board color variation |
| Best fit | A restrained, nearly white appearance and high wear resistance | A slightly warmer, more natural look, often at a lower price |
Janka figures are averages, not a guarantee of how a particular board will behave. Grain direction, moisture, and milling quality matter too. For flooring or a busy work surface, maple’s extra hardness is useful. For furniture and cabinets, the difference may matter less than the quality and consistency of the stock.
Color and grain under a clear finish
Unfinished hard maple can look nearly white, with fine, understated grain. Clear coating usually deepens it a little, and oil-based finishes tend to add more yellow than water-based products. Yellow birch commonly starts cream to light tan; clear finish can bring out a honey or amber tone. Its grain is usually more apparent, though individual boards can be quite plain.
Neither species is guaranteed to produce a single, uniform color. Sapwood and heartwood may differ, and boards from different parts of a tree can vary. Maple can have mineral streaks or pale reddish-brown areas; birch may show darker heartwood. If a consistent pale surface is the priority, buy enough stock from the same batch and lay it out before assembly. Reject or rearrange boards with strong color jumps rather than expecting clear finish to hide them.
Clear finish also does not mean the wood will stay its raw color. Many coatings warm or darken wood, and some change color with age. A water-based clear topcoat is often the safer starting point when you want to preserve a pale look. Check the product’s sample or technical sheet, then test it on offcuts from the actual boards. A sample on a different piece of maple or birch is not a reliable color test.
Which should you buy?
Choose hard maple when you want the palest, quietest look and can accept its higher price and demanding preparation. Its hardness helps on tabletops, counters, and floors, but it can be unforgiving: dents may be less common, while sanding marks and burn spots are conspicuous. A sharp cutter and steady feed help prevent scorching during machining.
Yellow birch is the sensible buy when a warm pale tone suits the project and the price or local supply is better. It is plenty durable for most furniture and cabinet work. If the piece will see heavy impact, maple has an edge; for a bookcase, dresser, or interior trim, the difference is unlikely to justify a large price premium. Compare actual boards before choosing by species name alone.
For either wood, inspect for twist, checks, and uneven color. If you are buying rough lumber, allow for milling loss and choose boards wide enough to trim away damaged edges. If you lack a jointer and planer, surfaced stock may cost more but can save time and reduce the risk of a wavy glue-up.
Prepare the surface before finishing
Sand evenly, working through the grits rather than skipping from coarse to fine. For most furniture surfaces, start around 120 grit if the board is already flat, then use 150 and finish at 180. If flattening requires 80 grit, remove its scratches completely before moving on. On maple especially, leftover cross-grain scratches can become obvious when finish catches the light.
Do not automatically sand to 320 grit. Very fine sanding can burnish dense wood and reduce how evenly a penetrating finish takes; it can also make a surface look slick without improving a film finish. Follow the coating maker’s preparation instructions. Vacuum dust thoroughly, including edges and corners, and avoid oily tack cloths that may leave residue. Before applying finish, check the surface under raking light.
Choose a finish and test it
For a pale result, compare a water-based clear topcoat with a water-based hardwax oil or other product specifically intended to keep wood light. A water-based film finish generally adds less amber than oil-based polyurethane, though its clarity and sheen vary by formula. Hardwax oils are easy to maintain locally but can deepen color and may offer less protection against standing water than a well-applied film finish. Product labels and test pieces matter more than broad claims such as “natural.”
If you choose a film finish, apply thin coats and follow the stated recoat time. Many water-based finishes need light sanding between coats, often with 220 grit, but use the manufacturer’s instructions. A first coat can raise grain; let it dry fully, then sand lightly without cutting through at edges. Applying a heavy coat to speed the job can leave runs, a cloudy surface, or soft spots.
For a clear, low-amber film, compare water-based clear topcoats and test the sheen and color on scrap. If you prefer an oil finish, test a clear hardwax oil beside it. “Clear” does not necessarily mean colorless.
Common mistakes to avoid
One frequent problem is judging the wood only while it is raw. Finish changes both color and contrast, so put on the full planned schedule—including every coat—on an offcut. Another is trying to correct mismatched boards with clear finish; clear coatings intensify natural differences rather than conceal them. If you need a uniform whitewashed look, that is a different finishing plan and should be tested separately.
Also avoid assuming a stain is necessary. Both species can look good without pigment, and stain adds another variable: dense, fine-textured maple can show uneven color, while birch can absorb stain unpredictably too. If you do want color, use a conditioner or a gel stain only after testing the complete process on offcuts. For a straightforward pale clear finish, buy the species whose natural color you prefer, prepare it carefully, and let a sample—not a product label—make the final decision.



0 Comments