What's inside
As an Amazon Associate I earn from qualifying purchases. This post may contain affiliate links at no extra cost to you.
A pantry door is a good place to use attractive wood, but it is also a poor place to ignore movement. Kitchen humidity changes, frequent handling, and a relatively wide door can expose weak joints or unstable boards. For a clear finish, hard maple is the safest all-around choice; white oak is the best choice when you want visible grain; cherry and walnut are excellent if their color and price suit the room.
As an Amazon Associate we earn from qualifying purchases at no extra cost to you.


Our Top Picks
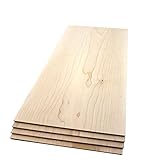
 Barrington Hardwoods Domestic Variety Pack 5 Walnut3/4" x 2" x 12"12 x 2 x 0.75 inchesCheck on Amazon
 Varathane Water-Based Ultimate Satin PolyurethaneHalf Pint (Pack of 1)3 x 3 x 3 inches0.64 poundsCheck on Amazon


Best wood species for a clear-finished pantry door
| Wood | Appearance | Stability and workability | Best use |
|---|---|---|---|
| Hard maple | Very light, subtle grain | Stable and hard, but can show sanding marks and blotching | Clean, modern doors |
| White oak | Strong, open grain with warm tan color | Stable, durable, and forgiving to finish | Traditional or contemporary doors |
| Cherry | Fine grain that darkens to reddish brown | Easy to machine and finish; color changes with light | Furniture-style doors |
| Walnut | Dark brown heartwood and dramatic grain | Stable and easy to work, but expensive | High-contrast accent doors |
| Clear pine | Warm, knot-free grain | Soft and more prone to dents and resin-related defects | Budget or rustic projects |
| Poplar | Plain grain, often greenish or grayish | Inexpensive and easy to machine, but rarely attractive clear-finished | Painted doors, not usually clear finishes |
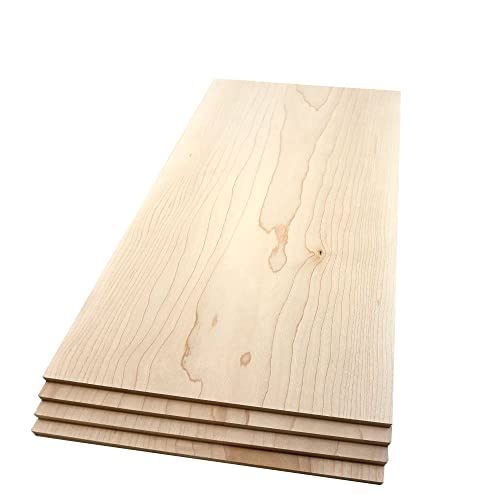
Hard maple is the practical default when you want a pale door with a smooth, understated appearance. It resists dents better than most softwoods, which matters around a pantry handle. Its tight grain does not need grain filler, but it must be sanded evenly. Coarse scratches can remain visible under clear varnish, especially across the grain.
White oak is the easiest species to recommend for a visible-grain door. It has enough character to look finished even with a simple water-based clear coat. Quarter-sawn white oak adds prominent ray fleck and is usually more dimensionally stable than ordinary flat-sawn stock, but it costs more and may be unnecessary for a small pantry.
Cherry starts pinkish and becomes noticeably darker and warmer with age and sunlight. Buy enough wood from one batch to keep the color consistent. If you want the original light color to last, use a finish with strong ultraviolet resistance, although no interior finish stops color change completely.
Walnut is stable and pleasant to machine, but it is usually a cosmetic upgrade rather than a functional necessity. Use it when the door is meant to be a focal point. A clear satin finish generally looks better than high gloss because gloss exaggerates unevenness and fingerprints.
Choose the construction before buying boards
A solid slab door made from one wide board is the most likely design to move. Wood expands and contracts across its grain as indoor moisture changes. A 24-inch-wide solid panel can move roughly 1/8 inch or more across the seasons, depending on species, construction, and humidity. That movement has to be allowed for; finish cannot stop it.
For a traditional door, use a frame-and-panel design with stiles, rails, and a floating panel. The panel should fit its groove with clearance rather than being glued in place. A 1/4-inch panel is adequate for many pantry doors, while a thicker raised panel gives a heavier furniture appearance. Mortise-and-tenon joints are excellent, but properly sized cope-and-stick or doweled joints also work when assembled with a quality interior wood glue.
If you prefer a flat slab, edge-glue narrow, straight-grained boards instead of using a single wide plank. Alternate the growth-ring orientation only if it produces a visually pleasing face; the important points are matching moisture content, straight edges, and sound glue joints. A stable hardwood plywood panel with a matching veneer is another sensible option. It moves far less than solid wood and is often the best value for a large, flat pantry door.
What to look for when buying lumber
Buy kiln-dried lumber intended for interior furniture, not construction boards. Measure the shop or home humidity if possible and let the wood acclimate in the house for at least several days. For a heated or air-conditioned home, lumber near 6% to 8% moisture content is a reasonable target.
Inspect boards under good light. Reject pieces with long end checks, twist, loose knots, pith, or abrupt grain changes in the stiles. A clear-finished door shows defects that paint would hide. If the door will be wider than about 30 inches, favor quarter-sawn or rift-sawn stock for the frame, or use a plywood panel and a solid-wood frame.
Sanding and surface preparation
Mill parts flat and square before sanding. Sand hardwood faces through 120, 150, and 180 grit; stop at 180 or 220 grit unless the finish manufacturer specifically calls for finer sanding. Sanding maple too finely can reduce absorption and make some finishes look uneven. Remove all scratches from the previous grit before moving on.
Use a sanding block on edges and hand-sand the final grit in the direction of the grain. Ease sharp edges slightly—about a 1/32-inch roundover is enough—because finish tends to pull away from a knife edge. Vacuum the surface and wipe it with a clean, lint-free cloth. Avoid soaking raw wood with water unless you deliberately plan to raise the grain.
Maple and cherry can develop uneven color with some penetrating stains. A clear finish is usually the better choice for these woods. If you must stain, test the exact species, sanding schedule, and stain on offcuts first. A pre-stain conditioner can reduce blotching, but it can also make color lighter and less uniform.
Choosing and applying the clear finish
For a kitchen pantry door, a water-based polyurethane or acrylic-urethane is a practical choice. It dries quickly, has low odor, and stays relatively clear on pale woods. Oil-based polyurethane adds warmth and can highlight oak and walnut, but it ambers over time and needs longer drying intervals. A wiping varnish is easy to apply but usually requires more coats.
Plan on three thin coats on each face, with at least two coats on all edges and the top and bottom ends. Lightly sand between coats with 320 grit only after the finish has dried hard; do not sand through on corners. Finish every surface, including the back, edges, hinge mortises, and routed profiles. Coating only the front face creates an imbalance that can contribute to cupping.
For a brushed or rolled application, use a quality water-based satin polyurethane and apply thin coats rather than trying to build thickness in one pass. A foam brush can work on a small door, but it may leave bubbles if overworked. Between coats, remove dust with a vacuum and a clean cloth; tack cloth residue can interfere with some water-based finishes.
Allow for fitting and seasonal movement
Do not finish the door at its final tight fit. Leave approximately 1/8 inch clearance at the latch side and top, and about 3/32 to 1/8 inch at the hinge side and bottom, adjusting for the opening and hardware. Seal freshly cut hinge mortises and handle holes before installation. Use three hinges on a tall or heavy hardwood door, and support the door while setting screws so the hinge side does not sag.
The cheaper option is fine when the door will be painted or when it is a small, low-use door: poplar frame parts with a hardwood plywood panel are economical and stable. For a clear finish, however, spend the money on straight, matching hardwood or veneered plywood. The finish will not improve poor grain, unstable construction, or rushed preparation.



0 Comments