What's inside
As an Amazon Associate I earn from qualifying purchases. This post may contain affiliate links at no extra cost to you.
Our Top Picks
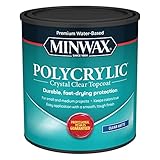
 Minwax 622224444 Polycrylic Protective Wood Finish32 fl oz4.4 x 4.4 x 5 inches2.2 poundsCheck on Amazon
 Minwax Fast Drying Polyurethane Protective Wood FinishQuart4.1 x 4.1 x 5.1 inches1 PoundsCheck on Amazon
 AquaCoat Water-Based White Cabinet Wood Grain Filler Gel16 Fl Oz (Pack of 1)10 x 10 x 10 inches1.2 poundsCheck on Amazon

What Makes a Species Good for a Tinted Clear Coat
A tinted clear coat is a transparent or semi-transparent finish with enough color to change the wood while leaving some grain visible. It can be a toner, tinted lacquer, colored polyurethane, or a clear finish mixed with compatible dye or pigment. Unlike opaque paint, it does not hide uneven sanding, glue spots, dents, or blotchy absorption.
The best wood species have a fairly even texture, predictable absorption, and grain that looks good through a thin film. Hardwoods with tight, uniform pores are usually easier to finish than open-pored woods. However, the finish itself matters just as much as the species. A water-based tinted product can behave very differently from an oil-based one, even on the same board.
As an Amazon Associate we earn from qualifying purchases at no extra cost to you.



Best Wood Species
| Species | Appearance under tint | Blotch risk | Best use |
|---|---|---|---|
| Hard maple | Very subtle grain and clean color | Low to moderate | Modern furniture, cabinets, trim |
| Birch | Light, fine grain with a pale base | High | Budget panels and painted-looking stains |
| Poplar | Plain grain, often greenish or gray | Moderate | Paint-grade work and low-cost projects |
| Red oak | Strong, open grain remains visible | Low | Rustic or pronounced-grain finishes |
| White oak | Open grain with a calmer, brown-gray cast | Low | Furniture, cabinetry, flooring |
| Cherry | Fine grain and warm, naturally darkening color | Low to moderate | Traditional furniture |
| Alder | Even, understated grain | Moderate | Cabinet doors and general woodworking |
Hard Maple and Birch
Hard maple is one of the safest choices when the goal is a smooth, even tinted clear coat. Its fine texture does not telegraph large pores, and its pale color gives a tint room to show accurately. It still needs careful sanding because cross-grain scratches can become obvious under a dark toner. Sand to 180 grit, then use 220 grit if the surface will be viewed closely. Going much finer can reduce absorption and make some water-based products sit unevenly.
Birch is inexpensive and widely available, especially as plywood. Its surface can look excellent under a light or medium tint, but solid birch and birch veneer are prone to blotching. A conditioner is not a cure-all: it can reduce dark patches but may also make the final color lighter and less transparent. A thin washcoat of dewaxed shellac, sanded lightly with 320 grit, often gives more predictable control. Test the exact product on an offcut before finishing the project.
For an inexpensive project where absolute color uniformity is not critical, birch plywood is often good enough. Choose a higher-grade face veneer if the surface will be clear-coated; sanding through a thin veneer is an easy and expensive mistake.
Poplar and Alder
Poplar has a smooth, fine texture and is cheap, easy to machine, and easy to sand. Its weakness is color: boards can be pale green, gray, cream, or nearly white. A transparent brown or amber tint may therefore look inconsistent from board to board. Poplar is a practical choice when the finish is fairly opaque or when the color variation is part of the design. It is less convincing when you want a uniform natural-wood appearance.
Alder is more attractive under a tinted clear coat. It has a relatively even surface and subdued grain, which makes it useful for cabinet parts and furniture. It can still absorb color unevenly around end grain and softer sections. Seal end grain separately, and avoid flooding the surface with finish. Two or three thin coats usually produce a smoother result than one heavy coat.
Oak and Other Open-Pored Woods
Red oak and white oak are not the smoothest-looking choices, but they are predictable. Their large pores accept color readily and create a strong grain pattern. Use oak when you want the tint to emphasize the structure rather than disappear into a flat, uniform surface.
For a smoother visual surface, fill the pores before applying the tinted clear coat. Use a compatible water-based wood grain filler for a lighter-colored finish, or an oil-based filler when its longer working time and stronger pore contrast are useful. Sand the cured filler flush with 220 grit. If you skip filling, the finish may be perfectly smooth to the touch but still look textured because the pores remain visible.
White oak generally gives a quieter, more neutral result. Red oak has a stronger pink or orange cast, which can push a brown or amber tint warmer than expected. Always judge a sample after the full number of finish coats; the color often becomes noticeably deeper with each coat.
Cherry and Other Naturally Darkening Species
Cherry has fine pores and finishes smoothly, but it darkens and reddens with light exposure. A tinted clear coat can make that change harder to predict. A fresh cherry sample may look pale tan, while older boards may be orange-brown. Use a low-color finish if you want the wood to age naturally, or use a controlled toner when matching existing furniture.
Walnut and mahogany can also take a clear tint well, but they already have strong color. A dark toner can muddy the figure and hide useful variation. On these species, a clear topcoat or lightly tinted first coat is usually safer than repeated heavily colored coats.
Surface Preparation and Application
Flatten the surface first. Scrape or plane glue squeeze-out; do not rely on sanding to remove it. Sand with the grain through 120, 150, and 180 grit. Remove dust with a vacuum and a clean, dry cloth. Avoid soaking the surface with water unless you deliberately plan to raise the grain and sand it back.
Before applying color, make a sample using the same species, sanding schedule, sealer, tint, and topcoat. Apply at least two finish coats to the sample. The first coat may look weak, while the second coat can cross the line from transparent to muddy.
For the smoothest result, use a synthetic-bristle brush for water-based finish or a quality natural-bristle brush for many solvent-based products. Apply thin coats at the manufacturer’s spread rate. Most finishes need roughly 2 to 4 hours before recoating, but cool, humid conditions can extend that substantially. Lightly scuff between coats with 320 or 400 grit only after the finish has hardened enough not to clog the abrasive.
For large flat panels, spraying gives the most even tint and avoids brush overlap. If spraying is not practical, a high-quality foam applicator can be a cheaper and adequate choice for small parts. Avoid wiping tinted products repeatedly as they begin to set; that creates lap marks and uneven color.
Choosing the Right Species for the Job
Choose hard maple for the cleanest, most controlled appearance. Choose birch when cost and availability matter, but plan for a conditioner or sealer. Choose poplar when the finish is semi-opaque or the project is paint-grade. Choose oak when visible pores and strong grain are desirable. Alder is a good middle ground for an even, natural-looking surface, while cherry is best when its changing warm color is part of the appeal.
If you need maximum color consistency across mixed boards, species selection alone will not solve the problem. Buy boards from the same source, arrange them by color before assembly, and use test panels. A light sealer and several thin tinted coats generally provide more control than one heavily pigmented coat.



0 Comments