What's inside
As an Amazon Associate I earn from qualifying purchases. This post may contain affiliate links at no extra cost to you.
A wide wood glue-up can bow for three reasons: uneven boards, uneven clamp pressure, or moisture from the glue. The usual mistake is treating clamps as a press and tightening them harder. That often squeezes out too much glue, pulls the panel into a curve, or crushes soft wood along the edges.
The reliable method is to prepare straight stock, use enough clamps, and control the panel from both faces while the glue cures. The goal is firm, even pressure—not maximum pressure.
As an Amazon Associate we earn from qualifying purchases at no extra cost to you.


Our Top Picks
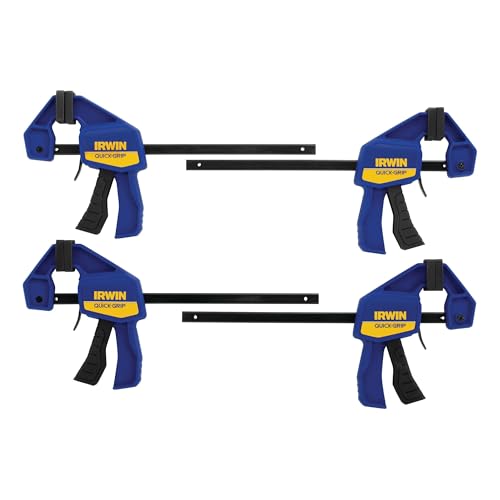 IRWIN Quick-Grip 1964758 One-Handed Mini Bar Clamp 44 Count (Pack of 1)21 x 8 x 2.5 Inches1 poundsCheck on Amazon

Prepare the boards before applying glue
Start with boards that are flat enough to sit together without force. Joint one face and one edge, or use a planer and table saw if that is your workflow. Lay the boards on a flat surface and arrange them so their growth rings alternate when viewed from the end. Alternating the rings does not guarantee a flat panel, but it can reduce the tendency for the boards to cup in the same direction.
Do not try to straighten a badly bowed board with clamp pressure. A clamp can hold it temporarily, but the board will usually spring back after the glue dries. Sight down each board, check the edges with a straightedge, and reject or recut stock that has a severe bow, twist, or cup.
Make a dry assembly first. Put the boards in order, close the joints without glue, and mark the sequence with a cabinetmaker’s triangle or simple pencil marks. Check that the ends line up reasonably well. If one joint opens when you press another closed, the edges need more work before glue-up.
Choose clamps and cauls for the panel width
For most furniture panels, parallel-jaw clamps, bar clamps, or pipe clamps work well. Use clamps long enough to reach across the panel with at least a few inches of spare capacity. For a panel 30 inches wide, clamps with a 36-inch or greater capacity are more practical than clamps working at their limit.
Place clamps on both sides of the panel. A common starting point is one clamp every 8 to 12 inches along the length, alternating above and below. For example, a 48-inch-long panel might need five or six clamps. Narrow panels may need fewer; thick, hard boards or panels made from several strips may need more.
Protect the work with cauls: straight pieces of scrap wood placed across the panel at the clamp locations. Cover the caul faces with packing tape or polyethylene so squeezed-out glue does not bond them to the panel. Slightly crowned cauls can be useful, with the center barely higher than the ends, but an aggressive crown can create a hollow or uneven surface.
For a regular panel, parallel-jaw woodworking clamps are convenient because their broad jaws distribute pressure. The cheaper option—ordinary pipe or bar clamps—is fine when you use cauls and do not need the jaws to stay perfectly parallel.
Use a layout that keeps the panel flat
Set the lower clamps on a flat bench or on two straight support strips. Put the boards on the clamps, apply glue, and bring the joints together by hand. Then install the upper clamps in the gaps between the lower clamps. This opposing pattern reduces the tendency for the panel to roll into a curve.
Use cauls near the ends and at intermediate points. A pair of cauls should span the panel’s width, not just press on one board. Tighten the clamps gradually from the center outward, alternating between top and bottom. Watch the faces as the joints close. If one board rises above its neighbor, correct it immediately with a caul, a light tap from a rubber mallet, or a small adjustment in clamp pressure.
| Glue-up condition | Useful starting layout | Main caution |
|---|---|---|
| Panel up to 24 inches wide | Clamps every 10–12 inches, alternating faces | Do not over-tighten the end clamps |
| Panel 24–36 inches wide | Clamps every 8–10 inches, plus full-width cauls | Check for a center bow as pressure increases |
| Panel wider than 36 inches | Opposing clamps, multiple cauls, and a flat reference surface | Consider a panel press or flattening after cure |
| Softwood or easily crushed wood | More clamps with lower pressure | Use broad cauls to prevent jaw dents |
Apply the right amount of glue and pressure
Spread a continuous, thin film over the edge. A small bead followed by a roller, brush, or finger spreads more evenly than a thick line left untouched. You should see squeeze-out along most of the joint after clamping, but glue should not pour out under heavy pressure.
Clamp until the joint is closed and the boards stay aligned. For typical PVA wood glue at normal room temperature, leave the assembly undisturbed for at least 30 to 60 minutes before removing clamps, then avoid heavy handling for roughly 24 hours. Cool temperatures, high humidity, thick glue lines, and oily woods can extend that time. Follow the label when its instructions differ.
Over-tightening can cause three problems: the joint becomes starved of glue, the boards slide out of alignment, and the panel bends between clamp points. If the panel starts bowing upward in the center, loosen the clamps slightly and add a straight caul or a clamp across the high area. Do not keep increasing pressure at the ends.
When a panel press is worth buying
A woodworking panel clamp system is useful if you regularly make wide tabletops, doors, or cabinet panels. Many systems apply sideways pressure while built-in dogs or top bars help hold the panel flat. They cost more and take storage space, but they reduce the balancing act required with loose bar clamps.
A cheaper setup is often adequate: use ordinary clamps, straight cauls, and a flat bench. For cauls, straight construction lumber is acceptable for occasional work, while carefully jointed hardwood or aluminum cauls are more reliable for repeated glue-ups. If your bench is not flat, lay the clamps and panel on a known-flat sheet of plywood or MDF.
Remove squeeze-out and check the cured panel
Remove large beads of glue before they fully harden, but avoid smearing wet glue across the face. A plastic scraper works well once the glue has become rubbery. Do not flood the surface with water; that can raise the grain and leave a larger sanding problem.
After curing, remove the clamps and check the panel with a straightedge across its width and length. A slight high joint can be leveled with a hand plane, router sled, or careful sanding. For a broad panel, a wide woodworking hand plane removes high spots faster than sanding alone, but it requires a sharp, properly set blade.
If the panel has a severe bow, do not try to correct it by soaking one face or clamping it aggressively in the opposite direction. That may create temporary movement without fixing the underlying stress. Flatten the panel mechanically, reduce it to a suitable thickness, or remake the glue-up with better-prepared stock and opposing clamp pressure.



0 Comments