What's inside
As an Amazon Associate I earn from qualifying purchases. This post may contain affiliate links at no extra cost to you.
Our Top Picks
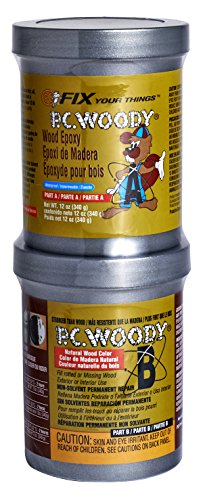 PC Products PC-Woody Wood Repair Epoxy Paste12 oz2.75 x 2.75 x 5.75 inches0.75 poundsCheck on Amazon


Choosing the Right Adhesive for Split Wood Grain
The best adhesive for a split in wood grain is usually a quality yellow or white PVA wood glue. It bonds bare wood strongly, sands cleanly, and gives you enough open time to align the split before clamping. For most furniture, trim, cabinet parts, and solid-wood boards, start with PVA wood glue.
That recommendation assumes the split is reasonably clean, the wood fits back together, and the repair is not exposed to constant water. Adhesive choice changes when the crack is oily, has missing wood, needs to remain flexible, or is part of a structural joint.
As an Amazon Associate we earn from qualifying purchases at no extra cost to you.
| Adhesive | Best use | Main advantage | Important limitation |
|---|---|---|---|
| PVA wood glue | Clean, tight splits in dry interior wood | Strong, inexpensive, easy to sand | Needs close-fitting joints and clamp pressure |
| Epoxy | Wide gaps, missing fibers, oily or difficult wood | Fills voids and bonds dissimilar surfaces | More expensive; excess is hard to remove |
| Cyanoacrylate | Small hairline cracks and quick spot repairs | Very fast and penetrates narrow cracks | Brittle, easy to stain the surrounding wood |
| Polyurethane glue | Some exterior repairs and slightly damp wood | Water-resistant and gap-expanding | Foam is weak and requires careful cleanup |
When PVA Wood Glue Is the Best Choice
Use PVA when the split closes nearly completely with hand pressure and the mating surfaces are unfinished, solid wood. Interior and “Type II” water-resistant PVA formulas are suitable for most indoor repairs. For outdoor furniture or areas that may get wet, choose an exterior-rated “Type III” PVA, but remember that the finish and the surrounding wood still need weather protection.
PVA does not work well as a thick filler. If the crack remains wider than about 1/16 inch after clamping, glue alone may leave a weak, visible line. A split that opens to 1/8 inch or more often needs epoxy, a fitted wood spline, or replacement of the damaged section.
Do not flood a split with glue and expect strength. Glue bonds best in a thin film between clean surfaces. Too much adhesive can prevent the faces from closing, create squeeze-out in the grain, and make later staining uneven. A small brush, flexible spreader, or thin strip of plastic is useful for working glue into the crack.
When Epoxy Is Worth the Extra Cost
Two-part epoxy is the better choice when the split has missing fibers, irregular edges, or a permanent gap. It is also useful on oily species such as teak, rosewood, and some exotic hardwoods, where ordinary water-based wood glue may not wet the surface reliably. A slow or medium-setting two-part wood epoxy gives more working time than five-minute epoxy and usually produces a stronger, cleaner repair.
Epoxy is not automatically stronger in every split. It is stiff, does not absorb stain like wood, and can leave a dark or shiny line. It is also harder to sand once cured. Mask both sides of the repair with painter’s tape, apply only enough to fill the void, and remove most squeeze-out while it is still rubbery. Follow the product’s mix ratio precisely; poorly mixed epoxy may remain soft or fail to cure.
For a visible furniture surface, tint epoxy with compatible pigment or use a carefully fitted sliver of matching wood. Clear epoxy in a dark crack rarely disappears. On a painted project, appearance is less demanding, so epoxy becomes more practical.
Where Cyanoacrylate Glue Fits
Thin cyanoacrylate, commonly called super glue, is useful for a fine crack that is difficult to clamp. Capillary action can draw it into a hairline split, and accelerator can shorten the cure time. It is a reasonable repair for small trim defects, veneer edges, and tiny checks that do not carry much load.
It is a poor default for a large split. Cyanoacrylate cures hard and brittle, so movement from humidity can reopen the crack beside the adhesive. It can also wick into end grain and leave a glossy, stain-resistant halo. If you use it near a finished surface, mask the surrounding area and test on scrap first. Wear eye protection; accelerator can cause a rapid, hot cure.
How to Repair Split Wood Grain
First, identify why the wood split. A split caused by a loose screw, excessive fastener pressure, or seasonal movement may reopen unless that cause is corrected. Remove the hardware if possible and check whether the wood closes naturally. Do not force a badly misaligned split into place with a clamp; that can crush the grain and make the repair weaker.
Clean out dirt, old finish, and loose fibers with a knife, dental pick, or compressed air. Avoid sanding the mating faces aggressively, because sanding rounds the edges and creates a larger glue line. A dry test fit should close with moderate hand pressure. If the split is under tension, use a clamp gradually before applying glue to confirm that the pieces align.
Apply a thin, even coat of adhesive to both faces when the manufacturer allows it. Close the split and use a padded bar clamp, pipe clamp, or parallel-jaw clamp. Tighten until you see a continuous, modest bead of squeeze-out—not until the wood bows or the grain crushes. For a typical furniture repair, 30 to 60 minutes of clamping is often enough for handling with PVA, but leave the repair undisturbed for 12 to 24 hours before sanding or stressing it. Cooler temperatures and thick glue lines require more time.
For a tight split where clamps cannot reach, small woodworking clamps or a temporary screwed-on caul can distribute pressure. Put wax paper between the repair and any caul so it does not become permanently glued to the workpiece.
Sanding and Finishing the Repair
Remove cured PVA squeeze-out with a sharp chisel or scraper, keeping the tool nearly flat. Start sanding with 120-grit paper only if necessary, then progress through 150 or 180 grit. For a clear finish, continue to 220 grit if that matches the surrounding surface. Do not sand only the repaired strip; feather the work several inches into the surrounding wood to avoid a visible dip.
Before staining, wipe the area with a slightly damp cloth to reveal remaining glue spots. PVA residue seals the grain and produces pale patches under stain. On difficult repairs, apply a coat of sanding sealer or a compatible conditioner after testing on scrap. If the color still does not match, paint is more forgiving than transparent stain.
Common Failures to Avoid
A repair usually fails because the crack was dirty, the adhesive was incompatible with the surface, or the wood moved after the repair. Gluing over oil, wax, paint, or an old finish is unreliable. Leaving clamps on too long can also trap moisture in PVA glue and delay curing. Finally, do not use gap-filling glue to compensate for a split that is actually a broken structural joint. If the damaged part supports weight or a fastener, reinforce it with a spline, dowels, or a properly rebuilt joint rather than relying on adhesive alone.



0 Comments