What's inside
As an Amazon Associate I earn from qualifying purchases. This post may contain affiliate links at no extra cost to you.
Choosing between Danish oil and hardwax oil comes down to the look you want, how much wear the wood will see, and how willing you are to maintain the finish. Both leave wood looking natural instead of forming the thick plastic-like film associated with many varnishes. They are not interchangeable, though. Danish oil is usually the cheaper and simpler option for furniture and light-duty projects. Hardwax oil costs more but generally gives better resistance to water, dirt, and abrasion while remaining easy to repair.
As an Amazon Associate we earn from qualifying purchases at no extra cost to you.
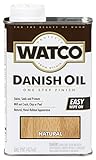


Our Top Picks

What Danish Oil Is
Danish oil is not one standardized formula. It is usually a blend of drying oil, such as tung or linseed oil, and varnish or resin, diluted with solvent. Some products behave more like penetrating oil; others leave a modest surface film after several coats. Always read the label rather than relying on the name.
It enriches the grain and usually produces a low-sheen, hand-rubbed appearance. On pale woods, it can add an amber tone, especially when the formula contains boiled linseed oil. It is inexpensive, widely available, and forgiving on open-grained species such as oak, ash, and walnut.
For a small table, shelf, picture frame, or indoor trim project, a Danish oil wood finish is often all you need. Its limitations become more obvious on floors, kitchen worktops, bathroom furniture, and other surfaces exposed to standing water or frequent abrasion.
What Hardwax Oil Is
Hardwax oil combines drying oils with hard waxes, commonly carnauba or candelilla wax. The oil penetrates and bonds with the wood while the wax helps seal the surface. Unlike a thick polyurethane film, it remains thin and can be spot-repaired without usually sanding the entire piece.
Hardwax oil is available in clear, tinted, and sometimes hardener-enhanced versions. A clear product may still warm the color of raw wood, so test it on an offcut. Some formulas are intended for floors and countertops, while others are designed only for furniture. Those categories are not automatically equivalent.
It generally costs more per container, but coverage can be good because many products require only one or two thin coats. A suitable hardwax oil finish is the stronger choice when you want a natural appearance with better everyday protection.
Danish Oil vs. Hardwax Oil
| Feature | Danish oil | Hardwax oil |
|---|---|---|
| Typical appearance | Low sheen, wet-looking grain, often ambered | Natural matte to satin, with a drier feel |
| Application | Wipe on, allow penetration, wipe completely dry | Apply very thinly and buff or wipe off excess |
| Coats | Usually 2–4 | Usually 1–2 |
| Drying and curing | Dry between coats in roughly 6–24 hours; cure may take several days | Dry between coats in roughly 8–24 hours; full cure commonly takes 1–3 weeks |
| Water and wear resistance | Fair to moderate | Moderate to high, depending on the product |
| Repair | Easy to refresh, but worn areas may look uneven | Usually easy to blend with a light scuff and another thin coat |
| Cost | Lower | Higher |
These are practical ranges, not guarantees. Temperature, humidity, wood species, coat thickness, and ventilation can change drying time substantially. A thick coat of either finish can remain sticky for days.
Prepare the Wood Properly
Sand bare wood through 120, 150, and finally 180 grit for most furniture. Stop at 180 or 220 grit unless the product instructions say otherwise. Over-sanding can burnish the fibers and reduce penetration, while coarse scratches remain visible under an oil finish.
Remove all dust with a vacuum and a clean, dry cloth. Avoid soaking the surface with water or using a tack cloth containing wax or silicone. On a new tabletop, ease sharp edges with a few passes of 180-grit paper. Finish tends to collect on sharp corners and can peel or look darker there.
Test the finish on an offcut or hidden area. Oil changes the color of different boards unevenly, and end grain absorbs far more product than face grain. If the wood has glue squeeze-out, oil will expose it as a pale, shiny patch. Scrape or sand those areas clean before finishing.
Application and Common Failure Modes
For Danish oil, flood a small area with a lint-free cloth or brush, let it penetrate for the time stated on the label, and wipe off every trace of excess. Apply another coat only after the previous one is dry. Two thin coats are usually better than four heavy ones. If the surface remains gummy, you applied too much, the room is too cold, or the wood contains contamination.
With hardwax oil, thin application matters even more. Spread a small amount over roughly 10 to 20 square feet, then work it into the grain and remove excess before it starts to set. Many products are best buffed with a white nonwoven pad. A shiny, sticky surface after the stated drying time usually means excess product, not a need for another coat.
Do not use either finish over a waxed, silicone-treated, or unknown existing surface without testing adhesion. Neither product is a dependable fix for outdoor exposure unless the label specifically rates it for exterior use. For a shower bench, sink surround, or unprotected exterior furniture, choose a finish designed for constant moisture and ultraviolet exposure instead.
Which Finish Should You Buy?
Choose Danish oil when the project is inexpensive, lightly used, and mainly decorative. It is a sensible finish for a bookshelf, lamp, wall-mounted shelf, or occasional-use side table. The lower price is meaningful, and refreshing the surface once a year is not a major burden.
Choose hardwax oil for dining tables, desks, countertops, children’s furniture, and frequently handled surfaces where you want a more durable natural finish. It is also preferable when localized repairs matter. Keep in mind that “food safe” claims generally apply only after full curing and proper use; follow the label and do not treat an uncured surface as ready for food contact.
For either finish, maintain the surface with a slightly damp cloth and mild soap rather than soaking it. Wipe spills promptly, use coasters and trivets, and wait the full cure period before heavy use. Store oil-soaked rags flat outdoors to dry, or submerge them in water in a sealed metal container. They can heat up and ignite when bunched together.

0 Comments