What's inside
As an Amazon Associate I earn from qualifying purchases. This post may contain affiliate links at no extra cost to you.
Small wood repairs usually fail for one of three reasons: the adhesive does not fit the joint, the surfaces are dirty or poorly fitted, or the repair is asked to handle more movement than it can tolerate. Cyanoacrylate glue (CA, commonly called super glue) and two-part epoxy can both fix damaged wood, but they work very differently. The right choice depends on the size of the gap, the strength required, and how much time you have for preparation and curing.
As an Amazon Associate we earn from qualifying purchases at no extra cost to you.


Our Top Picks
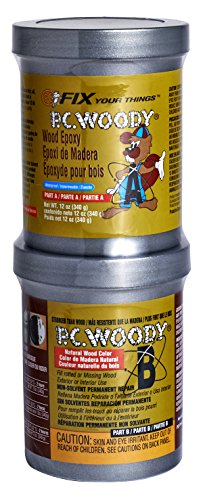 PC Products PC-Woody Wood Repair Epoxy Paste12 oz2.75 x 2.75 x 5.75 inches0.75 poundsCheck on Amazon

The quick choice
Use cyanoacrylate for a tight-fitting crack, a small chip, a loose veneer edge, or a repair that needs to set in minutes. Use epoxy when material is missing, the joint has a visible gap, the wood is end grain, or the repair will see impact, vibration, or changing moisture.
| Feature | Cyanoacrylate glue | Two-part epoxy |
|---|---|---|
| Best joint fit | Tight, close-fitting surfaces | Small gaps and missing material |
| Typical working time | Seconds to about 2 minutes | 5 to 30 minutes, depending on formula |
| Handling strength | Often in minutes | Usually several hours |
| Sanding | Can turn brittle and chip | Generally sands cleanly after curing |
| Gap filling | Poor with thin formulas; limited with gel | Good for small voids |
| Moisture and movement | Rigid and brittle | Stronger, but still not a substitute for a flexible wood joint |
When cyanoacrylate is the better choice
CA glue is excellent when the broken pieces already fit together. A split on a small picture frame corner, a lifted edge on a thin veneer, or a clean break in a small molding can often be repaired with a few drops. Thin CA wicks into hairline cracks; medium or gel CA stays where you put it and is easier to control on vertical surfaces.
The main advantage is speed. A tight joint can become handleable in 30 seconds to a few minutes, although full strength takes longer. An accelerator spray makes it set almost instantly, but it can leave a white haze on dark wood and may cause a brittle, uneven cure. If appearance matters, test the accelerator on scrap first.
CA is also useful for stabilizing tiny voids before sanding. For example, a small tear-out pocket in a tabletop can be filled with fine sanding dust and wetted with thin CA. Once cured, the patch can be leveled with a sharp scraper or sandpaper. This is a spot repair, not a good method for filling a large hole.
Buy CA glue in thin and gel viscosities if you do varied repair work. Thin glue handles cracks; gel is less likely to run.
When epoxy is the better choice
Epoxy is the safer option when the pieces do not meet perfectly. It can bridge small gaps, rebuild a missing corner, and bond end grain more reliably than CA. It is also a better choice for a loose chair rung socket, a damaged screw hole, or a broken furniture part that will be pulled or knocked repeatedly.
Two-part epoxy consists of resin and hardener. Measure the components accurately and mix them thoroughly on scrap cardboard or a disposable mixing surface. A five-minute epoxy may be convenient, but it gives you very little time to align a complicated repair. A 20- to 30-minute formula is easier to work with and often produces a more controlled result.
Epoxy is not automatically flexible. After curing, many formulas are hard and slightly brittle, though they generally tolerate impact better than CA because the glue line is thicker and better at distributing stress. Wood still expands and contracts with humidity. A wide epoxy-filled joint in a moving panel can crack or separate, especially if the surrounding wood is soft or damp.
For repairs that must be shaped and sanded, choose a sanded wood epoxy repair compound. These products are usually easier to carve and level than runny liquid epoxy. They are also more suitable for rebuilding a chipped edge than ordinary wood glue.
Surface preparation determines the result
Remove loose fibers, old adhesive, wax, polish, and finish from the bonding area. Adhesive cannot make a sound joint through a layer of furniture wax or flaking varnish. Use a sharp chisel, knife, or scraper to expose clean wood, then lightly sand smooth surfaces with 120- to 180-grit paper.
Do not over-sand a broken joint. The irregular fibers may help the pieces register in their original position. Instead, trim only crushed or dangling material. Dry-fit the parts before applying glue, and mark their alignment with a pencil. For epoxy, a slightly roughened surface usually bonds better than a polished one.
Wood should be dry. Damp end grain, pressure-treated lumber, and recently washed furniture can produce weak bonds. Wipe bare wood with a clean, dry cloth. Avoid soaking the joint with solvent unless you know the finish and adhesive will tolerate it.
Application, clamping, and cleanup
Use less CA than you think. A thin film bonds better than a thick puddle, and excess glue can leave a glossy spot that accepts stain differently from the surrounding wood. Apply it with the nozzle, a fine applicator tip, or a disposable pin. Keep your fingers away from the joint; CA bonds skin quickly and generates heat when it contacts cotton or wool.
Epoxy needs enough pressure to close the joint, but clamping too hard can squeeze out nearly all of the adhesive. Use light clamps, painter’s tape, or a strap. Wipe squeezed-out epoxy while it is still rubbery, following the product’s instructions. Do not smear it across finished wood, where it may leave a patch that will not take stain.
Protect the visible face with masking tape, but do not rely on tape to hold a structural repair aligned. For a broken small molding, a simple jig or carefully placed clamp is more reliable. Leave the repair undisturbed for the stated cure time. “Five-minute” epoxy often means initial set, not full working strength.
Sanding, staining, and common failure modes
Neither CA nor epoxy accepts penetrating stain like normal wood. CA can seal a halo around a crack, while epoxy usually remains a noticeably lighter or darker patch. If the repair will be visible, remove squeeze-out completely before finishing. Sand the surrounding area evenly, stopping around 180 grit when preparing for most stains and finishes.
CA commonly fails because the joint is too wide, the surfaces are dusty, or the glue is used on a flexible part. It can also fracture when a rigid repair is bent. Epoxy commonly fails because the mix ratio is wrong, the components are not blended fully, or the wood shifts before cure.
For a clean break in a small, low-stress item, the cheaper basic super glue is often entirely adequate. Spend more time on fitting and cleanup before spending more money on adhesive. Choose epoxy when the gap, load, or missing wood makes a thin glue line unrealistic.
If the repair supports a person, holds a handrail, or affects a chair, table leg, ladder, or structural cabinet joint, treat it as more than a cosmetic fix. Reinforce the joint mechanically or replace the damaged part rather than depending on either adhesive alone.



0 Comments