What's inside
As an Amazon Associate I earn from qualifying purchases. This post may contain affiliate links at no extra cost to you.
For most indoor wood joints, PVA glue is the sensible default. It is inexpensive, easy to apply, cleans up with water, and makes strong joints when the mating surfaces fit properly. Polyurethane glue earns its place when you need longer open time, some moisture resistance, or a glue that will bond wood to less-porous materials. It is not automatically stronger, and its foaming action does not make up for a badly fitted joint.
As an Amazon Associate we earn from qualifying purchases at no extra cost to you.
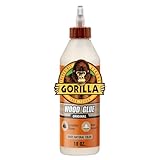


Our Top Picks


Quick comparison
| Feature | PVA glue | Polyurethane glue |
|---|---|---|
| Best use | Fitted indoor wood joints, cabinetry, furniture | Mixed materials, damp-prone areas, longer working time |
| Typical open time | 5–10 minutes, depending on formula and temperature | 15–30 minutes for many products |
| Clamp time | Usually 30–60 minutes | Often 1–2 hours |
| Full cure | About 24 hours | About 24 hours |
| Gap filling | Poor; requires close-fitting parts | Foams into gaps, but cured foam is weak |
| Cleanup | Wipe wet glue with a damp cloth | Remove wet squeeze-out with solvent or let it cure and scrape |
| Indoor odor and mess | Low odor and low mess | Stronger odor, sticky squeeze-out, gloves recommended |
When PVA is the better choice
Use PVA for edge-glued panels, butt joints with reinforcement, mortise-and-tenon joints, dowels, biscuits, drawers, and most cabinet assembly. The glue is water-based, so it wets ordinary wood well and gives you enough time to position parts before the joint locks up.
For a standard indoor project, look for an interior wood glue or an interior/exterior cross-linking PVA. The cheaper interior formula is fine for dry furniture that will stay indoors. A water-resistant Type II PVA is a useful upgrade for kitchens, laundry rooms, or furniture that may see occasional spills. There is little reason to pay for a waterproof adhesive for a dry bedroom dresser.
Browse interior PVA wood glue when price and easy cleanup matter most. PVA is also easier to sand after it has dried, although hardened glue can still clog abrasive paper and leave shiny patches under stain.
When polyurethane makes sense
Polyurethane glue is useful when one or both surfaces are difficult for PVA to bond. It can adhere to wood, some plastics, metal, foam, and sealed or slightly non-porous surfaces, provided the product label permits those materials. It also tolerates intermittent moisture better than ordinary interior PVA.
It is a practical choice for an indoor repair involving a metal bracket, a ceramic or plastic component, or wood that may occasionally get wet. Its longer working time can help with complicated assemblies containing several parts and clamps. Lightly misting one surface with water is often required or recommended because moisture activates the glue; follow the label rather than guessing.
For these jobs, compare polyurethane wood glue. Buy a small bottle unless you use it regularly. Once opened, polyurethane glue can gradually cure from moisture in the air, leaving a thick or unusable product in the bottle.
Joint fit matters more than the label
Neither adhesive is a substitute for a sound joint. PVA performs best when the parts meet over broad, clean surfaces with no visible gaps. A well-fitted PVA joint in wood is commonly stronger than the surrounding wood. Plane or sand mating surfaces flat, then remove dust with a vacuum or clean, dry brush.
Polyurethane foams as it cures, but that foam has limited structural strength. Do not use it to bridge a 1/8-inch gap in a loose tenon or a crooked butt joint. The joint may look full after trimming, while the actual load-bearing contact is poor. If a joint has a substantial gap, remake the part, add a properly fitted shim, or use a suitable epoxy designed for gap filling.
Do not over-sand the mating faces with very fine abrasive. Sanding to 220 grit can burnish some woods and reduce wetting. A freshly machined surface or a surface sanded around 120 to 180 grit is usually appropriate, followed by thorough dust removal.
Application and clamping
Apply PVA in a thin, continuous film. A small roller, glue spreader, or finger protected by a disposable glove can distribute it evenly. You need enough glue to wet both surfaces, not a thick puddle. Assemble parts while the glue is still fluid, then clamp until the joint is stable. Excessive clamp pressure can squeeze out nearly all the adhesive and starve the joint.
Polyurethane should also be applied sparingly. A thin coat is normally enough, and the surfaces should be clamped firmly because the expanding glue can push parts apart. Use masking tape or plastic film to protect clamps and nearby finished surfaces. Wear gloves: cured polyurethane is difficult to remove from skin, and wet squeeze-out can spread farther than expected.
For either adhesive, dry-fit the complete assembly first. Check that clamps reach every joint, parts are correctly oriented, and the glue-up can be completed within the product’s open time. PVA squeeze-out can be wiped with a damp cloth, but avoid flooding an unfinished edge. Water can raise the grain and create a visible depression after the wood dries.
Finishing and common failures
Let the assembly cure for at least 24 hours before heavy sanding, machining, or stress. Follow the label if the shop is cold or humid; cure times lengthen below about 60°F. Remove large PVA beads before they harden, but allow a thin residue to dry if wiping would smear glue into the pores. Scrape it carefully, then sand the area evenly.
Polyurethane squeeze-out is best prevented rather than cleaned. Wet glue can smear, while cured foam must usually be cut away with a sharp chisel or knife. Do not sand a large blob flush with the wood unless necessary: the foam can tear out surrounding fibers and contaminate a larger area.
Glue residue is especially troublesome under stain. PVA seals the pores and creates pale or uneven spots; polyurethane can leave a glossy, dark-looking patch. Before staining, inspect the joint under raking light, scrape or sand contamination, and test the full finishing schedule on scrap. If the project will be painted, minor color variation matters less, but raised grain and uneven filler can still show through a thin finish.
For a normal dry indoor wood joint, choose PVA and spend the savings on better clamps or sharper preparation tools. Choose polyurethane when the materials are mixed, the joint may see periodic moisture, or the longer working time solves a real assembly problem. In both cases, accurate joinery and controlled clamping matter more than the adhesive’s marketing claims.



0 Comments