What's inside
As an Amazon Associate I earn from qualifying purchases. This post may contain affiliate links at no extra cost to you.
For a clear-finished console cabinet, the best wood is usually hard maple for a clean, pale modern look, white oak for visible grain and durability, or walnut when a dark, high-end appearance matters more than cost. The right choice depends on whether the cabinet is solid wood, veneered plywood, or a combination of both.
A console cabinet has long, visible surfaces, doors that must stay flat, and edges that catch the light. That makes wood movement, grain matching, and surface preparation more important than they are on a painted utility cabinet. Clear finish does not hide mistakes. It emphasizes glue spots, sanding scratches, uneven color, and mismatched boards.
As an Amazon Associate we earn from qualifying purchases at no extra cost to you.

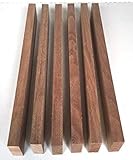
Our Top Picks
 Walnut Lumber Sheets Unfinished Walnut Wood Sheets Thick17x4x7/8 Inch - 1PCS3.93 x 7.87 x 0.8 inches1.4 PoundsCheck on Amazon
 10 Walnut Boards for Making Cutting Boards24"L x 2"W x 3/4"Th24 x 2 x 0.75 inches8 PoundsCheck on Amazon
 Varathane Water-Based Ultimate Satin PolyurethaneHalf Pint (Pack of 1)3 x 3 x 3 inches0.64 poundsCheck on Amazon
Best Species for a Clear Finish
| Wood | Appearance | Stability and workability | Best use |
|---|---|---|---|
| White oak | Strong grain, tan to medium brown | Stable enough for cabinets; machines well | Modern, mission, and mid-century cabinets |
| Hard maple | Very light, subtle grain | Hard and wear-resistant; can show blotching | Minimalist cabinets and light interiors |
| Walnut | Rich brown with varied figure | Machines well; softer than maple | Premium doors, tops, and visible cases |
| Cherry | Pinkish brown that darkens with age | Easy to work; reasonably stable | Traditional cabinets and warm interiors |
| Birch plywood | Light, fairly uniform face | Flat and predictable in sheet form | Cabinet boxes, shelves, and budget builds |
| Poplar | Greenish or grayish; uneven color | Easy to machine and inexpensive | Painted parts, not usually clear-finished faces |
White Oak: The Safest All-Around Choice
White oak is the most forgiving choice for many console cabinets. Its open grain gives a clear finish something to work with, and small sanding inconsistencies are less obvious than they are on a dead-flat maple surface. It is hard enough for door edges and shelf fronts, but still cuts cleanly with sharp tools.
Quarter-sawn or rift-sawn white oak produces straighter, quieter grain than ordinary plain-sawn boards. It costs more, but that extra expense is often worthwhile on narrow cabinet doors where grain direction is highly visible. Oak plywood is also widely available and makes a stable cabinet box. Use solid oak for face frames, door frames, and edge trim rather than building wide panels from solid stock.
Oak’s open pores can be left visible or filled for a smoother finish. If you want a glass-smooth surface, apply a grain filler after sanding and before finish. Without filler, several coats of finish may still leave the pores visibly textured.
Maple, Walnut, and Cherry
Hard maple is a good choice when the cabinet should look light and contemporary. It is dense, takes abuse well, and has restrained grain. The downside is that maple can look sterile, and it may develop uneven color under some oil-based finishes. Test the exact finish on offcuts before committing. A water-based clear coat generally keeps maple lighter than an oil-based product.
Walnut is the premium visual option. It needs little help from stain, and a clear finish brings out its brown color and figure. Walnut is expensive, so use walnut veneer plywood for large panels and reserve solid walnut for edges, doors, and the top. Avoid trying to make a wide solid walnut top from poorly matched boards; the color variation can look accidental rather than intentional.
Cherry is easy to machine and gives a warm, traditional result. It darkens noticeably with exposure to light, especially during the first year. A freshly built cherry cabinet may look much lighter than it will later. Cherry also benefits from a careful, even sanding schedule because dark sanding marks can become more apparent as the wood ages.
Solid Wood Versus Plywood
For the cabinet carcass, veneered plywood is usually the better material. It stays flatter and is less likely to split at screws or change size enough to bind a door. Choose plywood with a matching face veneer, preferably the same species as the solid edging and doors. A 3/4-inch sheet is standard for sides, partitions, and shelves; a 1/4-inch back set into a rabbet is common for a furniture-grade cabinet.
Solid wood is best used where its appearance and edge strength matter: door frames, face frames, legs, front edges, and the top. Wide solid panels must be allowed to expand and contract across their grain. Do not glue a solid-wood top across its full width to a plywood case. Use figure-eight fasteners, elongated screw holes, or clips that hold the top down while allowing movement.
For a cheaper build, birch plywood with solid-wood edge banding is entirely reasonable. It is not a compromise you will notice from normal viewing distance if the veneer is consistent and the edges are carefully prepared. Avoid construction plywood; its core voids, rough faces, and thin veneer make a clear finish frustrating.
Sanding and Surface Preparation
Start with 120-grit abrasive on machined surfaces, then move through 150 and 180 grit. Stop at 180 or 220 grit for most clear finishes. Sanding much finer than 220 can burnish some woods and reduce finish adhesion. On solid maple, 180 grit often gives a better, more even result than an aggressively polished surface.
Break sharp edges with a light pass of 180-grit paper. A tiny 1/32- to 1/16-inch radius looks better under finish and is less likely to chip. Vacuum thoroughly, then wipe with a clean, dry cloth. Do not flood the surface with water or solvent unless the finish manufacturer specifically recommends it.
Glue squeeze-out is a major failure point. Dried glue prevents stain and finish from penetrating, leaving pale patches that are difficult to repair. Use moderate clamp pressure, remove squeeze-out while it is rubbery, and inspect joints under raking light. On end grain, thin glue can soak surprisingly far into the fibers.
If you plan to stain maple, birch, or cherry, test a wood conditioner for staining on scrap first. Conditioners can reduce blotching, but they can also make the color weaker. A clear natural finish is usually safer than trying to force a pale species into a dark, uniform color.
Choosing the Clear Finish
For a practical console cabinet, water-based polyurethane is a strong default. It dries quickly, adds little amber color, and usually allows another coat in 2 to 4 hours. Three or four coats, with a light scuff using 320-grit abrasive between coats when required, provide good protection.
Oil-based polyurethane gives oak, walnut, and cherry a warmer appearance and tends to flow out well, but it ambers noticeably and may take 8 to 24 hours between coats. It also produces stronger fumes. For a hand-rubbed appearance, wiping varnish is easy to apply, though it may require five or more thin coats and offers less build per application.
Spraying can produce the smoothest result, but it requires ventilation, masking, and the right safety equipment. For brush or wipe application, use a water-based polyurethane clear finish if you want the wood to stay close to its raw color. Apply thin coats rather than trying to achieve full coverage in one pass.
What to Buy
Choose white oak plywood with solid white oak edging for the best balance of appearance, durability, and price. Choose hard maple when a pale, low-grain look is the priority, and walnut veneer plywood when the cabinet is meant to look unmistakably premium. If the cabinet will be painted, save money with poplar or birch plywood; clear finishing those species rarely rewards the extra preparation.
Buy at least one extra piece of the chosen wood for testing. A sample lets you compare finish color, check blotching, verify grain filler, and confirm that your sanding process has removed glue and machine marks before they are permanently visible.



0 Comments