What's inside
As an Amazon Associate I earn from qualifying purchases. This post may contain affiliate links at no extra cost to you.
Choosing the right wood species is the first step toward a clear finish that stays close to its original color. The finish still matters more than most people expect: oil-based polyurethane, shellac, lacquer, and many oils add amber tones, while quality waterborne finishes usually add the least color. A pale species under a yellowing finish will not stay pale for long.
For the most neutral result, start with naturally light wood such as hard maple, birch, ash, or white oak, then use a waterborne clear coat labeled non-yellowing or crystal clear. No finish completely stops color change. Ultraviolet light, heat, and oxidation will gradually alter both the coating and the wood.
As an Amazon Associate we earn from qualifying purchases at no extra cost to you.
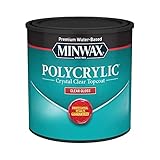
Best wood species for a clear, low-yellowing finish
| Wood species | Natural appearance | Clear-finish performance | Main trade-off |
|---|---|---|---|
| Hard maple | Very pale cream to nearly white | One of the best choices for a neutral, modern look | Can blotch with stain and has relatively subtle grain |
| Birch | Light tan to pale cream | Stays light under waterborne finishes | Blotches easily and is less hard than maple |
| Ash | Light tan with bold grain | Bright appearance with visible texture | Open pores require more finish or grain filling |
| White oak | Light beige with strong grain | Clear finish produces a durable, classic look | Most clear coats add visible warmth to its natural tan color |
| Poplar | White, cream, or pale green | Acceptable for painted or low-cost clear projects | Green and gray areas can look uneven when left natural |
| Beech | Pinkish cream to light tan | Can look clean with waterborne finish | Usually becomes noticeably warmer with oil-based products |
Hard maple and birch: the palest choices
Hard maple is usually the safest pick when the goal is a light, almost unfinished appearance. It has a tight, fine grain and a naturally pale color that works well on shelves, cabinets, desks, and small furniture. A clear waterborne polyurethane generally preserves that look better than oil-based polyurethane.
Maple’s downside is that its restrained grain can make scratches and uneven sanding visible. Sand through the grits consistently, typically from 120 to 150, then finish at 180 or 220 grit depending on the product instructions. Do not polish the surface excessively with very fine paper; burnished areas can absorb finish differently.
Birch plywood and solid birch are cheaper alternatives when maple prices are high. Birch can look excellent under a clear coat, but it has a strong tendency to blotch if you apply stain or tinted oil. For a natural clear finish, blotching is less severe, but glue spots, handling marks, and uneven sanding still show clearly. A careful final sanding matters more than buying a premium finish.
Ash and white oak: pale wood with stronger grain
Ash is a good choice when you want a light color without sacrificing prominent grain. It resembles oak in texture but can appear slightly brighter and less tan under a neutral waterborne coating. Its open pores absorb finish quickly, so the first coat may look uneven until the surface is sanded and recoated.
White oak is widely available, durable, and often easier to match across boards than ash. It is not the best choice if “no yellowing” means a stark white appearance. Even before finishing, white oak is beige rather than white. Oil-based polyurethane or Danish oil pushes it toward honey and amber tones, while waterborne finish keeps the color closer to its starting point.
For oak or ash, decide whether you want the pores visible. Three or four thin coats of waterborne finish will protect the surface but will not flatten the grain. Grain filler creates a smoother, more contemporary surface, but it can change the color and add a preparation step.
Species that can disappoint under a clear finish
Poplar is inexpensive and easy to work, but its color varies from white to pale green, gray, and purple. Clear finish can make those variations more noticeable. It is a sensible budget choice for painted projects, hidden parts, or rustic work, but not usually the best choice for a uniformly pale natural finish.
Walnut is a poor match for a low-yellowing, light-colored design because its defining feature is its dark brown color. It looks excellent under clear finish, but most coatings make it appear richer and warmer. Cherry also darkens naturally with age, often shifting toward reddish brown even when the finish itself is waterborne.
Pine and other softwoods are cheap and widely available, but their resin, knots, and uneven absorption complicate a clear finish. They can look good in a rustic application, yet they rarely produce the even, pale surface associated with maple or birch.
Choose a finish that adds little color
For the least yellowing, compare waterborne polyurethane clear finishes. These are generally the best all-around option for furniture and interior woodwork. They dry quickly, clean up with water, and usually remain clearer than oil-based products. Some formulas still add a slight blue, gray, or warm cast, so test on an offcut.
Oil-based polyurethane is often cheaper per usable ounce and can be more forgiving during application. It also provides a warm, amber appearance that many people prefer on oak, walnut, and traditional furniture. It is not the right choice when preserving a nearly white wood is the priority.
Water-based lacquer and acrylic finishes can also stay clear, especially on pale wood. Lacquer dries fast but may require good ventilation and is less forgiving of dust during application. Penetrating oils are simple to apply, but they almost always deepen the color and emphasize yellow or amber tones. If you choose one, look for a non-yellowing clear wood finish and test it first.
Preparation prevents more failures than finish choice
Sand with fresh abrasive and remove all glue squeeze-out before finishing. Dried glue prevents absorption and leaves pale patches that become obvious under a clear coat. Wipe the surface with mineral spirits only when the wood and finish manufacturer allow it; on many projects, vacuuming and wiping with a clean, dry microfiber cloth is safer.
Apply the finish in thin coats rather than trying to build protection in one heavy pass. Lightly sand between coats only when the label calls for it, commonly with 220 or 320 grit. Heavy coats can stay soft, trap bubbles, and develop runs. On end grain, extra finish may be needed because it absorbs more rapidly than the face grain.
Always make a sample board using the actual species, sanding schedule, and number of coats. Check it in daylight and indoor light after at least 24 hours. A finish that looks clear in the can can add visible warmth after two or three coats. For a particularly pale project, compare a waterborne polyurethane with a clear water-based wood lacquer on the same offcut.



0 Comments