What's inside
As an Amazon Associate I earn from qualifying purchases. This post may contain affiliate links at no extra cost to you.
Our Top Picks
 Varathane Water-Based Ultimate Gloss PolyurethaneHalf Pint (Pack of 1)3 x 3 x 3 inches1.22 PoundsCheck on Amazon
 Varathane Water-Based Ultimate Satin PolyurethaneHalf Pint (Pack of 1)3 x 3 x 3 inches0.64 poundsCheck on Amazon
 Barrington Hardwoods Domestic Variety Pack 5 Walnut3/4" x 2" x 12"12 x 2 x 0.75 inchesCheck on Amazon

Choosing wood for a small box
A clear finish leaves the wood’s color and grain visible, so species choice matters more than it does under paint. For a keepsake box, also consider how easily the wood machines, how stable it is in thin parts, and whether its color will suit the contents or the recipient. A box side may be only 6–10 mm thick; wood that behaves well in a wide tabletop can still split or chip at that scale.
For most beginners, cherry, maple, walnut, and alder are practical choices. They are commonly available as boards or project stock, take a clear finish well, and can be worked with ordinary hand or power tools. Pick straight-grained, dry stock without knots near corners or joinery. A small box uses little material, so paying for a clear, straight board can be worthwhile; there is no need to buy premium lumber if a cheaper board is flat and sound.
As an Amazon Associate we earn from qualifying purchases at no extra cost to you.


How common species compare
| Species | Appearance under clear finish | Working trade-off | Good fit |
|---|---|---|---|
| Cherry | Warm pinkish tan that deepens to reddish brown with light exposure | Machines and sands well; can show blotchy areas if stain is added | A traditional box with a warm, changing color |
| Hard maple | Pale cream, usually with a subtle grain | Hard and durable, but may burn if a cutter or sander lingers | A clean, light-colored box |
| Black walnut | Rich brown with pronounced contrast | Easy to work, though the dark color can obscure small details | A darker box or contrasting lid |
| Alder | Light brown with a fairly quiet grain | Soft and easy to cut; dents more readily than maple or walnut | A lower-cost box that will be handled gently |
| White oak | Tan with strong grain and visible pores | Hard and durable; open pores can remain noticeable under a thin finish | A box where bold grain is part of the design |
Best choices for most boxes
Cherry is a dependable all-around choice. Its grain is attractive without being busy, and it takes a clear oil or varnish evenly when the surface is properly prepared. Expect the color to darken over months or years in daylight; that is normal, not a finish defect. Cherry can develop dark marks from iron reacting with moisture, so keep steel wool and wet, rusty tools away from the bare surface.
Maple works well when you want a pale, restrained look. It is dense enough to resist everyday dents, but its hardness rewards sharp tools and light passes. Sanding too long in one spot can create a shallow hollow that catches light, while dull cutters can leave burn marks. Maple is often a better choice than trying to stain a cheaper pale wood evenly: a clear finish preserves its natural color with fewer surprises.
Walnut gives a strong, dark appearance without stain. It is a good option for a lid paired with maple or cherry, but contrasting woods move at different rates as humidity changes. Keep the grain direction and seasonal movement in mind when designing a wide panel or a solid-wood lid. For a small box, thin panels and sound joinery help limit stress.
Alder is a sensible budget choice if the box is decorative rather than likely to take hard knocks. It cuts easily and can look attractive with a clear finish, but it is softer and dents more easily than maple or walnut. If a box will ride in a bag or be handled often, the extra cost of a harder species may be justified.
Buying and preparing stock
Buy boards thick enough to flatten and still reach your finished dimensions. For sides around 6–10 mm thick, stock roughly 12–19 mm thick is often workable, though the right starting thickness depends on whether you have a planer, a drum sander, or only hand tools. Check for twist by sighting along the board, and avoid cracks, loose knots, and runout that reaches an exposed edge. A small board with straight grain is more useful than a larger, cheaper board that forces you to work around defects.
Allow wood to acclimate in the shop before cutting; a few days is a useful minimum, but moisture content and local conditions matter more than a fixed waiting period. If you can measure it, stock near 6–9% moisture content suits many heated indoor settings. Wood that is too wet may shrink after assembly, opening joints or distorting a lid.
For a first project, a hardwood project board can save time over buying a full-length board. Inspect the actual piece before cutting: online color and grain photos are only a guide.
Sanding and surface preparation
Make cuts and joints clean before sanding. Sanding cannot remove a gap, tear-out, or glue ridge without changing the shape of the part. Use a sharp scraper or chisel to remove squeeze-out; dried glue blocks finish and can appear as pale patches. On box parts, dry-fit the assembly and check the lid fit before applying finish.
Sand flat surfaces in a sequence such as 120, 150, then 180 grit, removing the previous grit’s scratches before moving on. For many clear finishes, stopping at 180 or 220 is enough. Very fine sanding can burnish some woods and reduce absorption, especially if you plan to use oil. Hand-sand the final pass with the grain. A bright raking light helps reveal scratches that overhead lighting misses.
Before finishing, remove dust with a vacuum and a clean, dry cloth. Avoid wiping with a damp rag unless you intend to raise the grain and sand it back; water can swell fibers and leave rough patches. If the wood has torn grain, address it before the final sanding rather than trying to hide it with more finish.
Choosing a clear finish
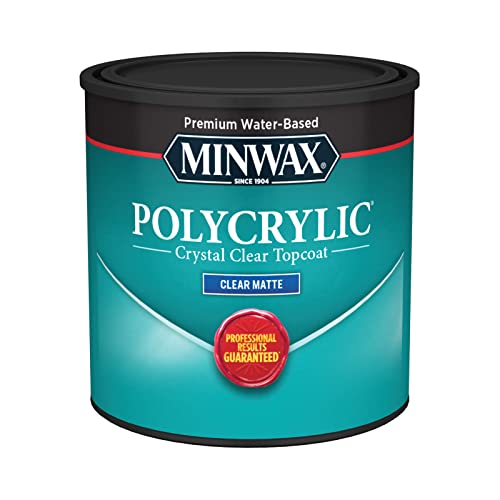
For a simple hand-applied finish, clear oil finish brings out grain and is easy to refresh, but it offers less protection against scratches and standing water than a film finish. Wipe on thin coats according to the label and dispose of oil-soaked rags safely; they can heat up and ignite if left crumpled. A water-based clear topcoat stays relatively light in color and dries quickly, but raised grain may need a light sanding after the first coat. Oil-based varnish adds warmth and protection but takes longer to dry and can amber pale maple.
Test the full sanding and finish schedule on an offcut from the same board. The finish in the can is not a reliable preview of how it will look on your wood, and even clear products can deepen or warm color. Two or three thin coats usually give a neater result than one heavy coat; follow the product’s recoat and cure times, and do not assemble or wrap the box until the finish has cured.
Matching the species to the job
Choose cherry for warmth and straightforward finishing, maple for a pale and durable box, walnut for a naturally dark accent, or alder when low cost and easy machining matter more than dent resistance. White oak suits a more pronounced grain. In every case, straight, dry stock and careful surface preparation will show more clearly under a transparent finish than a premium label on poorly prepared wood.



0 Comments