What's inside
As an Amazon Associate I earn from qualifying purchases. This post may contain affiliate links at no extra cost to you.
A smooth lacquer finish depends as much on the wood beneath it as on the lacquer. Even a well-sprayed coat can reveal open pores, uneven grain, or sanding scratches. For a sleek surface with minimal filling, start with a fine-textured, stable wood. If you already have open-pored stock, you can still get a smooth result, but expect more preparation and extra coats.
As an Amazon Associate we earn from qualifying purchases at no extra cost to you.
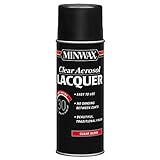

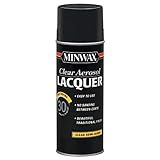

Best choices for a smooth lacquer finish
Maple is a reliable choice for a clean, pale finish. Its tight grain usually needs no pore filler, and its hardness helps it resist dents. Hard maple can be demanding to sand evenly, though: scratches and burnished patches may show under clear lacquer. Sand carefully, and avoid pressing hard with a power sander.
Birch is widely available and often costs less than maple. Its fine texture takes lacquer well, but color and grain can vary between boards, and blotchy appearance is more of a concern if you add stain. For an unstained or lightly tinted finish, birch is a practical cabinet and furniture option.
Cherry has a fine, closed grain and can produce a particularly refined clear finish. It darkens with light exposure, so a fresh sample may not match its appearance months later. Lacquer does not prevent that color change. Buy enough stock from a consistent batch when matching parts matters.
Poplar is inexpensive and easy to work, making it useful for painted or opaque lacquer finishes. Its greenish or purplish streaks can look uneven under clear lacquer, and it dents more easily than maple. Choose it when the finish will cover the wood, not when you want a uniform natural-wood appearance.
How the common choices compare
| Species | Grain and preparation | Best use | Main trade-off |
|---|---|---|---|
| Hard maple | Fine, closed grain; usually no pore filler | Pale, clear furniture or cabinetry | Hard to sand uniformly; scratches can show |
| Birch | Fine grain; usually no pore filler | Budget-friendly clear or light-colored work | Board-to-board variation; stain can blotch |
| Cherry | Fine, closed grain; easy to smooth | Clear-finished furniture | Darkens with age and light exposure |
| Poplar | Fine grain; easy to prepare | Painted or opaque finishes | Uneven natural color; dents readily |
| Oak | Large open pores; needs filling for a level surface | Visible grain under a smooth topcoat | More filling and sanding work |
When oak or walnut is worth the extra work
Oak and walnut can take lacquer beautifully, but their open pores remain visible through ordinary clear coats. A smooth-to-the-touch surface is not necessarily pore-free: several coats may feel level while depressions still show under reflected light. If you want a flat, glassy appearance, use a compatible pore filler before building the lacquer film.
Filler adds labor and can change the look. A contrasting filler emphasizes the grain; a close color match makes pores less prominent. Test the filler, sealer, and lacquer together on scrap from the same board. On oak, brushing or rubbing filler across the grain helps pack the pores. Let it dry as directed, then remove excess without pulling material back out of the pores.
Sand and prepare for the finish
Start with boards that are dry, flat, and free of glue residue. Sanding does not fix dents or a wavy surface; address those first. For most furniture work, progress through the grits in order, such as 120, 150, and 180. Stop around 180 or 220 unless the lacquer maker specifies otherwise. Sanding very fine can burnish some woods and reduce adhesion, while jumping grits leaves scratches that become obvious under a glossy coat.
Use a bright light held at a low angle to inspect the surface. Remove dust with a vacuum and a clean, lint-free cloth. Avoid oily tack cloths unless the finish manufacturer approves them; residue can interfere with adhesion. On end grain, use the same final grit as on the face, and consider an additional sanding pass if it absorbs finish more heavily.
For a small project, a 5-inch random-orbit sander can speed up broad, flat surfaces. Keep it moving, use light pressure, and hand-sand edges and profiles. Holding a sander in one spot can leave a shallow dish or swirl marks that the glossy finish will reveal.
Build a smooth lacquer finish
Follow the product label for temperature, ventilation, recoat windows, and sanding. Lacquer dries fast, but fast drying is not permission to rush: heavy coats can sag, trap solvent, or wrinkle earlier layers if the schedule is wrong. Apply several light, even coats rather than one wet coat. The exact number depends on the product and desired film thickness; three or four coats may suit a modest build, while pore filling and a high-gloss finish require more preparation and polishing.
After the recommended drying time, level dust nibs or unevenness with fine abrasive, commonly 320 or 400 grit, taking care not to cut through edges. Remove sanding dust before recoating. A lacquer sanding sealer can make sanding easier, but use it only if it is compatible with the topcoat. Too much sealer can weaken the finish or make it brittle, so follow the manufacturer’s instructions.
For brushing, choose a lacquer specifically labeled for brush application; spray lacquer and brush lacquer do not behave identically. If spraying, use appropriate respiratory protection and strong ventilation. Lacquer solvent is hazardous and highly flammable: keep it away from flames, pilot lights, and sparks, and follow the safety data sheet.
What to buy for the job
For a naturally smooth, clear finish with the least filling, choose maple, birch, or cherry based on color, price, and availability. Birch is often the sensible low-cost option when its appearance suits the project. Choose poplar for painted work. Pick oak or walnut when you want their distinctive grain and are prepared to fill pores—or accept a textured look. Before committing, finish a sample at least as large as a hand, using the same sanding sequence and products. That test catches color shifts, visible scratches, and compatibility problems far more cheaply than reworking a finished panel.



0 Comments