What's inside
As an Amazon Associate I earn from qualifying purchases. This post may contain affiliate links at no extra cost to you.
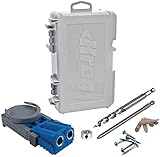
The best pocket hole jig for most woodworkers in 2026 is the Kreg 720PRO if you build at a bench, the Kreg 520PRO if you carry your jig to the work, and a Massca or Milescraft jig if you want solid joints for less money. Every one of them drills the same 15-degree stepped hole; what you are really choosing is how fast the jig sets up, how it clamps, and whether it survives years of use.
As an Amazon Associate we earn from qualifying purchases at no extra cost to you.



Our Top Picks


What actually separates one pocket hole jig from another
A pocket hole is a simple joint: a stepped bit bores an angled hole, and a self-tapping screw pulls the two boards together. Because the geometry is standardized, the differences between jigs come down to four things.
- Thickness setting. Stock from 1/2 in. to 1-1/2 in. needs the drill guide and the bit’s stop collar set to match. Auto-adjusting clamps and printed scales cut setup time; fixed-preset jigs force you to remember which setting goes with which board.
- Clamping. A built-in toggle or ratcheting clamp means one hand on the drill and none on the workpiece. Budget jigs often rely on a separate C-clamp or face clamp.
- Guide material. Hardened steel drill guides keep the hole on-axis for thousands of holes. Cheaper composite bodies with steel inserts work fine but can wobble as they wear.
- Workflow extras. Dust ports, material stops for repeat parts, and plug-cutting guides matter most when you drill dozens of holes per project.
Pocket hole jigs compared
| Jig | Drill guides | Thickness range | Setup method | Dust port | Typical price |
|---|---|---|---|---|---|
| Kreg 720PRO | 3 (hardened steel) | 1/2 in. – 1-1/2 in. | Auto-adjusting clamp | Yes | Roughly $130–$180 |
| Kreg 520PRO | 2 (hardened steel) | 1/2 in. – 1-1/2 in. | Material presets, rotating clamp | No | Roughly $90–$120 |
| Kreg 320 | 2 (detachable) | 1/2 in. – 1-1/2 in. | Manual collar setting | No | Roughly $35–$50 |
| Massca M2 Pro | Aluminum body, steel guides | 1/2 in. – 1-1/2 in. | Adjustable slide, separate clamp | No | Roughly $90–$110 |
| Massca M1 | Aluminum body, steel guides | 1/2 in. – 1-1/2 in. | Adjustable slide, separate clamp | No | Roughly $70–$90 |
| Milescraft PocketJig200 | Composite body, steel guides | 1/2 in. – 1-1/2 in. | Manual, needs clamp | No | Roughly $25–$40 |
Picks by situation
Kreg 720PRO: the bench-mounted workhorse
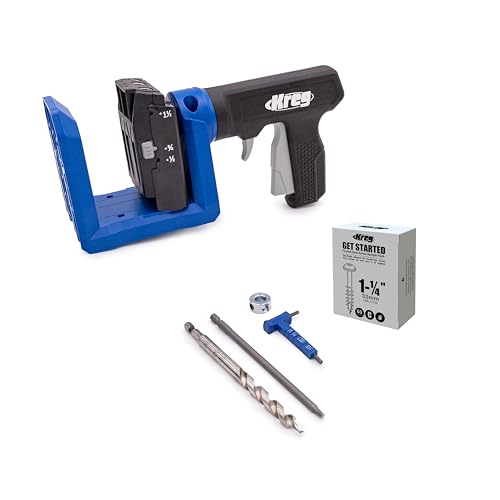
The 720PRO is built for volume. Its clamp senses board thickness and sets the guide automatically, a material stop locks in a repeat position for identical rails, and the dust port connects to a shop vacuum so chips do not pack into the bit flutes. It also has a guide for drilling plug holes on the face of a joint. The trade-off is size and weight: this jig lives on a workbench and is awkward to bring to a cabinet that is already assembled. If you build face frames, carcasses or furniture several weekends a month, the time saved on setup pays back the higher price.
Kreg 520PRO: portable and flexible
The 520PRO is a handheld jig with a squeeze clamp that rotates a full circle, so you can clamp it to the end of a long board, a sheet of plywood or a part already installed. It uses presets for common thicknesses rather than automatic sensing and skips the dust port and material stop. It is the better choice for remodelers and anyone working on stock too large to bring to the bench.
Kreg 320: the inexpensive starter
The 320 has two drill guides that can be separated and spaced to suit wider boards. It needs a separate clamp, and setting the collar takes more care, but it drills exactly the same joint as the more expensive models. It is a sensible first jig if you are not sure how often you will use pocket screws.
Massca M1 and M2 Pro: metal construction at a mid price
Massca jigs use machined aluminum bodies instead of the glass-filled plastic found on many competitors. The M2 Pro adds wider capacity and more spacing options. Neither includes a clamp, so budget for a face clamp or a 6 in. C-clamp. Woodworkers who are rough on tools tend to like the rigidity.
Milescraft PocketJig200: lowest cost of entry
For occasional repairs, a shelf or two, or a kid’s project, the Milescraft PocketJig200 kit is enough. Expect to slow down on setup, and treat it as a tool for dozens of joints a year rather than hundreds.
Decision matrix
| Your situation | Best fit | Why |
|---|---|---|
| Weekend furniture builder with a dedicated bench | Kreg 720PRO | Fastest repeat setup, dust collection |
| Remodeling, built-ins, on-site work | Kreg 520PRO | Clamps anywhere, light enough for a tool bag |
| First jig, light use | Kreg 320 or Milescraft PocketJig200 | Same joint, lowest cost |
| Wants all-metal body, owns clamps already | Massca M1 or M2 Pro | Rigid aluminum without paying for a built-in clamp |
| Shop building many identical parts | Kreg 720PRO plus a second portable jig | Bench jig for production, portable one for assembly fixes |
Screw length and setup: the part most guides skip
Most pocket-hole problems come from the wrong screw, not the wrong jig. As a working rule, the screw should be roughly twice the thickness of the board you are drilling, minus a bit so it does not break through the face of the mating board.
| Material thickness | Typical screw length | Jig/collar setting |
|---|---|---|
| 1/2 in. | 1 in. | 1/2 in. |
| 5/8 in. | 1 in. | 5/8 in. |
| 3/4 in. | 1-1/4 in. | 3/4 in. |
| 7/8 in. | 1-1/2 in. | 7/8 in. |
| 1-1/2 in. | 2-1/2 in. | 1-1/2 in. |
Use coarse-thread screws in softwoods, plywood and MDF, and fine-thread screws in hardwoods such as oak and maple, where coarse threads can split the end grain. Washer-head screws seat with more clamping pressure than standard pan heads.
- Set the jig to the actual measured thickness of the board, not its nominal size. A “3/4 in.” plywood sheet often measures closer to 23/32 in.
- Set the stop collar on the bit using the gauge on the jig, then lock it firmly; a slipping collar is the main cause of screws breaking through.
- Run the drill at full speed before the bit enters the guide, and back it out once or twice on deep holes to clear chips.
- Clamp the joint flat with a face clamp before driving the screw. Pocket screws pull the parts slightly as they seat, which causes uneven joints if the boards are not held.
- Drive slowly at the end and stop when the head seats. Overdriving strips the hole, especially in particleboard.
What wears out and how to keep a jig accurate
- Drill bits dull first. A stepped bit used on plywood and MDF dulls faster than one used on pine. A dull bit burns the hole and wanders; replacement bits are inexpensive, so keep a spare.
- Stop collars loosen. Check the set screw at the start of each session.
- Guides wear with debris. Blow chips out of the guide holes; packed dust can push the bit off its line.
- Clamp pads compress. On auto-adjusting jigs, if the clamp no longer seats firmly, inspect the pad before blaming the mechanism.
Common questions
Are pocket hole joints strong enough for furniture?
For face frames, cabinet boxes, tabletops attached to aprons, and casual furniture, yes, especially when glued. For chairs and other pieces under heavy racking loads, traditional joinery such as mortise and tenon is still the stronger choice.
Can I use any brand of screw with any jig?
The 15-degree angle and stepped bit profile are nearly universal, so most pocket screws work with most jigs. Match the screw length to the thickness as shown above.
Do I need a dust port?
It is optional, but on long sessions it keeps chips out of the bit and reduces the cleanup around the bench. For occasional use, backing the bit out once mid-hole does most of the same job.

0 Comments