What's inside
As an Amazon Associate I earn from qualifying purchases. This post may contain affiliate links at no extra cost to you.
Clear finish makes window trim less forgiving than painted trim. A thin coat of clear varnish shows the wood’s color and grain, but it also leaves knots, mineral streaks, glue residue, and sanding scratches in view. For most homes, poplar is a poor choice for this job: it is affordable and easy to machine, but its uneven color can look muddy under clear finish. Choose the wood for the appearance you want, then test the full finishing schedule on a scrap before buying enough for the room.
As an Amazon Associate we earn from qualifying purchases at no extra cost to you.


Our Top Picks
 Varathane Water-Based Ultimate Semi-Gloss PolyurethaneHalf Pint (Pack of 1)3 x 3 x 3 inches0.64 poundsCheck on Amazon
 Varathane Water-Based Ultimate Gloss PolyurethaneHalf Pint (Pack of 1)3 x 3 x 3 inches1.22 PoundsCheck on Amazon
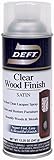
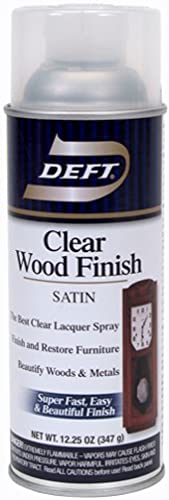 Deft Inc. Deft 037125017132 Interior Clear Wood Finish12.25 Ounce (Pack of 1)8 x 4 x 4 Inches0.1 poundsCheck on Amazon
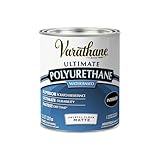
 Varathane Water-Based Ultimate Matte PolyurethaneQuart (Pack of 1)9.8 x 5.5 x 6.3 inches2.2 poundsCheck on Amazon
 Varathane Water-Based Ultimate Satin PolyurethaneHalf Pint (Pack of 1)3 x 3 x 3 inches0.64 poundsCheck on Amazon
Choose by appearance and budget
For a light, fairly consistent look, clear soft maple is a strong all-around option. It is harder than many trim woods and takes a smooth surface, though its subtle grain can look plain. White oak has more pronounced grain and a warmer tone; red oak is usually less expensive, but its pinker cast may not suit every interior. Both are relatively hard and durable.
Pine costs less and is easy to find, but boards can vary sharply in color and contain knots or resin pockets. Select clear, kiln-dried boards if you want a more uniform result. Cherry darkens with exposure to light, so a new sample may not match the trim a year later. These differences matter more under a clear finish than they do beneath paint.
Common choices compared
| Wood | Typical appearance under clear finish | Cost and workability | Watch-outs |
|---|---|---|---|
| Poplar | Green, gray, or brown patches; limited grain | Usually inexpensive; easy to cut and nail | Best reserved for paint, unless the uneven color is acceptable |
| Clear pine | Light yellow with visible knots and grain | Often the lowest-cost option; easy to shape | Resin, knots, dents, and board-to-board color variation |
| Maple | Pale and relatively quiet-grained | Mid-to-high cost; hard and sometimes prone to tear-out | Can look bland; sanding scratches show in smooth, light-colored surfaces |
| White oak | Warm brown with bold grain | Mid-to-high cost; dense and durable | Strong grain pattern; check that the color suits nearby floors and doors |
| Cherry | Warm reddish brown that deepens over time | Often expensive; machines cleanly | Light exposure changes its color, potentially unevenly |
Inspect boards before buying
Look at several boards together under the same light. Compare color, grain, and how much sapwood, knots, or mineral streaking each contains. “Clear” describes a grade with fewer defects; it does not guarantee perfectly uniform color. If matching existing trim, bring a sample or a clear photo, but judge a finish sample in person whenever possible.
Check that boards are straight, dry, and free of twist. For interior trim, wood around 6–8% moisture content is a useful target in a conditioned home. A basic pin moisture meter can help, though readings vary by species and meter settings. Let new stock acclimate indoors for several days before installation. Wood that is still losing moisture can shrink at joints and leave gaps.
Buy enough stock to select for color and grain, especially with pine or cherry. For a small window, one extra length may be sufficient; for several windows, sorting boards across the whole job gives a more consistent result. If the budget is tight, clear pine is often a reasonable choice when you accept knots and variation. A carefully selected pine board can look better than a poorly matched premium board.
Prepare and finish a test piece
Cut and fit the trim before applying finish when practical. Sand the visible faces and edges with the grain, usually progressing from 120 or 150 grit to 180 grit. For maple and oak, 180 grit is a sensible stopping point; sanding much finer can reduce absorption and make some finishes look uneven. Remove dust with a vacuum and a clean, lint-free cloth. Glue squeeze-out must be scraped or sanded away: even a thin film can leave a pale patch that finish will not hide.
Make a sample using the same sanding, stain, and topcoat planned for the installed trim. Clear finishes themselves can change color: oil-based polyurethane adds an amber cast, while many water-based finishes stay clearer. Neither is universally better. Test the finish on the actual species because maple, oak, and pine do not respond identically. If you plan to stain, test the stain too; blotching is common on pine and can also affect maple.
For more even stain on blotch-prone wood, try a compatible conditioner or a gel stain, but follow the product directions and test the result. Conditioner can also make stain lighter or less vivid. A clear coat is simpler and often shows off the wood more naturally. For trim that may be touched or cleaned, choose a durable clear finish such as water-based polyurethane or oil-based polyurethane. Apply thin coats, and respect the label’s recoat and cure times; dry to the touch does not mean fully cured.
Install without spoiling the finish
Fasten trim into framing where possible, and predrill near narrow edges to reduce splitting. Use a nail set to place finish nails just below the surface, then fill holes with a filler that matches the wood after finishing. Many fillers dry a different color than the surrounding grain, so test one before filling every hole. On clear-finished trim, a color-matched wax or putty applied after the topcoat may blend better, though it can be less durable.
Leave room for seasonal wood movement, especially on wide solid-wood pieces. Do not force a bowed board flat against the wall with nails; it may pull away later. If the opening is exposed to condensation or frequent cleaning, seal all faces and cut ends, not just the front. That small step helps limit moisture uptake and reduces the chance of cupping or finish failure at the edges.



0 Comments