What's inside
As an Amazon Associate I earn from qualifying purchases. This post may contain affiliate links at no extra cost to you.
Water-based grain filler is the fastest way to get a flat, glass-smooth finish on open-grained woods like oak, ash, walnut, and mahogany without dealing with solvent fumes or long dry times. It does not add strength and it does not hide bad sanding, but when applied correctly it levels the pores so lacquer, polyurethane, or paint sits flat instead of sinking into craters. On close-grained woods like maple or cherry you can usually skip it entirely.
As an Amazon Associate we earn from qualifying purchases at no extra cost to you.


Our Top Picks
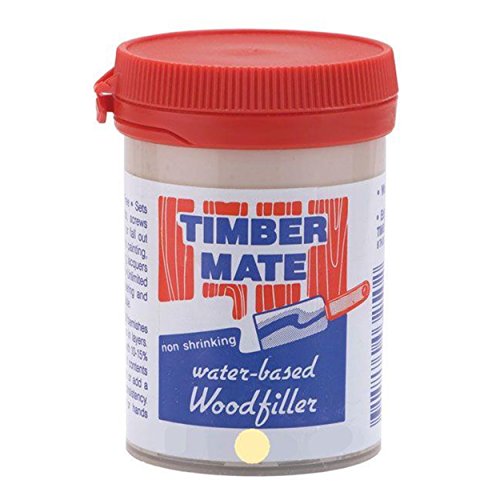
- Aqua Coat Water-Based Clear Wood Grain Filler GelPint3.55 x 3.55 x 4.2 inches1.14 PoundsCheck on Amazon
 AquaCoat Water-Based White Cabinet Wood Grain Filler Gel16 Fl Oz (Pack of 1)10 x 10 x 10 inches1.2 poundsCheck on Amazon
Why fill the grain at all?
Open-grained species have large, deep pores that run along the grain. If you spray or brush a topcoat directly, the finish sinks into those pores as it dries. You get a pitted texture that telegraphs through every coat. You can eventually fill pores with 5-6 coats of high-build lacquer or poly, sanding between each, but you will burn a lot of finish and time. Grain filler is a high-solids paste designed to do that leveling in one or two applications. It is far cheaper than building up finish alone.
Filled grain is a choice, not a rule. If you want the natural textured look of oak or walnut, don’t fill. If you want a piano-flat tabletop, a painted cabinet door without grain telegraphing, or a level surface for a gloss clear coat, filling saves you hours of finishing.
What water-based filler can and can’t do
Water-based fillers use water as the carrier instead of mineral spirits or naphtha. Most are an acrylic or latex paste with fine silica or wood flour solids. They dry by evaporation, clean up with water, and have very low odor, which makes them practical for a small shop or indoor work.
Expect dry-to-sand in 30 to 60 minutes at 70F and 40-50% humidity, and dry-to-recoat in 1 to 2 hours. You can usually apply stain or finish the same day. Oil-based fillers typically need 8 to 24 hours before you can topcoat.
Trade-offs are real. Water-based filler raises grain slightly, shrinks a bit more if applied too thick, and can leave a faint whitish haze in deep pores if you don’t tint it or sand cleanly. Oil-based filler stays open longer (easier to work on large tops), shrinks less, and is a little more transparent. If you are working in a cold shop below 60F or need maximum clarity under a clear oil finish, oil-based still has an edge.
| Feature | Water-Based Grain Filler | Oil-Based Grain Filler |
|---|---|---|
| Dry time before sanding | 30-60 minutes | 8-12 hours |
| Dry time before topcoat | 1-2 hours | 12-24 hours |
| Odor / cleanup | Very low, water cleanup | Strong solvent odor, mineral spirits cleanup |
| Working time | 5-15 minutes before it starts to haze | 20-40 minutes |
| Shrinkage risk | Moderate if applied too thick | Low |
| Best for | Water-based stains and finishes, indoor/small shop, paint prep | Oil-based finishes, large surfaces, dark woods where clarity matters |
Tools and materials you need
You don’t need specialty equipment. The key is a filler that matches your finishing system and a way to apply it thin and scrape it off cleanly.
For most projects, a ready-made water-based wood grain filler in natural or tint-matched color is the simplest choice. Natural dries light tan and can be tinted with water-based dye or universal tint before application if you want it to blend with a stained finish. If you plan to stain after filling, use natural filler; if you stain first, use a filler tinted to match the final color, or the pores will look lighter than the surrounding wood.
You will also need 150 and 220-grit sandpaper for prep, 320-grit for de-nibbing the filler, flexible plastic spreaders or an old credit card, clean cotton rags or burlap, and a sanding block. Don’t use steel wool before water-based filler – stray fibers plus water can leave rust spots.
Prep and application step by step
Wood prep determines the result more than brand. Sand the bare wood to 150-grit, then 180-grit. Don’t jump to 220 yet. Coarser scratches give the filler something to grip. Vacuum thoroughly and wipe with a barely damp rag, then let dry. If you are using a water-based stain, you can stain before or after filling. Staining after filling gives more uniform color but lighter pores. Staining before filling gives darker, more contrasted pores. Test on scrap from the same board.
1. Stir, don’t shake. Water-based filler settles hard on the bottom. Stir for a full minute to a smooth, mayonnaise consistency. If it is thick and draggy, thin with 5-10% water by volume – no more. Over-thinning causes severe shrinkage and weak fill.
2. Apply across the grain. Scoop a small amount and spread aggressively across the grain, not with it, using the plastic spreader held at about 45-60 degrees. Work in 2×2 foot sections. The goal is to force paste into the pores. Apply a thin, opaque layer. Thick globs do not fill better, they just crack and shrink.
3. Wait for the haze. In 5 to 15 minutes the filler will turn dull and hazy but still feel slightly soft. This is the window. If you wipe too early you pull it out of the pores. If you let it dry hard you will have to sand much more.
4. Scrape and wipe off. Hold the spreader nearly perpendicular (80-85 degrees) and scrape hard across the grain to remove the excess from the surface. Then immediately wipe with a coarse cloth like burlap or terry cloth, still across the grain, with moderate pressure. You want the wood surface clean but the pores left packed. A light final wipe with the grain removes streaks. Don’t use a wet rag – water will dissolve filler out of the pores.
5. Let dry and sand flat. After 45 to 60 minutes it should sand to a fine white powder. Sand lightly with 220-grit on a flat block, just enough to remove any haze. Do not cut through to bare wood with aggressive sanding. Feel with your hand and look at a low angle – pores should look filled and the surface uniformly dull. If deep pores still show as dark pits, apply a second thin coat the same way. Two thin coats always beat one thick coat.
6. Final prep before finish. De-nib with 320-grit by hand, vacuum, and tack off. You can now apply your stain (if you haven’t already) or go straight to topcoat. Most water-based fillers are compatible under water-based poly, lacquer, and acrylic paint. If you are topcoating with oil-based poly or varnish, check the filler label – some water-based fillers recommend a light seal coat of dewaxed shellac first to prevent adhesion issues.
Common failures and how to avoid them
Shrinkage and sinking happens when filler is applied too thick or topcoated too soon. If you see pores reappearing after your first topcoat, you sanded too early or needed a second fill. Let it cure fully – an hour is minimum, overnight is safer before a solvent topcoat.
White or light spots in pores means filler was left on the surface or not tinted. This is especially visible under dark stain. Fix it by tinting the filler to the stain color beforehand, or by staining first and then filling with tinted filler. Always test the whole system – sand, fill, stain, topcoat – on scrap.
Grain raising and roughness comes from water in the filler. It is worse on oak and ash. You can minimize it by doing a water-popping or pre-raising step before final sanding: wipe the bare wood with a damp cloth, let dry, then sand again with 180-grit. Then apply filler.
Sanding through at edges is common. Edges and corners have less filler and more sanding pressure. Ease your pressure near edges and check frequently. If you break through, spot-fill that area and re-sand.
When to skip or substitute
You don’t need filler on maple, cherry, poplar, pine, or birch – their pores are too small to benefit. On those woods, a good sanding sequence to 180 or 220 and a proper primer or sanding sealer will give you a flat finish with less work.
If you want to fill grain on the cheap and your finish schedule allows it, thinned drywall compound or sanding slurry (sanding dust mixed with wood glue or finish) can work for paint-grade projects. It sands easily and costs almost nothing, but it is brittle, not moisture resistant, and can flash through stains, so don’t use it under clear coat on a tabletop.
For the best depth under a clear oil or varnish on walnut or mahogany, some finishers still prefer oil-based filler or epoxy pore filler for its clarity. Water-based is faster and cleaner, but if absolute transparency is the priority and you have ventilation and time, oil-based is not obsolete.

0 Comments