What's inside
As an Amazon Associate I earn from qualifying purchases. This post may contain affiliate links at no extra cost to you.
Why Color Matching Is Difficult
Wood filler rarely matches a finished surface straight from the tub. The reason is simple: filler is usually a solid, opaque material, while stained wood gets its color from a combination of wood species, grain, stain, and clear finish. A repair that looks close on bare wood can look too light, too gray, or too orange after staining and topcoating.
Color matching is also affected by the repair itself. A deep hole filled in one pass may dry with a different color at the center than at the edges. Sanding can expose a lighter layer. Glossy finish can make a dark patch appear darker, while surrounding grain continues to reflect light unevenly.
The most reliable approach is to match the finished appearance, not the filler in its container. Test the entire process—filler, sanding, stain, and clear coat—on scrap wood or an inconspicuous area before repairing the visible surface.
Identify the Surface Before Buying Filler
First determine whether you are repairing solid wood, veneer, plywood, MDF, or previously painted material. A filler that works well on oak may look obvious on maple, and a deep repair in thin veneer can break through during sanding.
Also identify the existing finish. Oil-based stain, water-based stain, paint, lacquer, shellac, and polyurethane do not all interact with filler in the same way. If the surface is painted, exact wood color is usually unimportant; a paintable filler with good adhesion is the better choice. If the surface will be stained, filler absorbency matters as much as its starting color.
Clean the area with a suitable wood-safe cleaner before assessing the color. Dirt, wax, and aged finish can make the surrounding wood appear darker than it really is. Do not sand aggressively just to expose “fresh” color unless you are prepared to refinish the whole area.
Choose the Right Filler Type
Use the smallest product category that solves the problem. Lightweight spackling is cheap and easy to sand, but it is intended mainly for shallow cosmetic repairs and painted surfaces. It often shrinks in holes deeper than about 1/8 inch.
For stained furniture and trim, a solvent- or water-based wood filler is more appropriate. Some are stainable, but “stainable” does not mean they will absorb stain like wood. They usually remain lighter and more uniform than the surrounding grain.
For repairs that need strength—such as damaged screw holes, chipped edges, or gaps up to roughly 1/4 inch—two-part epoxy filler is often the most dependable option. It can be shaped and colored, but it is harder to sand and may resist stain. Epoxy is best when you plan to tint it or cover it with paint.
For tiny finishing defects after staining, use a colored wood repair putty or wax stick. These products are useful for nail holes and pin-sized dents because they can be matched directly to the finished color. They are not a substitute for structural filler in deep damage.
| Filler type | Best use | Color and finish behavior | Main trade-off |
|---|---|---|---|
| Lightweight spackling | Shallow holes on painted surfaces | Usually opaque and easy to paint | Shrinks and lacks strength |
| Stainable wood filler | Small repairs before staining | Often lighter and less grain-like than wood | Can still show as a flat patch |
| Two-part epoxy | Deep, strong, or edge repairs | Usually needs tinting or paint | Harder to sand and more expensive |
| Colored putty or wax | Finished nail holes and tiny defects | Can match the final color directly | Not suitable for structural repairs |
Match Color With a Test Panel
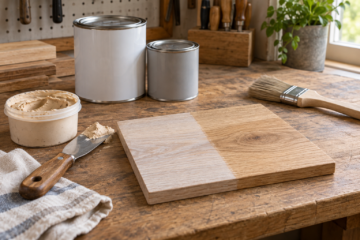
Make a test panel from the same species and, if possible, the same batch of wood. Sand it to the same grit as the project—typically 150 or 180 grit for stained furniture, or 220 grit for a smoother painted surface. Apply the filler in a patch at least 1 inch wide. A large test area is easier to judge than a tiny dot.
Let the filler dry completely. Many products feel dry at the surface while remaining soft below. For a patch 1/4 inch deep, waiting overnight is safer than sanding after the label’s shortest stated time. Sand flush using a flat sanding block, starting around 120 or 150 grit and finishing with the same grit used on the surrounding surface.
Apply the exact stain you intend to use, then apply the clear finish if the project will receive one. Compare the test after it has dried. A clear coat can deepen color and increase contrast, so judging the unstained, unsprayed patch leads to predictable mistakes.
If the filler is too light, you can try a darker filler, tint the filler before application, or use a matching touch-up marker after the clear coat. If it is too dark, replacing it is usually cleaner than trying to bleach or sand out the patch.
Tint and Blend the Repair
For custom colors, mix a small amount of universal tint or wood filler colorant into the filler. Add color in tiny amounts; a drop can change a teaspoon-sized batch significantly. Start with the lightest base and adjust toward the target. It is easier to darken filler than to lighten it.
Do not try to reproduce every grain line in the filler. Match the overall value first—how light or dark it appears—then the general color direction, such as yellow-brown, red-brown, or gray-brown. After the finish dries, use a fine wood touch-up marker set to add one or two grain lines if needed. Keep the lines irregular and taper their ends; straight, evenly spaced marks look artificial.
On open-grained woods such as oak and ash, a smooth filler patch can remain visible even when the color is close. A small amount of grain texture drawn over the patch may help, but the best result often requires filling only the hole and leaving surrounding pores untouched.
Apply and Finish the Repair
Press filler firmly into the defect and leave it slightly proud of the surface—about 1/16 inch is enough for most small repairs. Overfilling creates extra sanding and can spread filler onto clean grain, where it may block stain and leave a halo.
Sand only after the filler has hardened. Use a sanding block on flat work and folded abrasive on profiles. Remove dust thoroughly before staining; trapped dust can make a light filler patch look even more obvious.
For visible furniture repairs, a small artist acrylic paint set and fine brushes can be more useful than buying another filler color. Thin paint can adjust hue after the stain has dried, but apply it sparingly and seal it with the same clear finish used on the surrounding surface.
The inexpensive option is fine when the repair is on painted trim, inside a cabinet, or beneath hardware. Spend more time—and possibly use tinted epoxy or layered touch-up color—when the repair sits in the middle of a highly visible, clear-finished panel. In those locations, preparation and testing matter more than the filler’s label.

0 Comments